
-
1. Welcome
-
2. Install a WordPress Theme
-
3. Install the Required Plugin
-
4. Install Additional Required Plugins
-
5. Configure Permalinks and WPGraphQL Settings
-
6. Configure Environment Variables
-
7. Import Demo Content(optional)
-
8. Run and Test the Project
Polor - NextJs Headless WordPress Blog Magazine
- Version: 1.0.0
- Last Updated: July 01 – 2025
- Author: Themesflat
Thank you so much for your interests. Your comments and ratings would be much appreciated. If you purchase this template, you will get support. We will update this template time by time and we want to hear your wishes for the future updates or for complete new templates.
You need file images please contact: helpdeskthemesflat@gmail.com
Step 1: Install a WordPress Theme
To activate the theme:
- Log in to your WordPress admin dashboard.
- Go to Appearance > Themes.
- Find the TwentyTwentyFive theme (it is usually available by default).
Click Activate to enable the theme.
Step 2: Install the Required Plugin
Inside the downloaded package, you will find a plugin file named polor-headless-core.zip.
To install this plugin:
- From the WordPress dashboard, go to Plugins > Add New.
- Click on Upload Plugin, choose the polor-headless-core.zip file, and click Install Now.
Once the installation is complete, click Activate
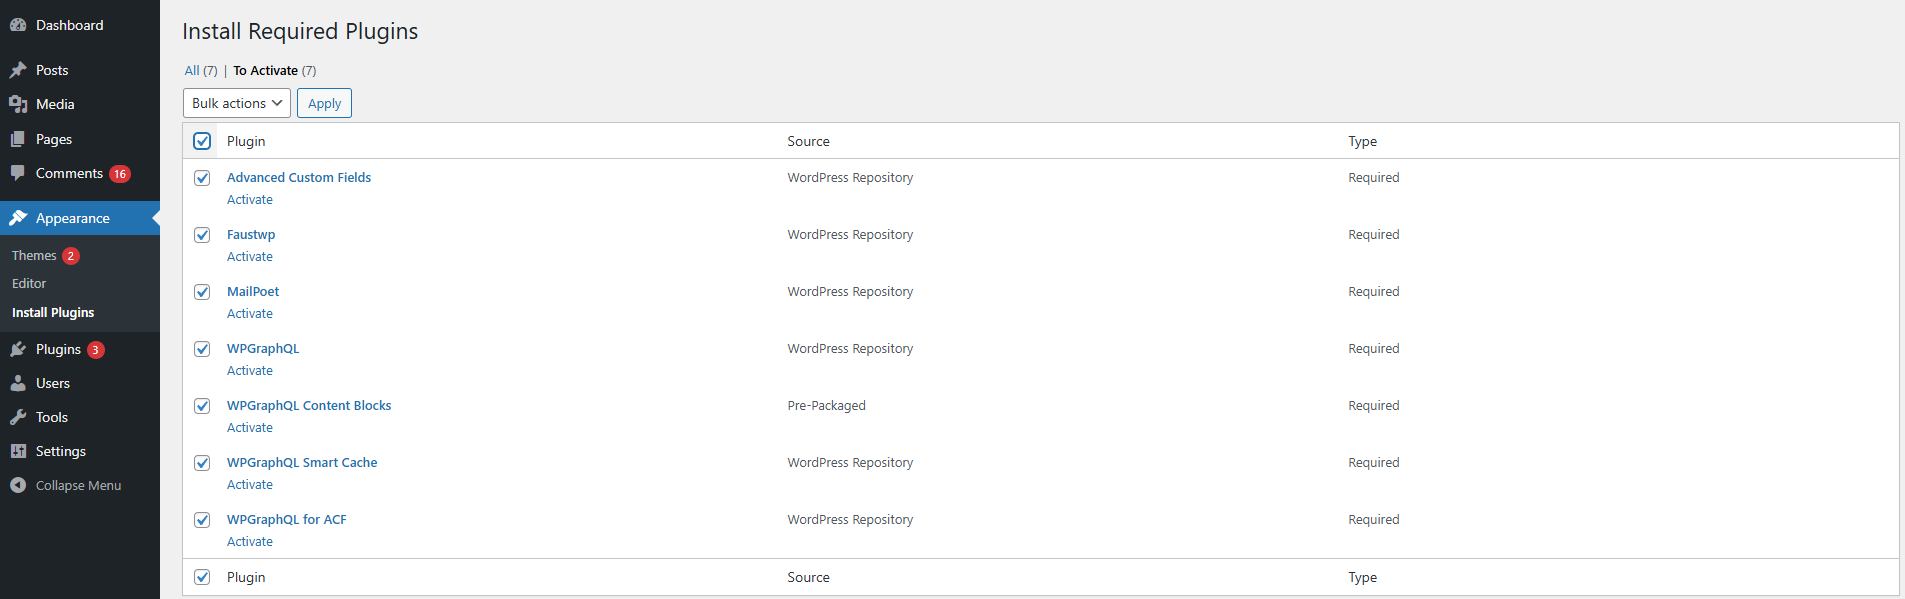
Step 3: Install Additional Required Plugins
- Navigate to Appearance > Install Plugins from the WordPress dashboard.
- Select all the listed plugins by checking the boxes next to their names.
- In the Bulk Actions dropdown, choose Install, then click Apply.
- After the installation is complete, go back to the same page.
Select all the plugins again, then choose Activate from the Bulk Actions dropdown and click Apply.
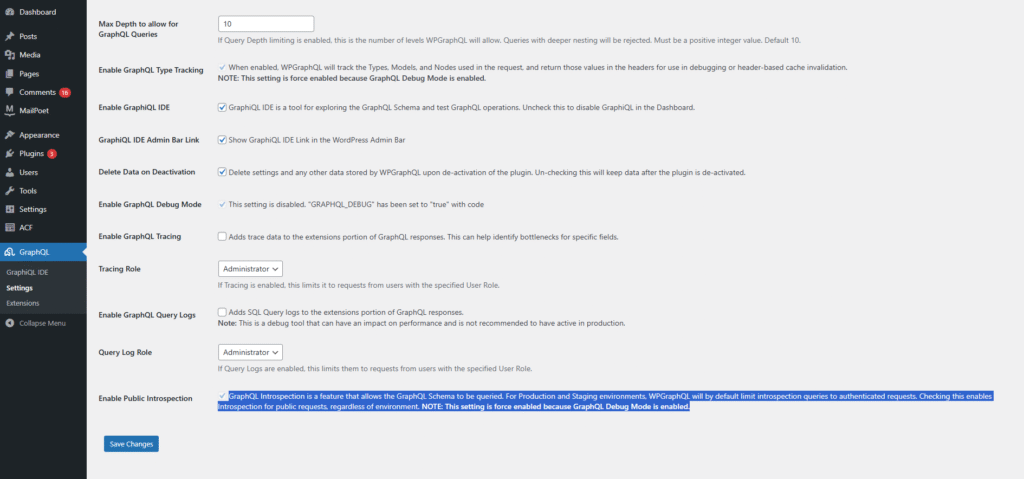
Step 4: Configure Permalinks and WPGraphQL Settings
WPGraphQL Settings
- In the WordPress dashboard, go to:
WPGraphQL > Settings > General Settings - Find the option Enable Public Introspection and set it to True (enabled).
This allows GraphQL introspection queries to work properly.
Permalink Settings
- Go to Settings > Permalinks in the WordPress dashboard.
- Set the permalink structure to Post name.
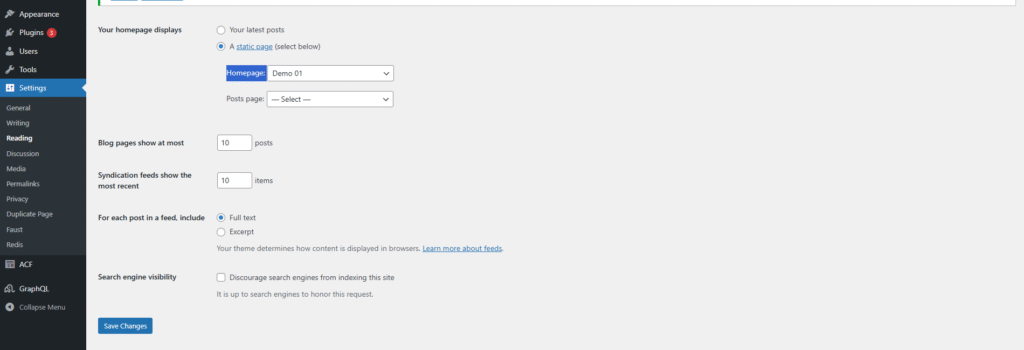
Home page
- Go to Settings > Reading in the WordPress dashboard.
- Set the static page.
This ensures that your URLs are clean and compatible with the headless setup.
Step 5: Configure Environment Variables
After installing and activating the required plugins, you’ll need to set up your environment variables for the frontend (Next.js) project.
How to Set It Up:
- In your polor-nextjs project, locate the file named .env.local.sample.
- Duplicate this file and rename the copy to:
.env.local
Open .env.local, and you will see something like this:
.env.local
# Your WordPress site URL
NEXT_PUBLIC_WORDPRESS_URL=https://faustexample.wpengine.com
# Plugin secret found in WordPress Settings → Faust
FAUST_SECRET_KEY=YOUR_PLUGIN_SECRET
# Your frontend Next.js site URL
NEXT_PUBLIC_URL=http://localhost:3000
# Allowed image domains
NEXT_PUBLIC_IMAGE_DOMAIN=faustexample.wpengine.com,secure.gravatar.com
What to Update:
- Replace faustexample.wpengine.com with your actual WordPress site URL.
Replace YOUR_PLUGIN_SECRET with the Secret Key found in WordPress admin → Settings → Faust.
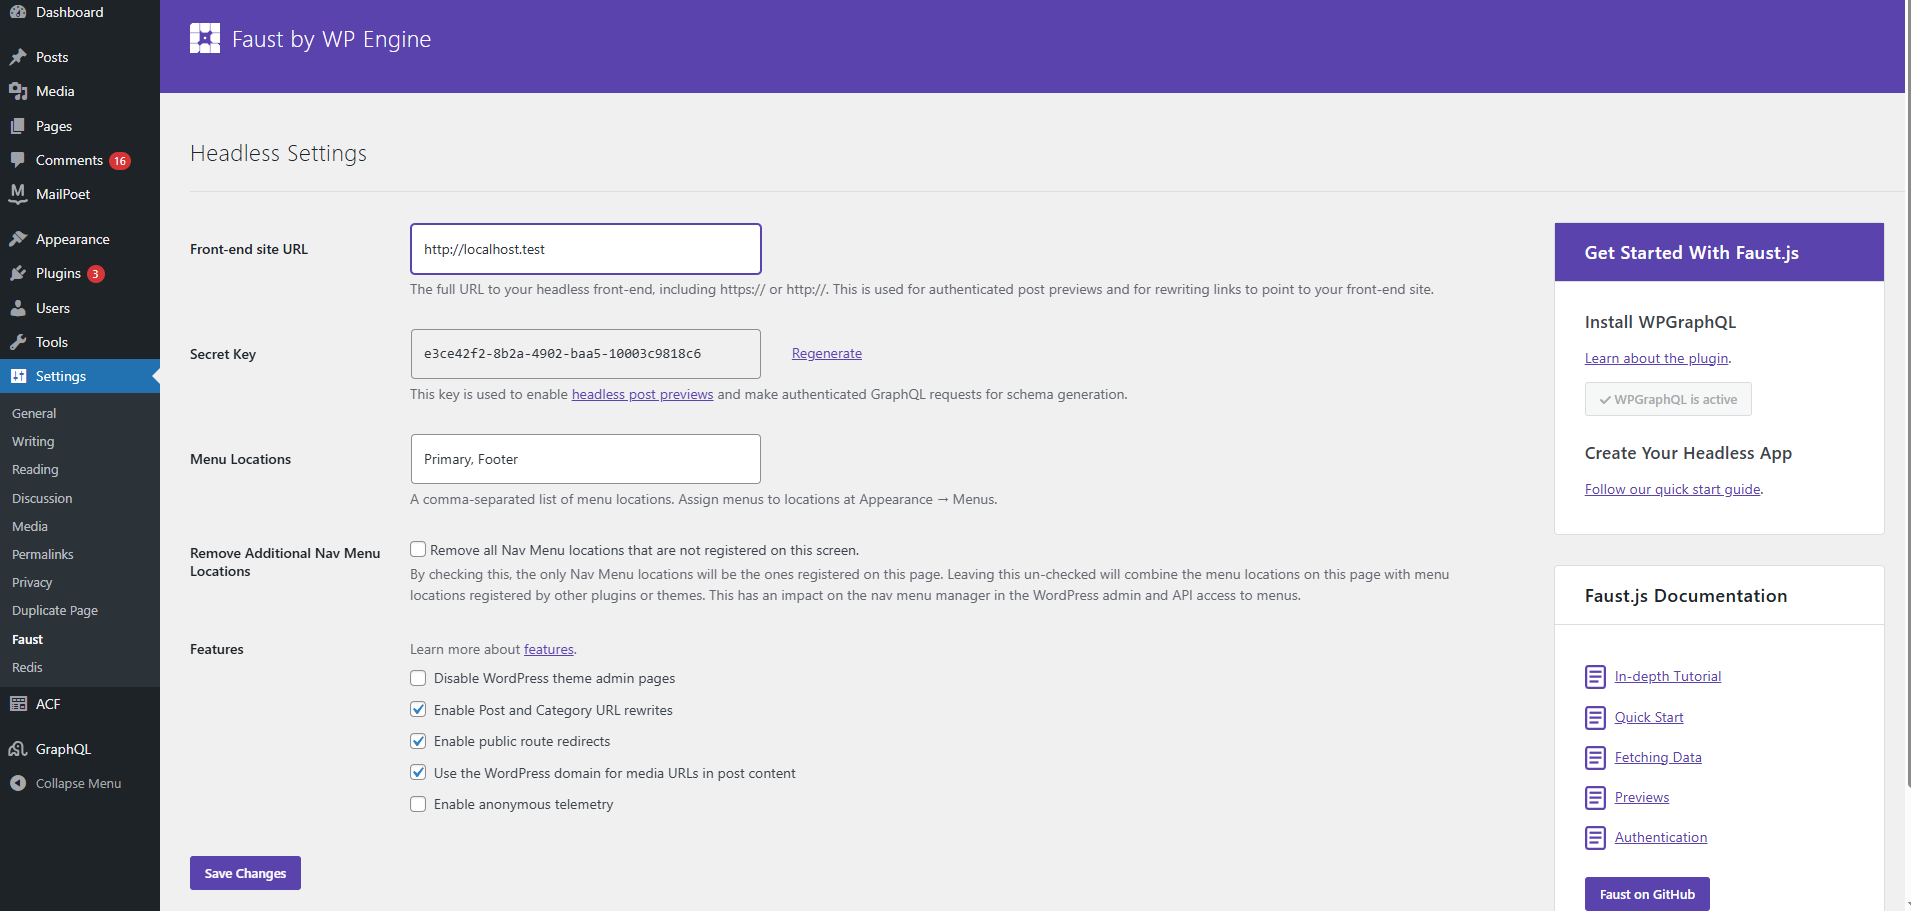
This configuration is required to enable features like preview mode and image loading in your headless setup.
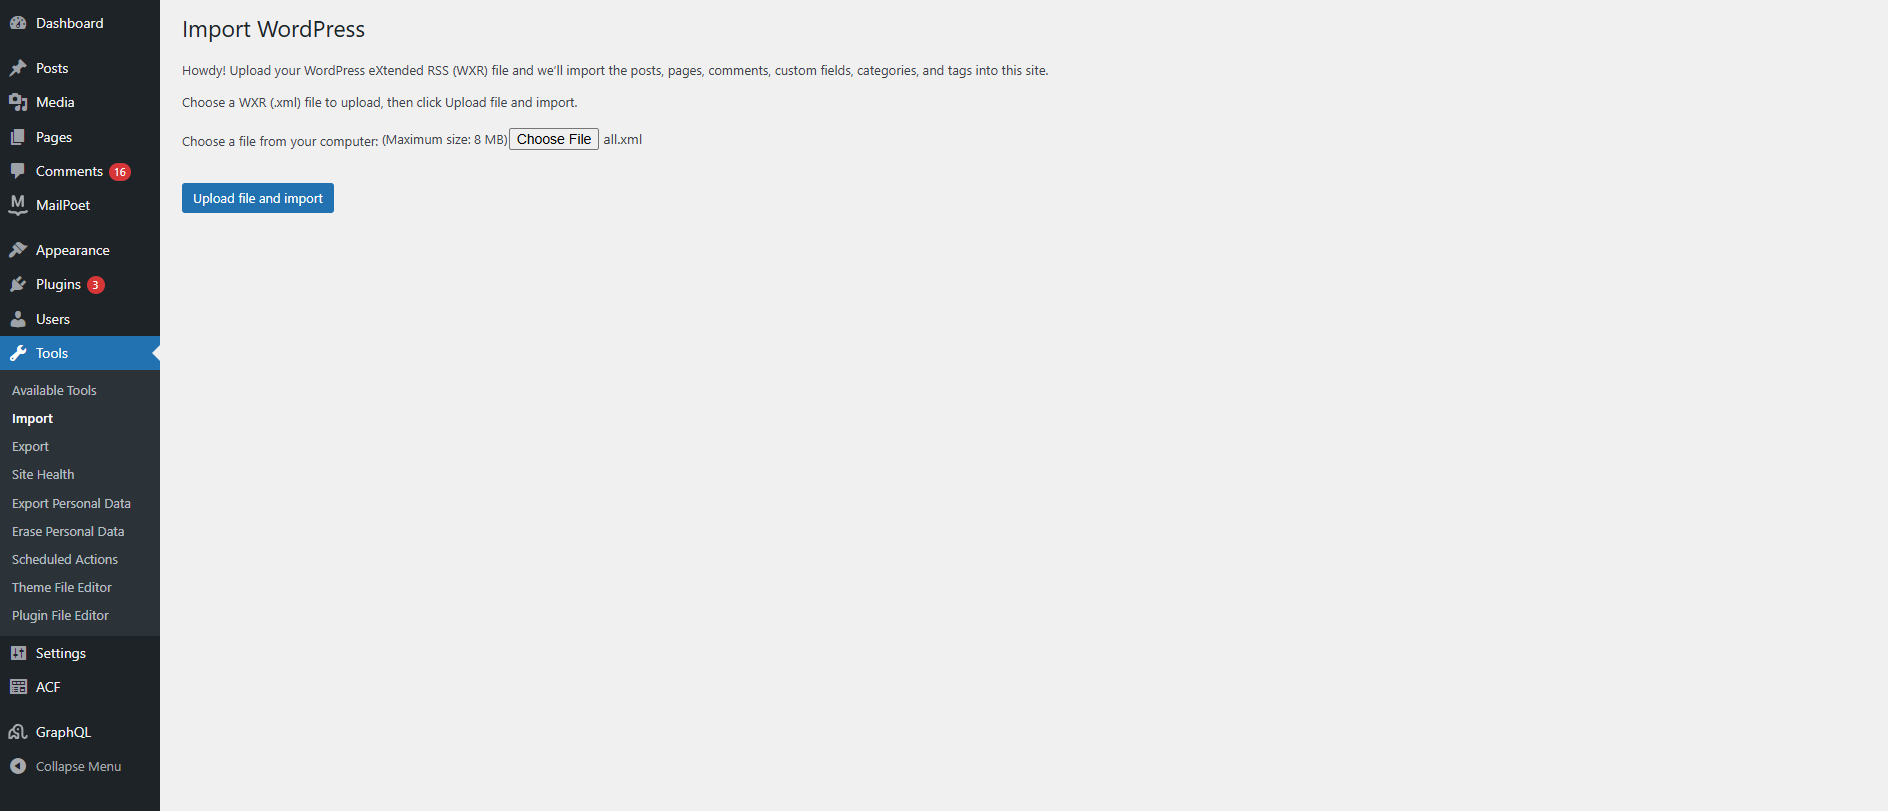
Step 6: Import Demo Content(optional)
To quickly set up demo pages, menus, and content, follow the steps below:
Import the XML Demo File
- In the WordPress admin dashboard, go to:
Tools > Import - Choose the “WordPress” importer (install it if prompted).
- Upload the all.xml file located inside the polor-headless-core folder.
- Follow the on-screen instructions to assign authors and import attachments (recommended).
Assign Menus
- Go to Appearance > Menus.
- Assign the menu Polor Header to the Primary location.
- Assign the menu Polor Footer to the Footer location.
- Save the changes.
- Go to Appearance > Menus.
Step 7: Run and Test the Project
Follow the steps below to start your headless frontend and make sure everything is working properly:
How to Start the Development Server:
- Open a terminal and navigate to the polor-nextjs project folder.
- Run the following commands:
npm install
ℹ️ Note: If you encounter dependency conflicts during installation, try using the following command with a compatibility flag:
npm install –legacy-peer-deps
This flag helps resolve issues related to peer dependency mismatches in some environments.
npm run dev
- Once the server starts, open your browser and go to: http://localhost:3000
- You should now see your headless frontend loading content from your WordPress backend.
- Check that:
- Pages and posts display correctly.
- Menus and images are loading.
- Gutenberg blocks (if used) are rendering properly.
- Preview mode works (if FAUST_SECRET_KEY is configured correctly).
- Pages and posts display correctly.
> Deploying the Polor Faust Nexjs to Vercel.