This is the simplest way for most users.
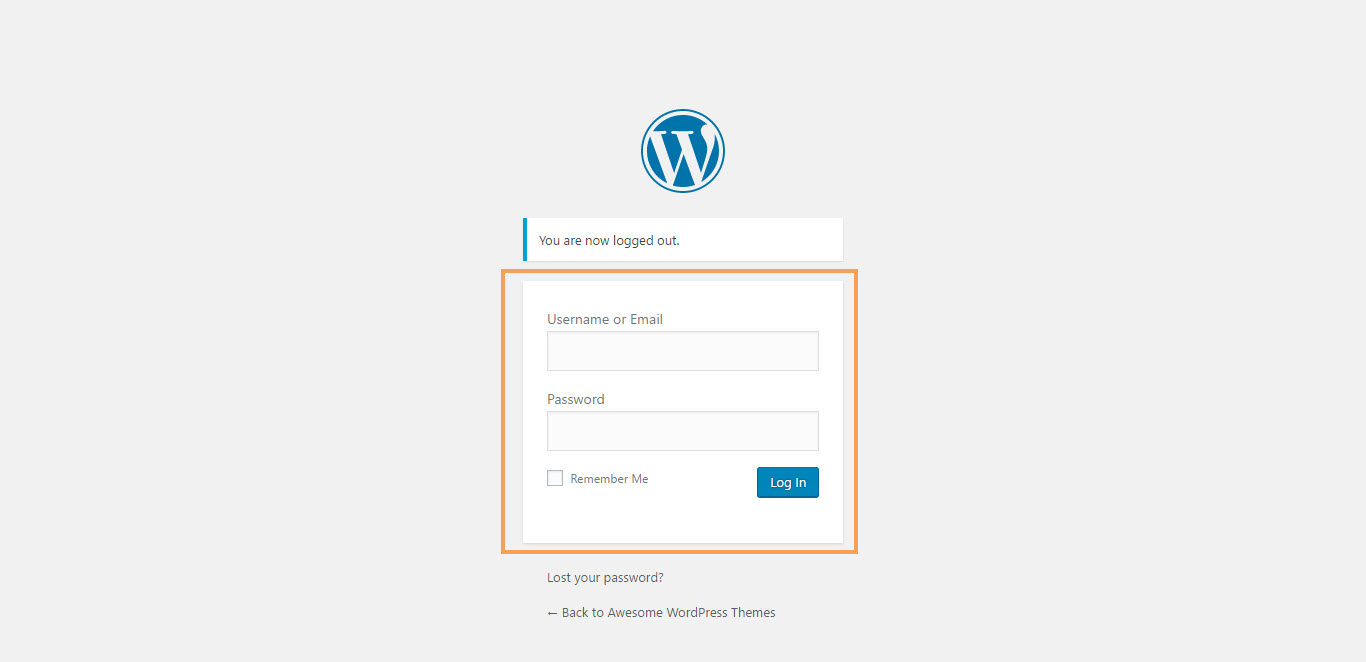
Step 1. Log in to your WordPress Dashboard.
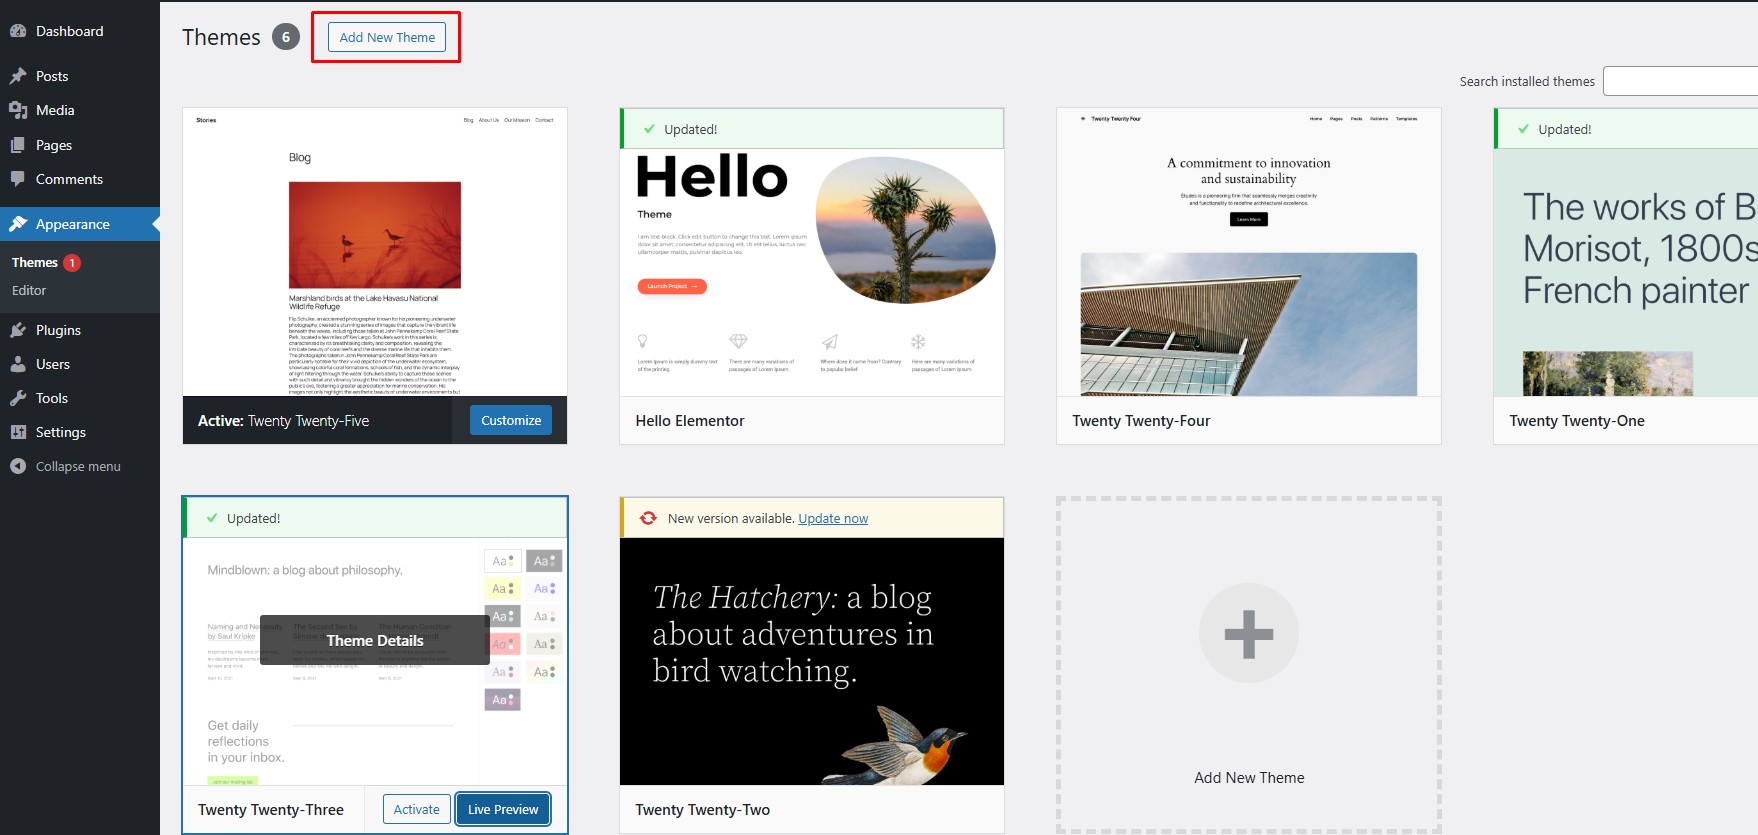
Step 2. Go to Appearance > Themes, then click Add New at the top of the screen.
Step 3. Click the Upload Theme button.
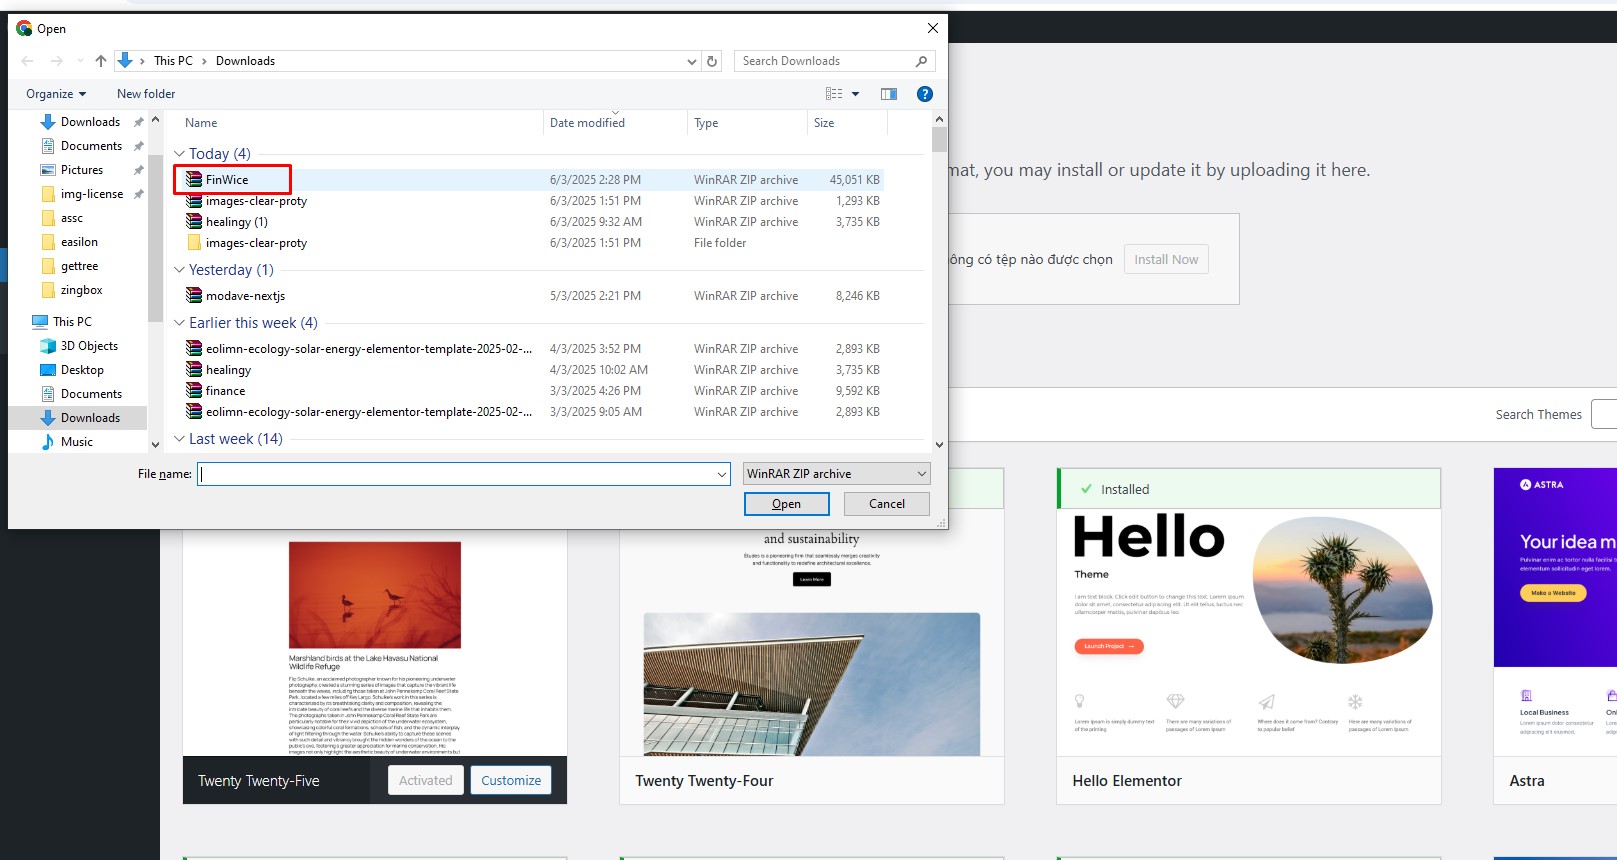
Step 4. Click Choose File and select themename.zip.
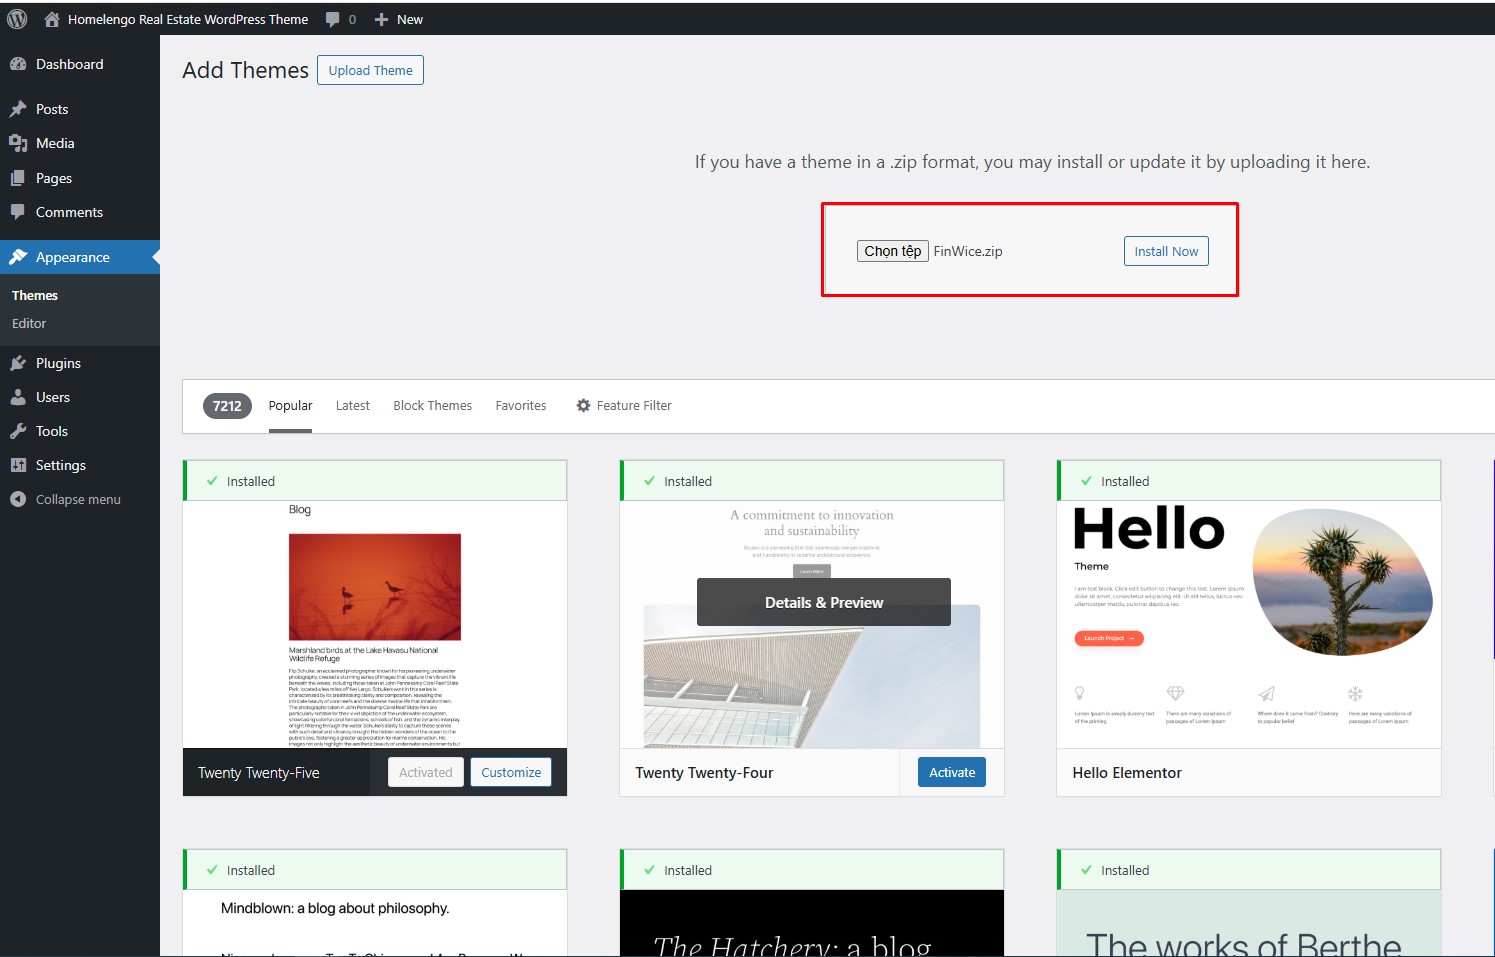
Step 5. Click Install Now and wait a moment.
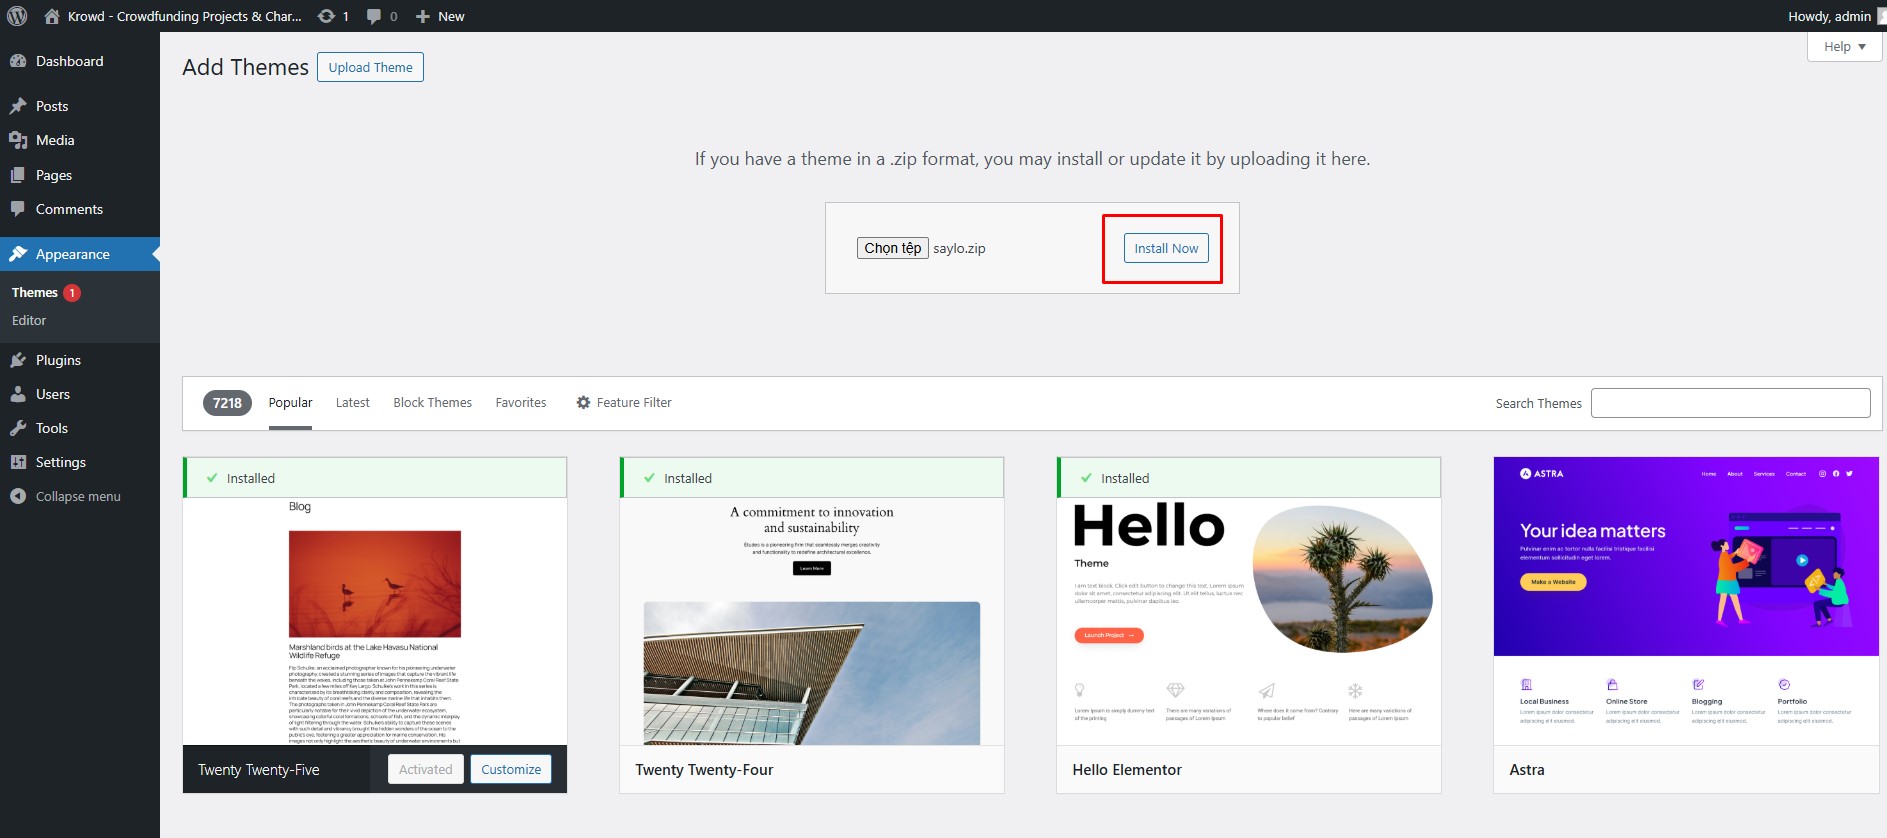
If you want to use the child theme, install theme-child the same way, then activate the child theme.
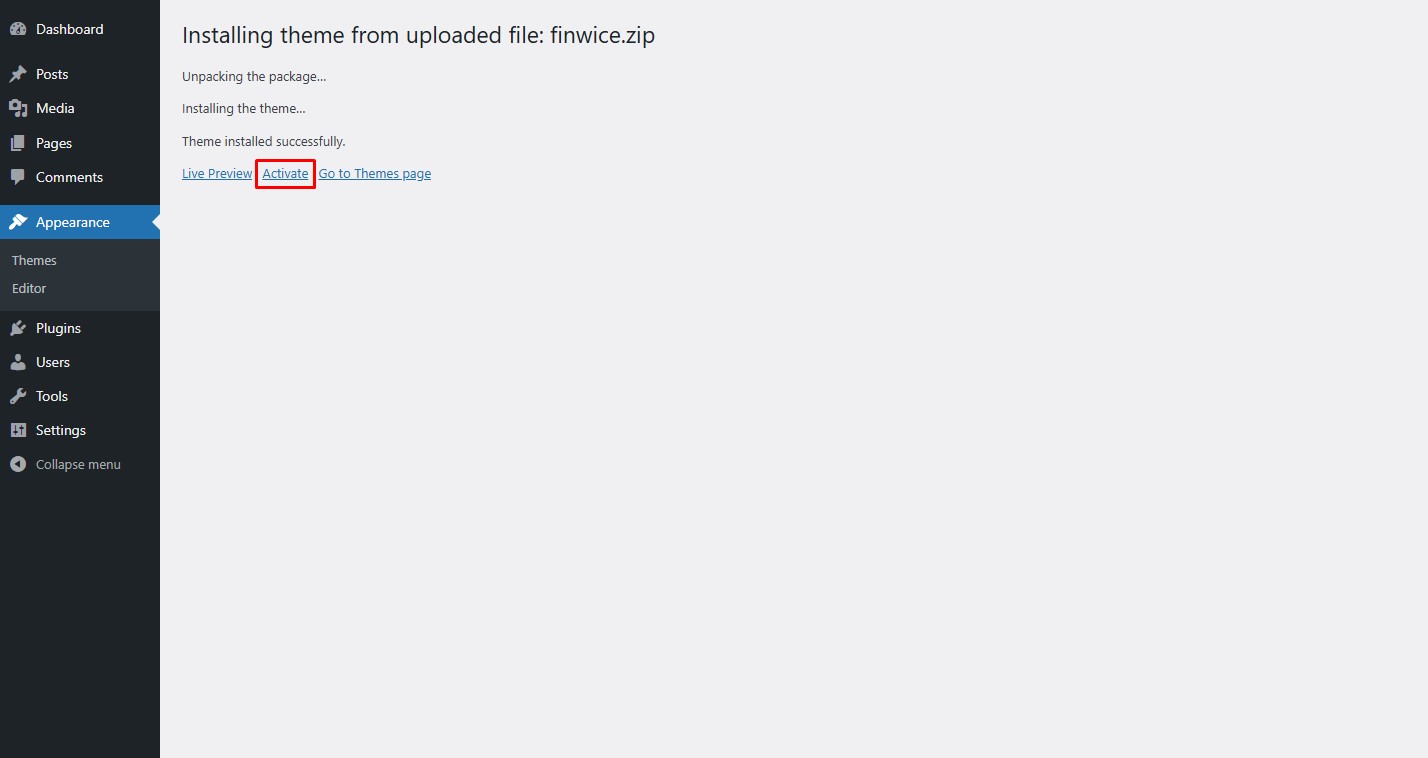
Step 6. When the installation is done, click Activate.
Step 1. After you activate the theme, a notice appears at the top of the screen. Click Begin installing plugins.
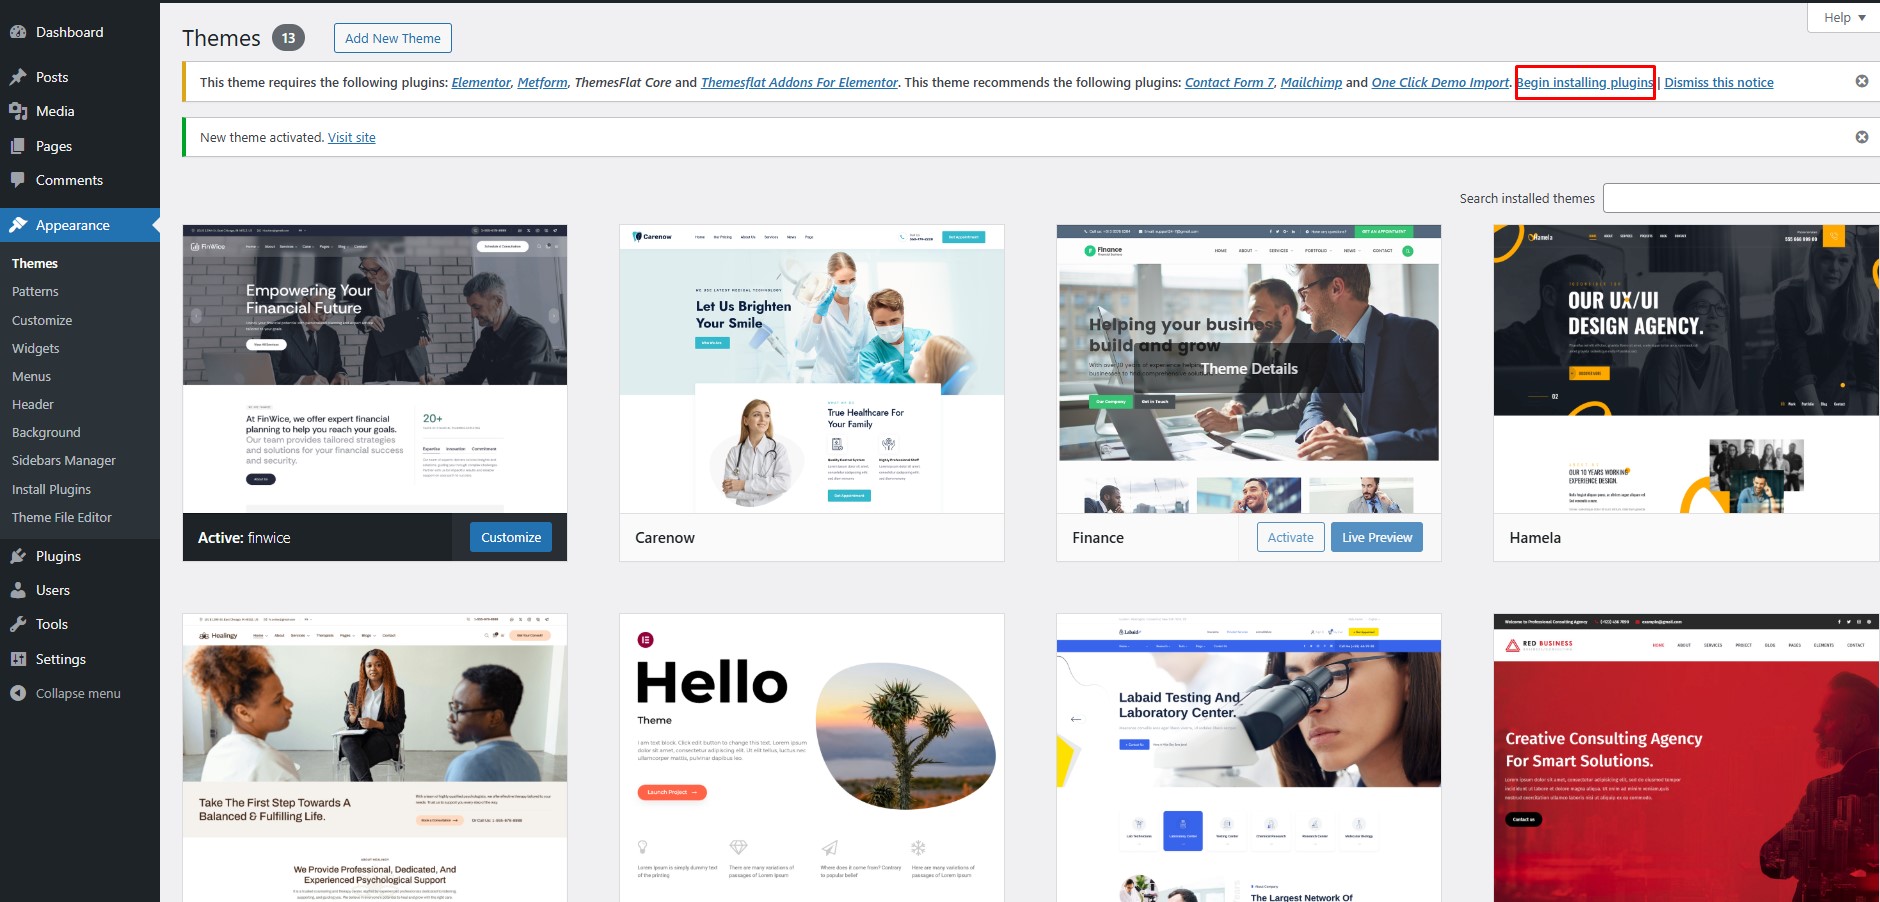
Step 2. Go to Appearance > Install Plugins and select all the plugins required by the theme (Contact Form 7, Elementor, Themesflat Core, Themesflat Addons For Elementor, Mailchimp) and the recommended One Click Demo Import.
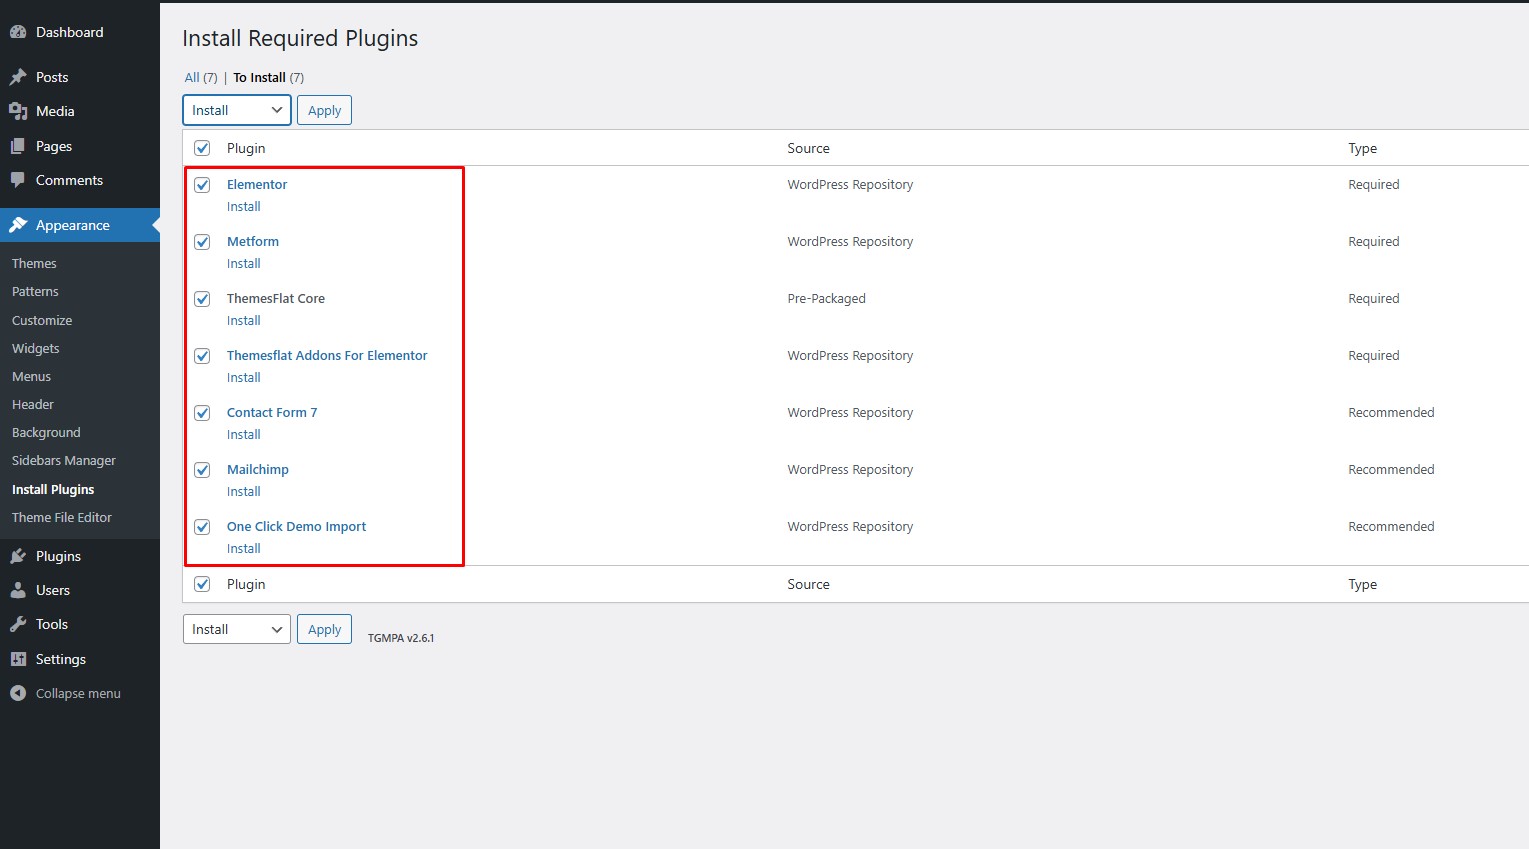
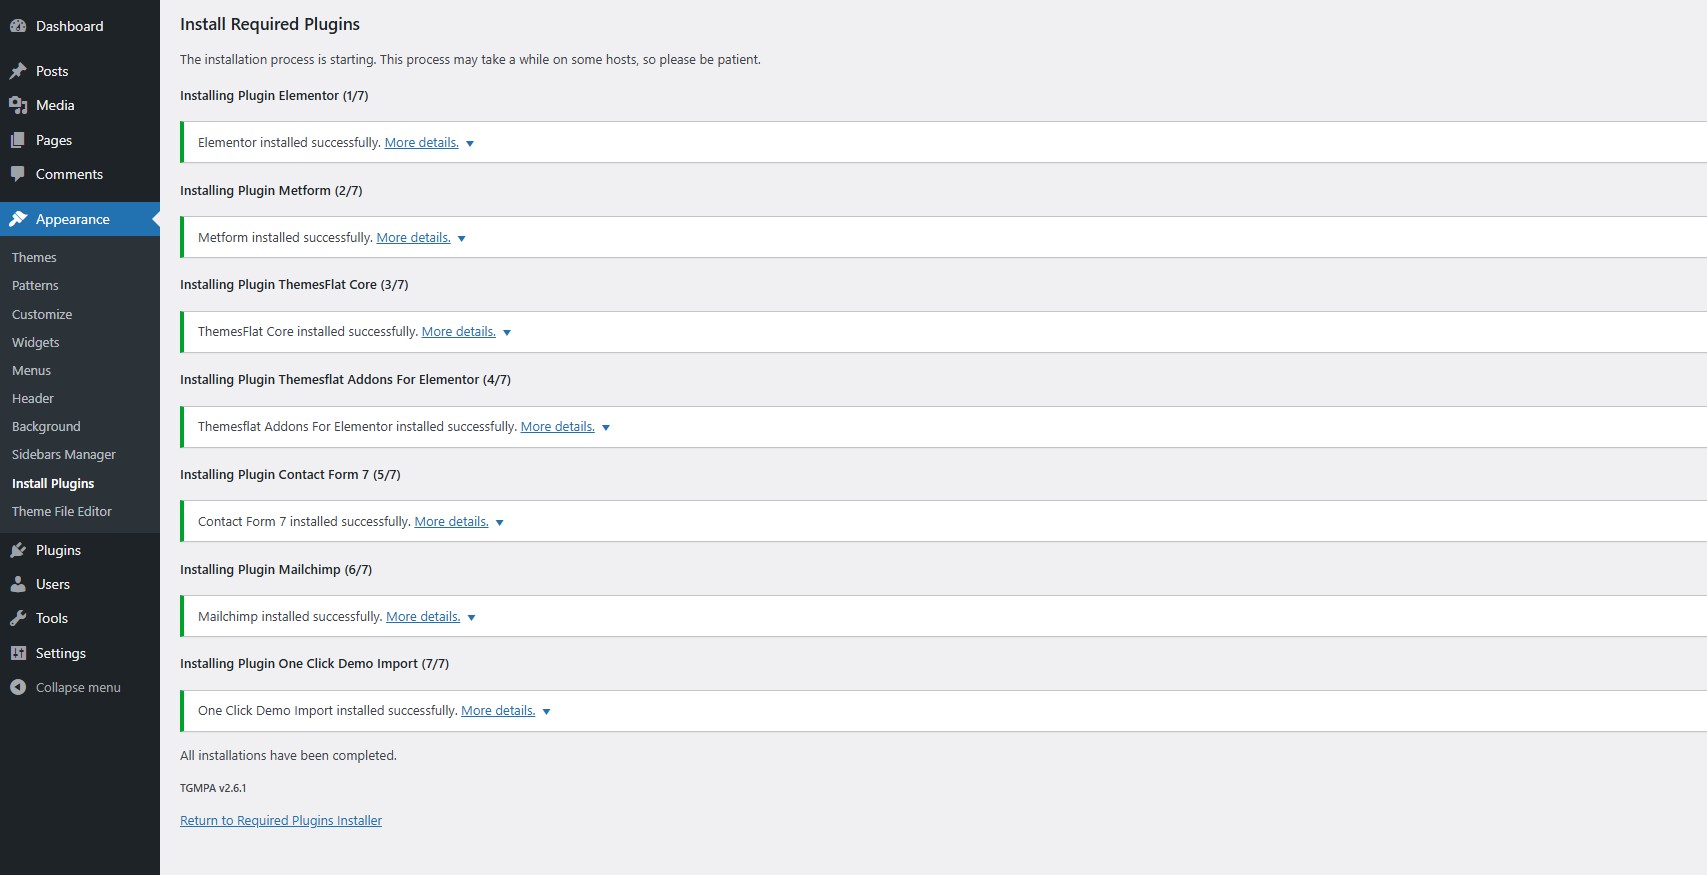
Wait for the installation to finish.
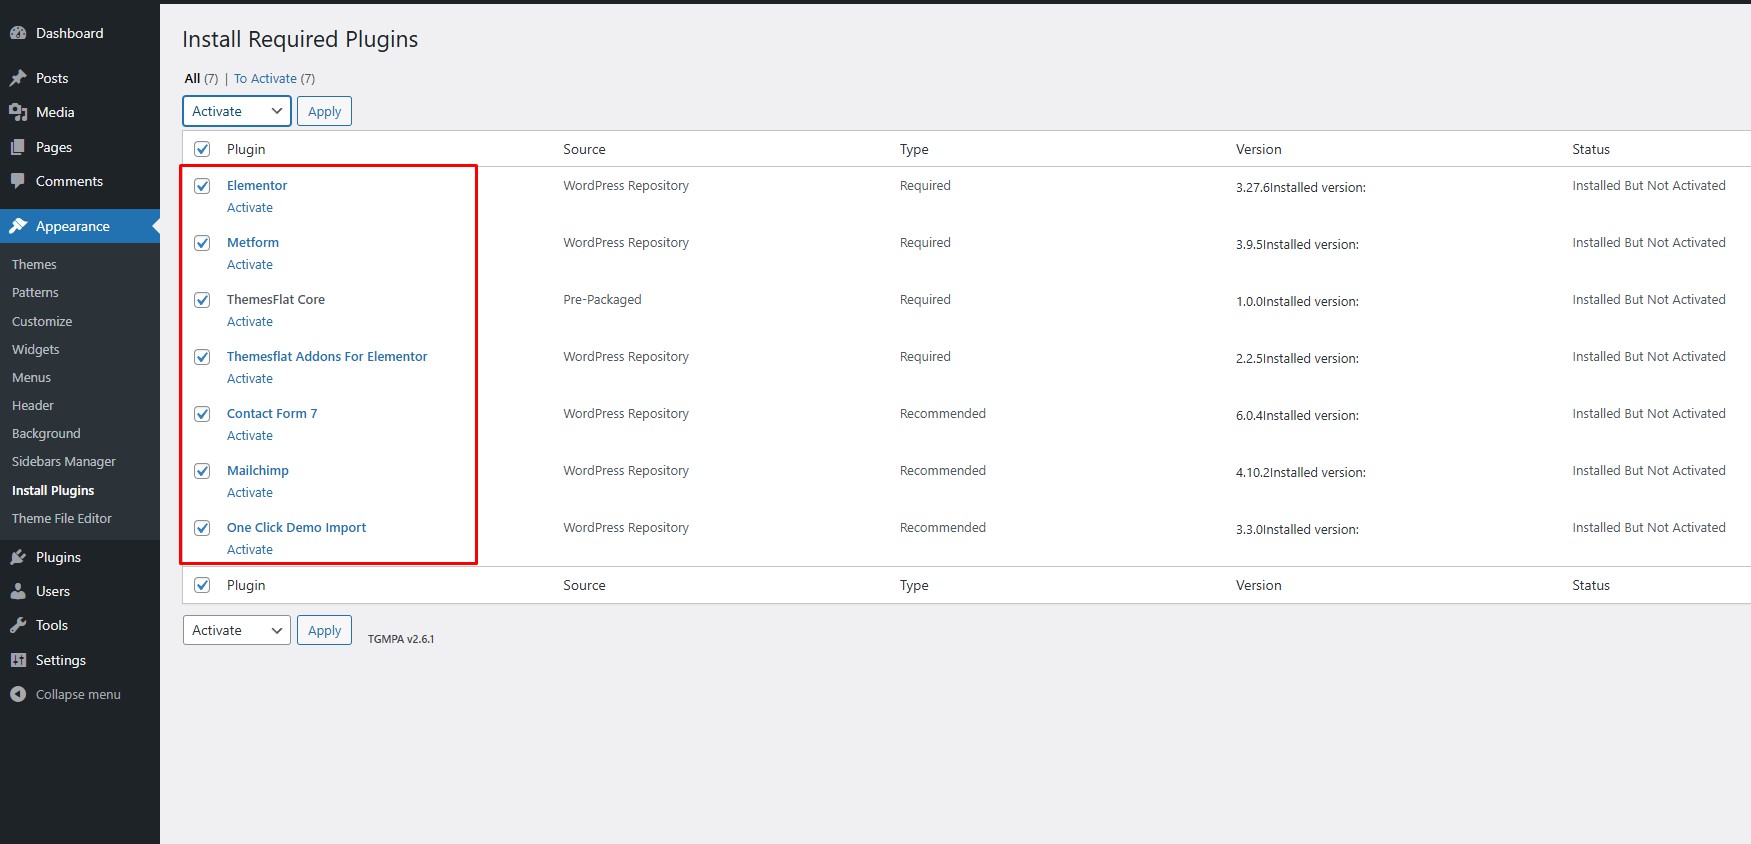
Step 3. Activate the plugins.
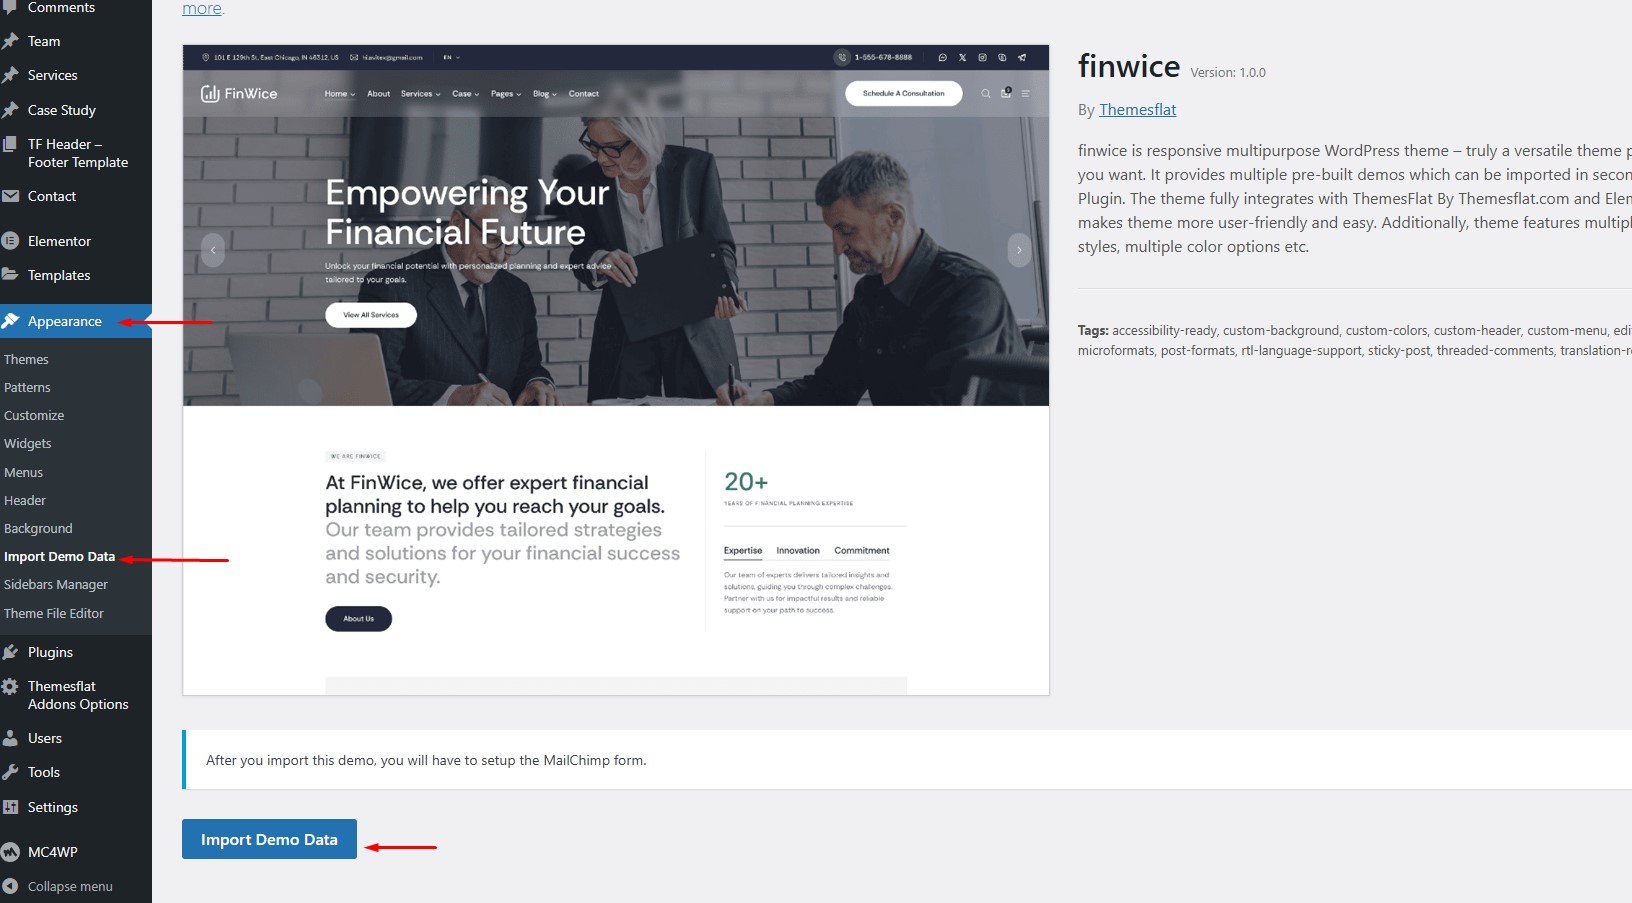
Step 4. Go to Appearance > Import Demo Data.
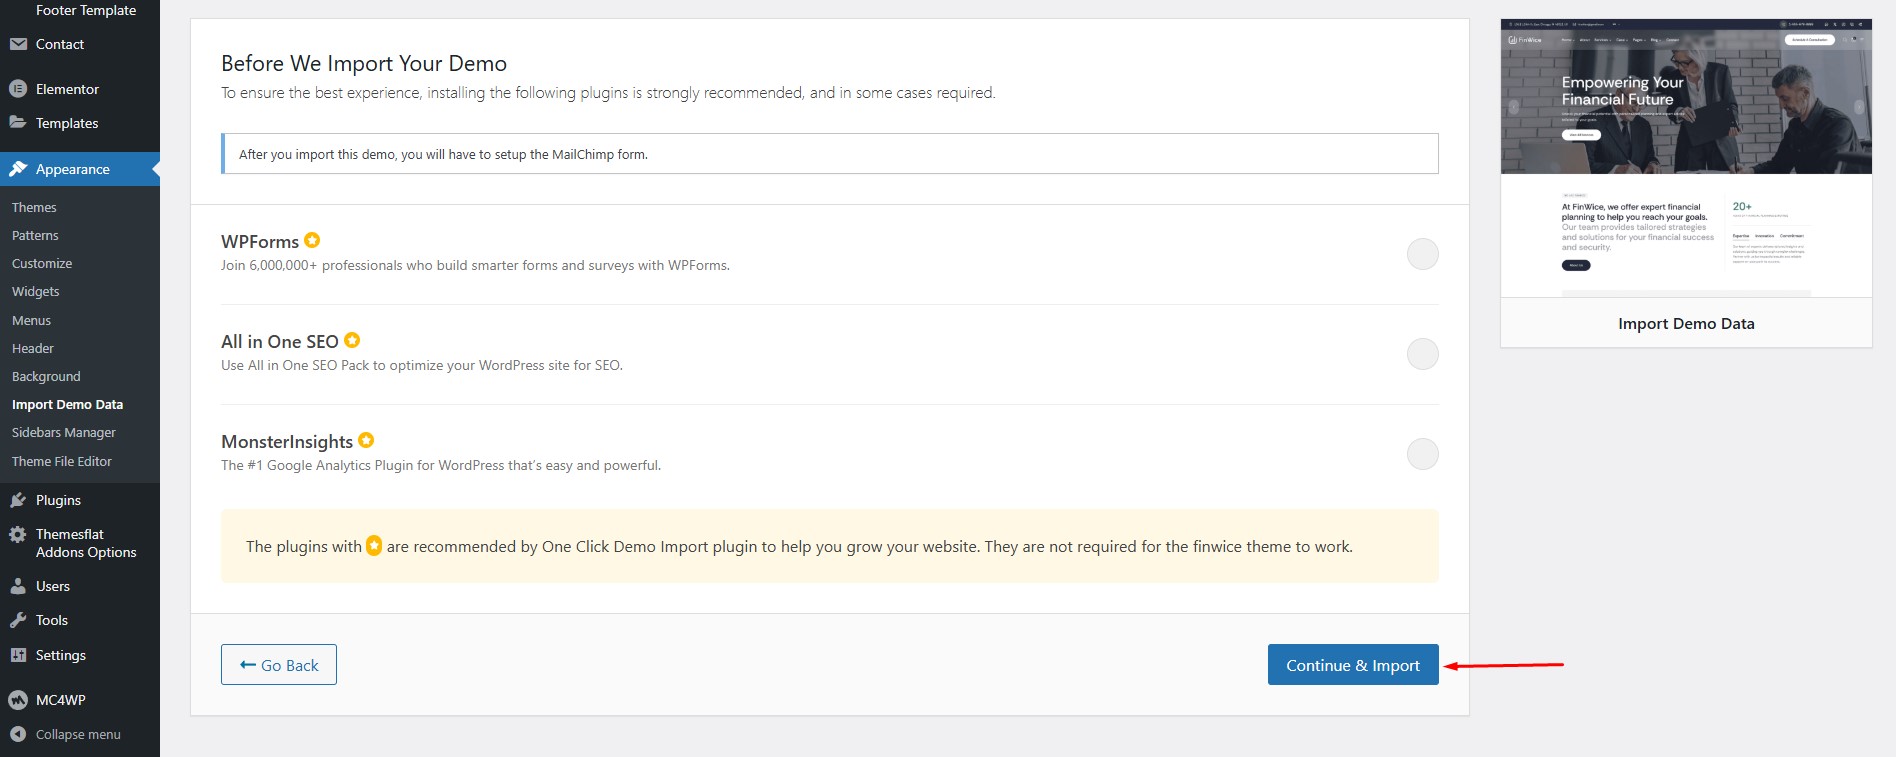
Step 5. Click Continue & Import.
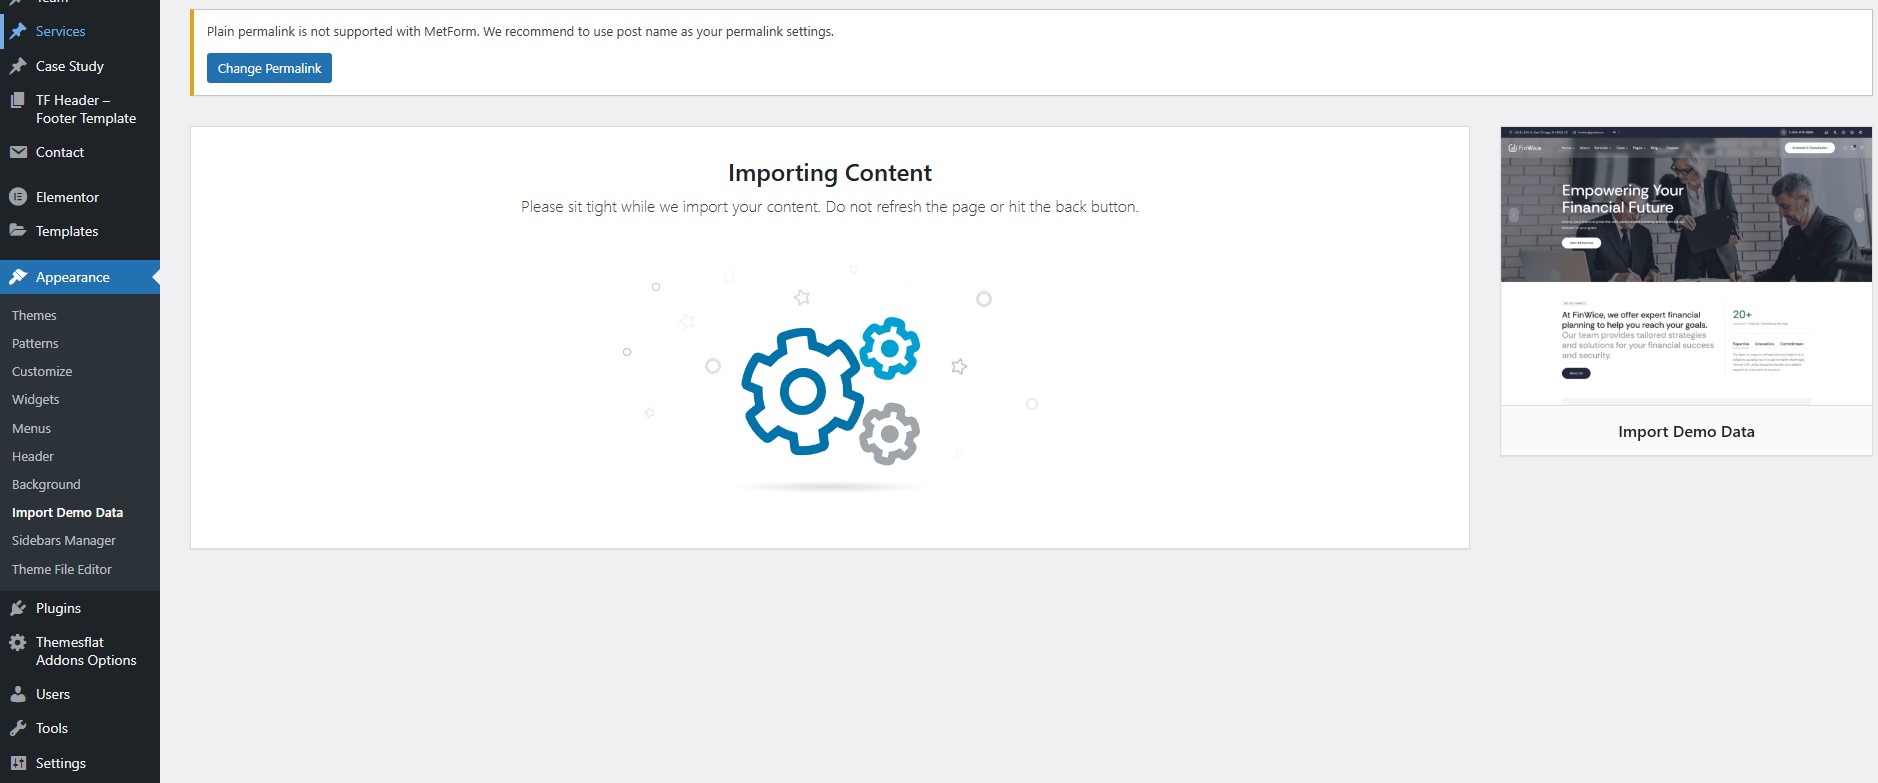
Step 6. Wait while the demo is imported. Do not close the page.
Step 7. Finish. Your site now looks like the live preview.
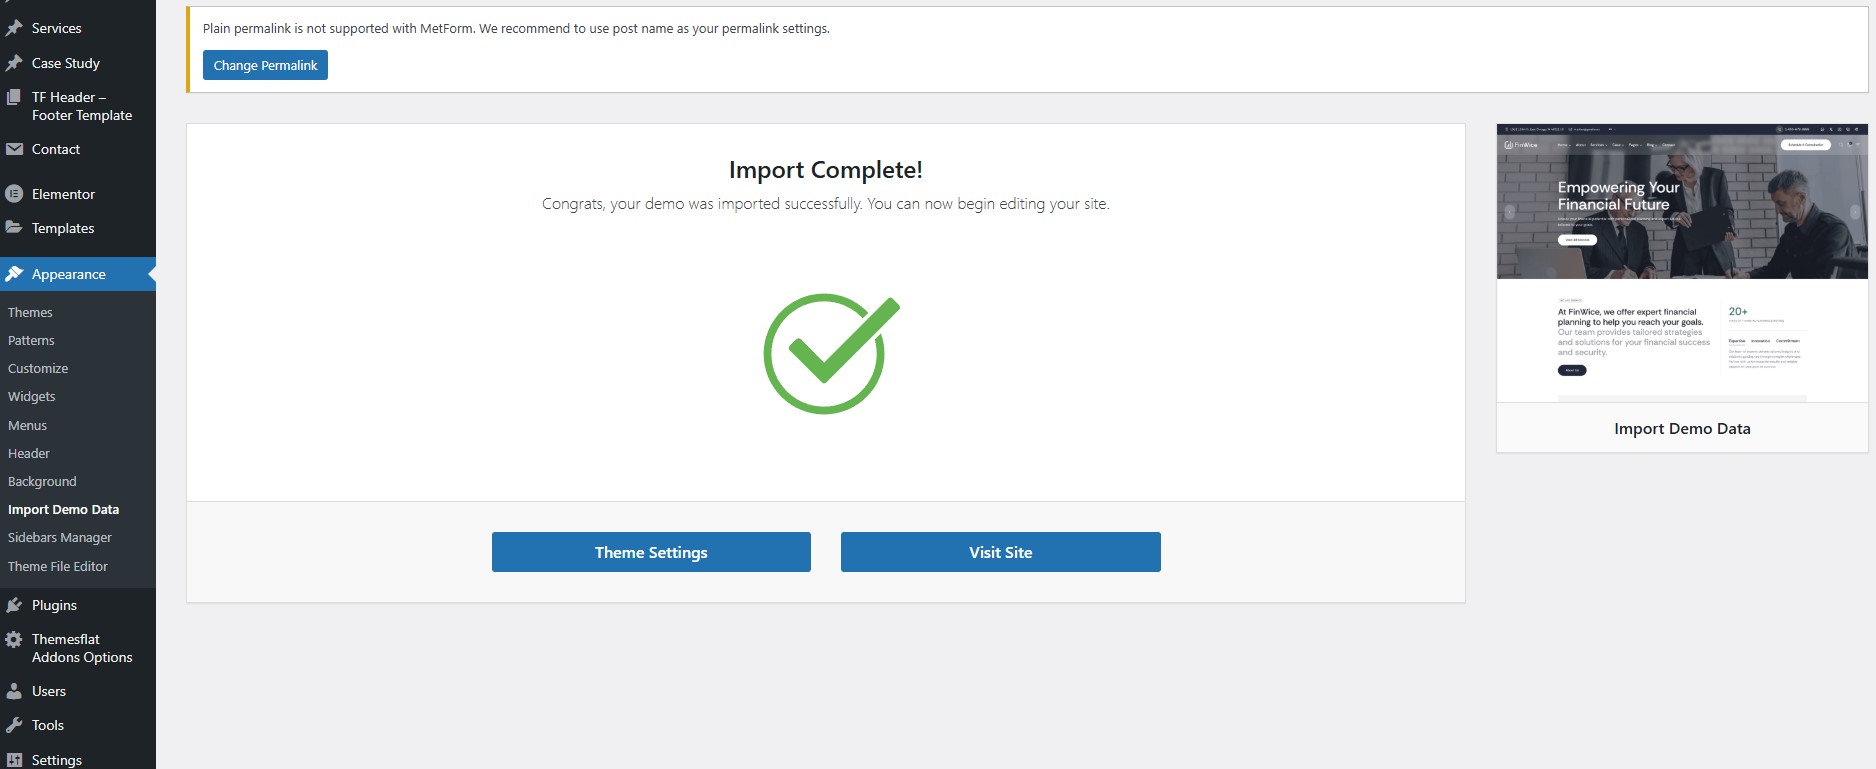
The import adds the demo pages, posts and menus to your site. For the best result import on a new WordPress installation.
To start customizing the theme, go to Dashboard > Appearance > Customize.
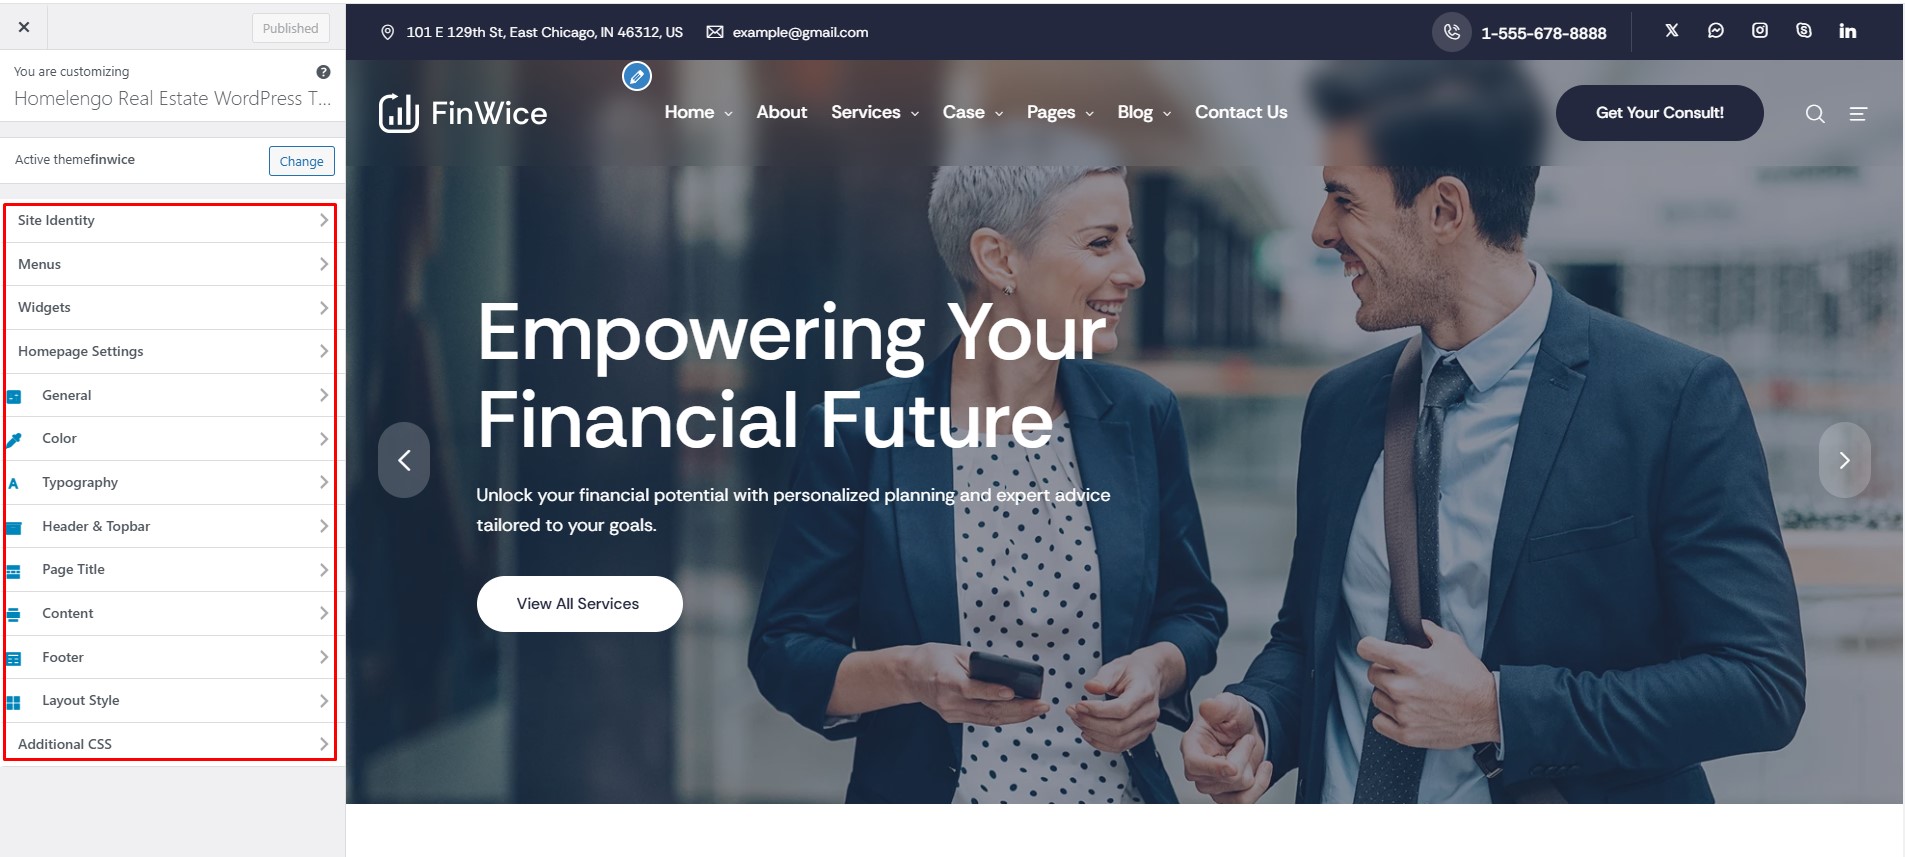
Click Save & Publish after you finish customizing. These are global settings that apply to the whole site, and they can be overridden on a single post or page.
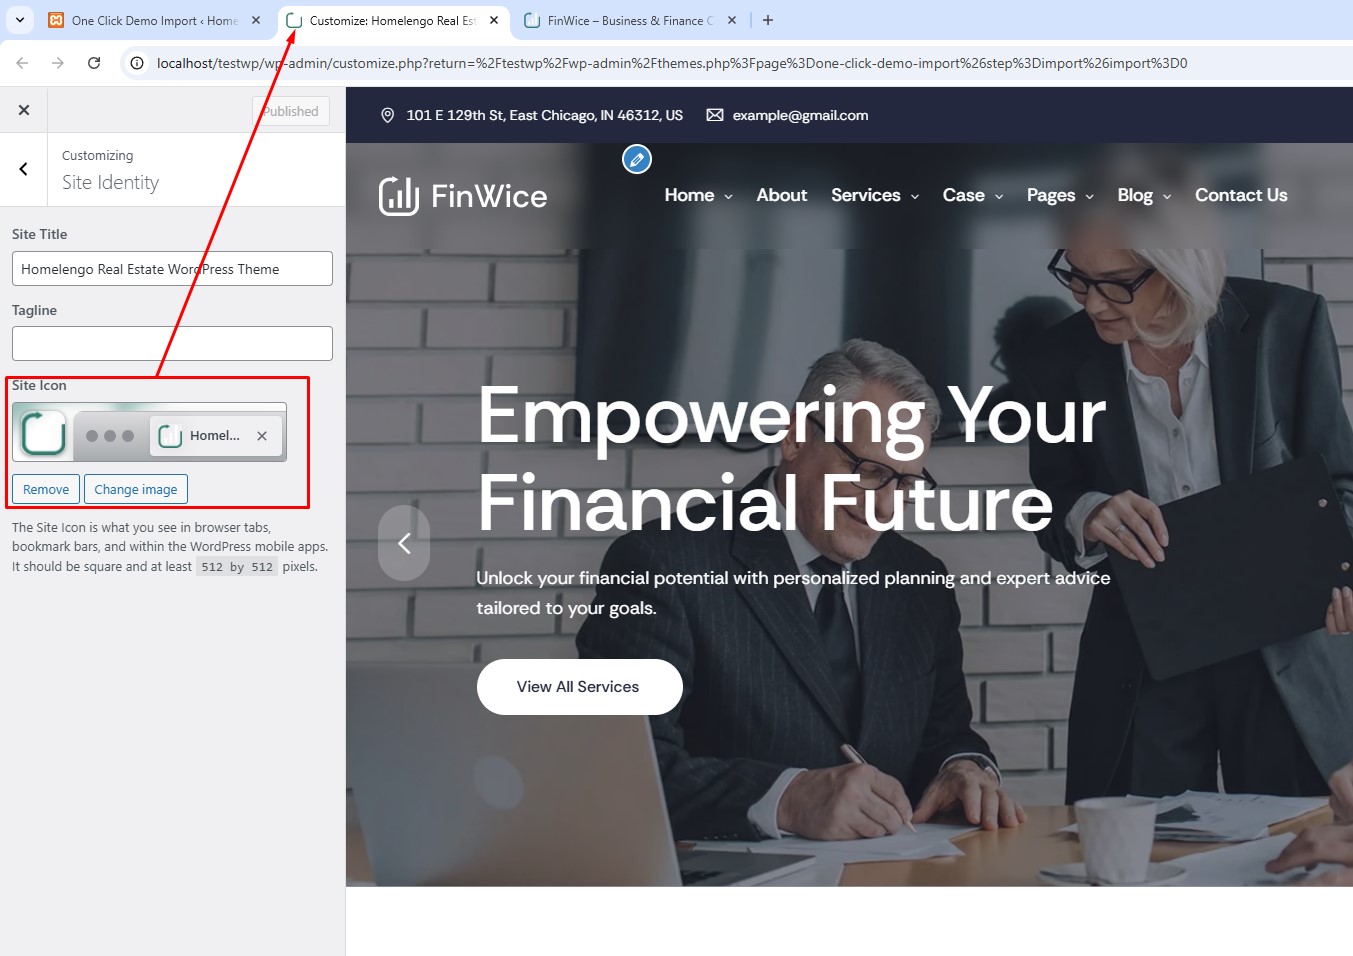
Site Identity
Go to Appearance > Customize > Site Identity. Site Title is the name of your site, Tagline is a few words that describe it, and Site Icon is the icon you see in browser tabs, bookmarks and the WordPress mobile apps.
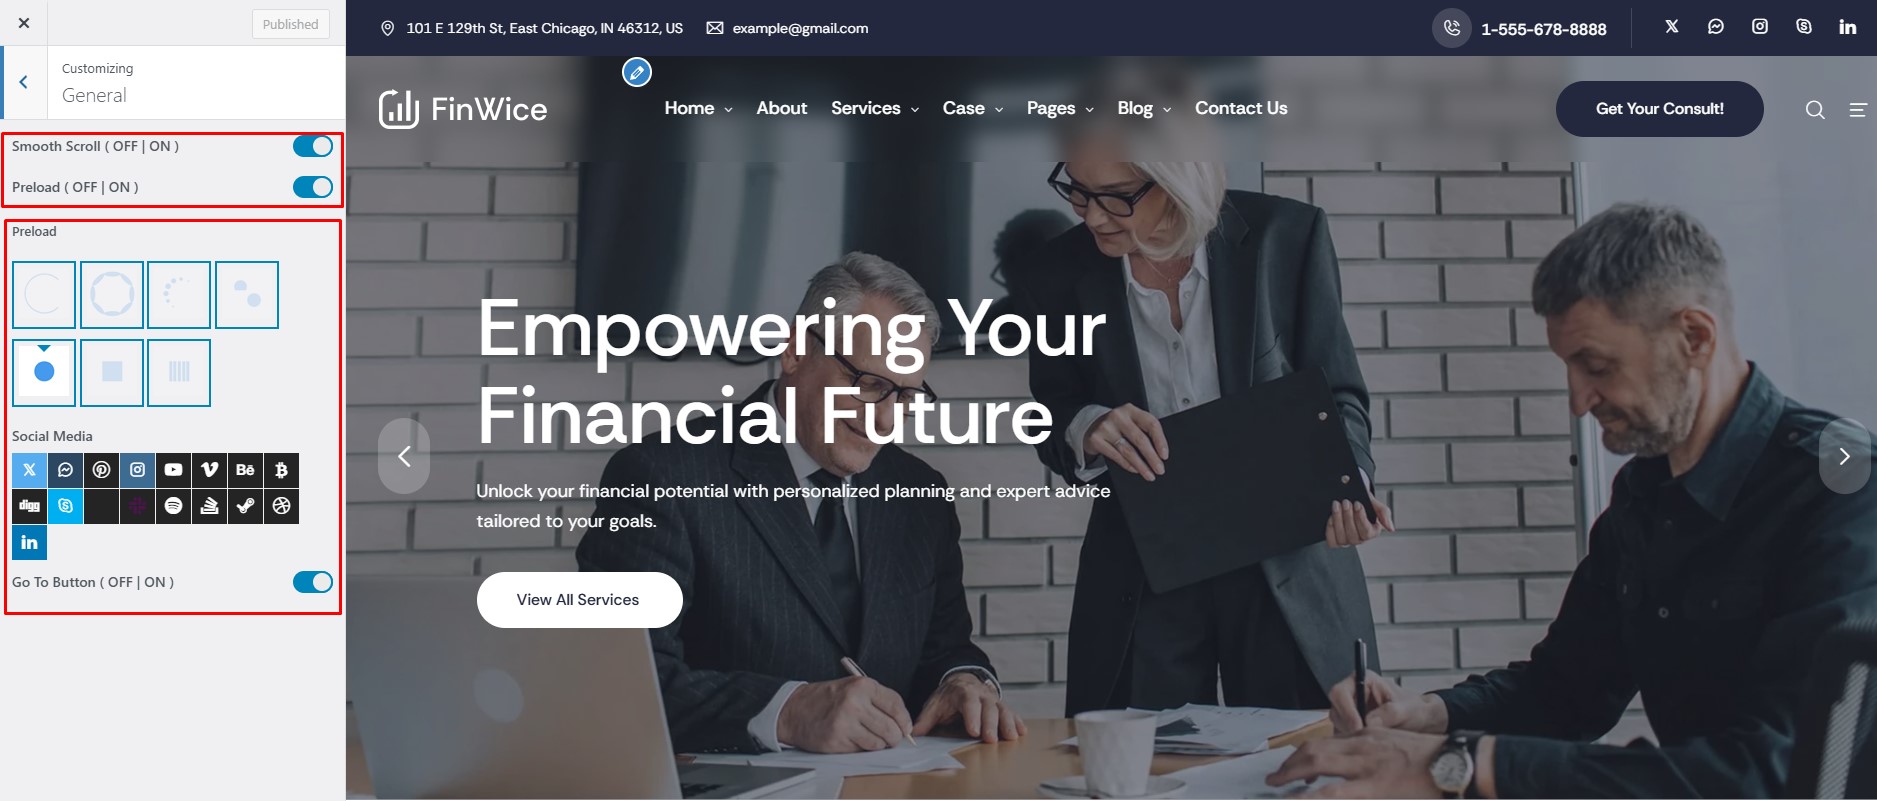
Site Display
Go to Appearance > Customize > General. Enable Smooth Scroll turns smooth scrolling on or off, Enable Preload shows a loader while a page opens, and Go To Button shows or hides the scroll-to-top button.
To set up the header go to Appearance > Customize > Header.
Custom Logo
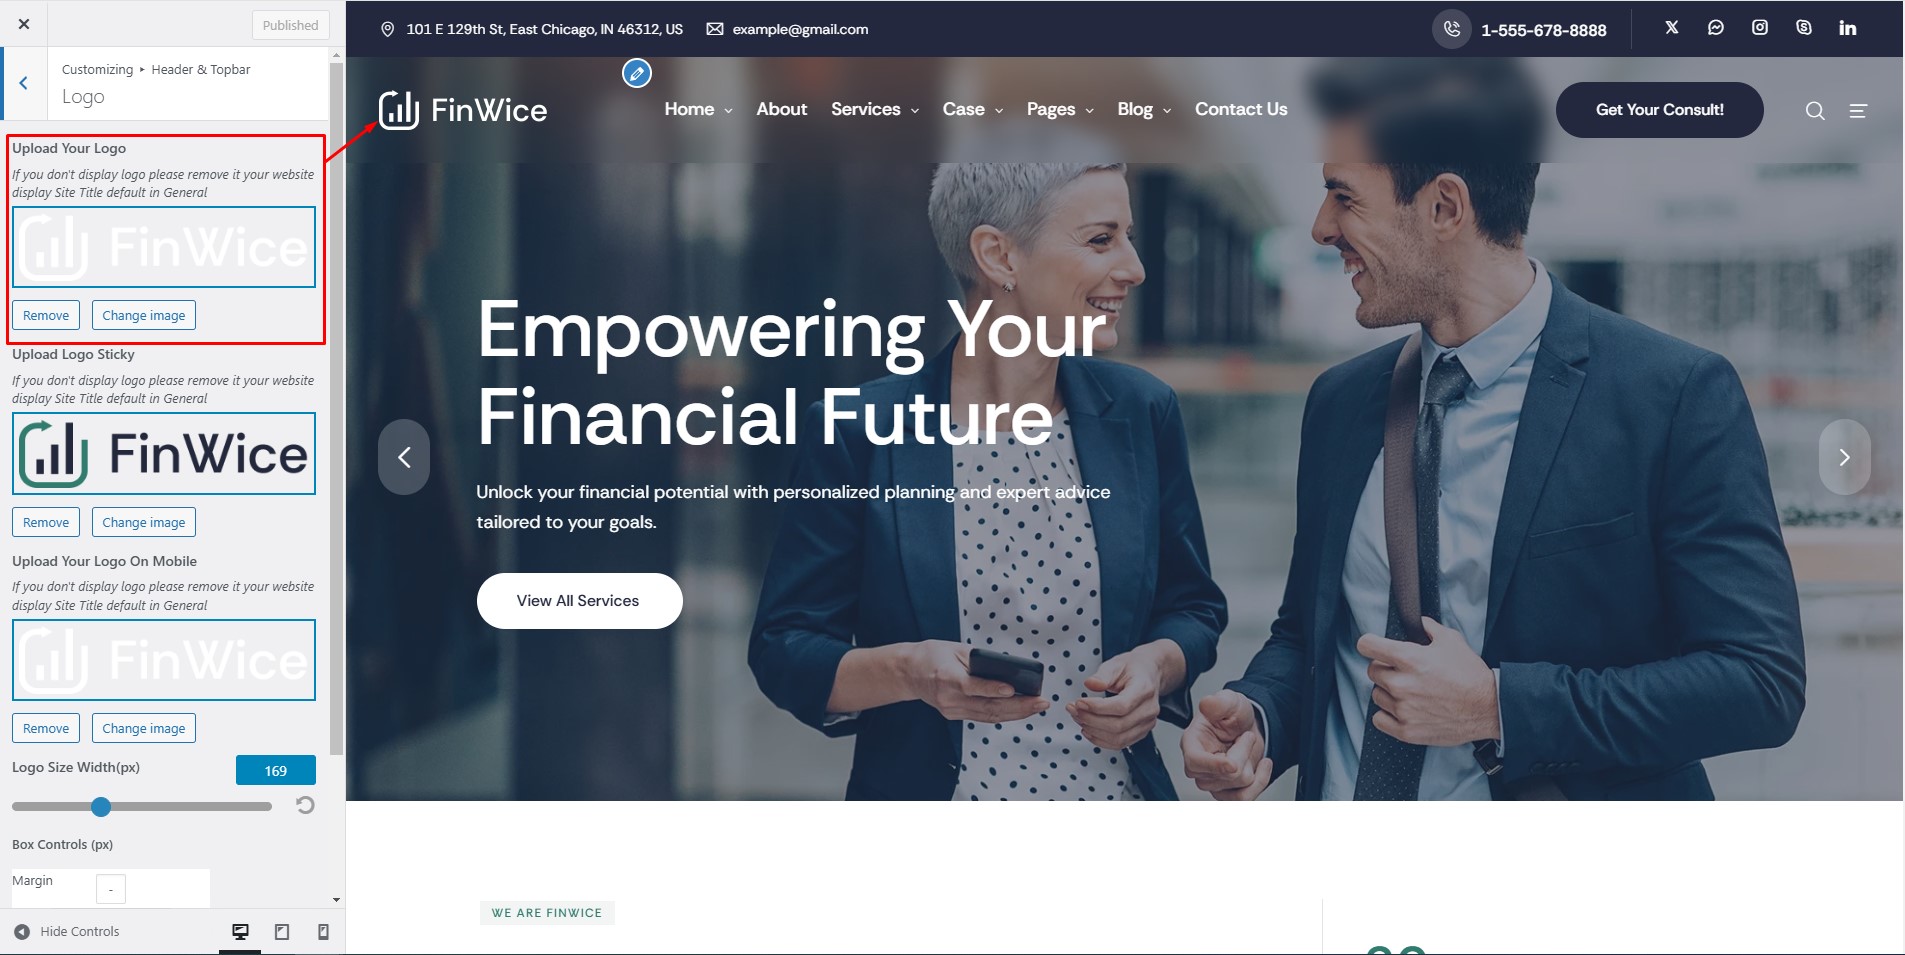
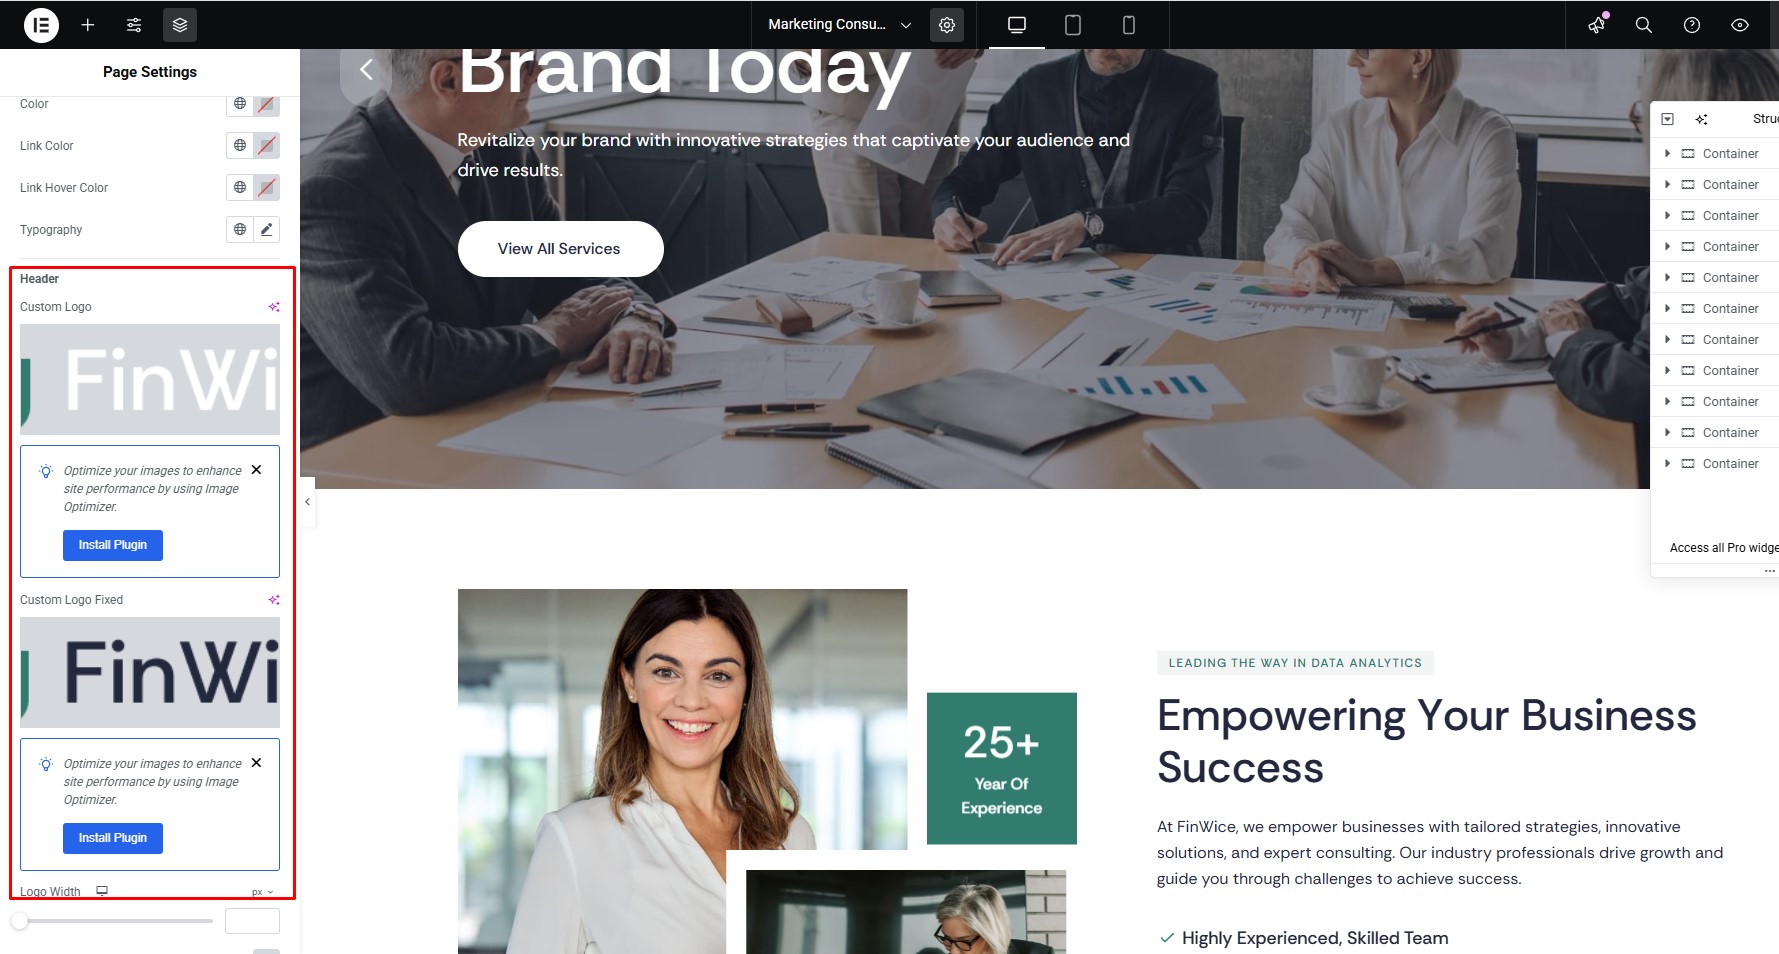
Upload Your Logo, Upload Logo Sticky and Upload Your Logo On Mobile change the logo on desktop, sticky header and mobile. Logo Size sets its size and Box Controls adjusts padding and margin.
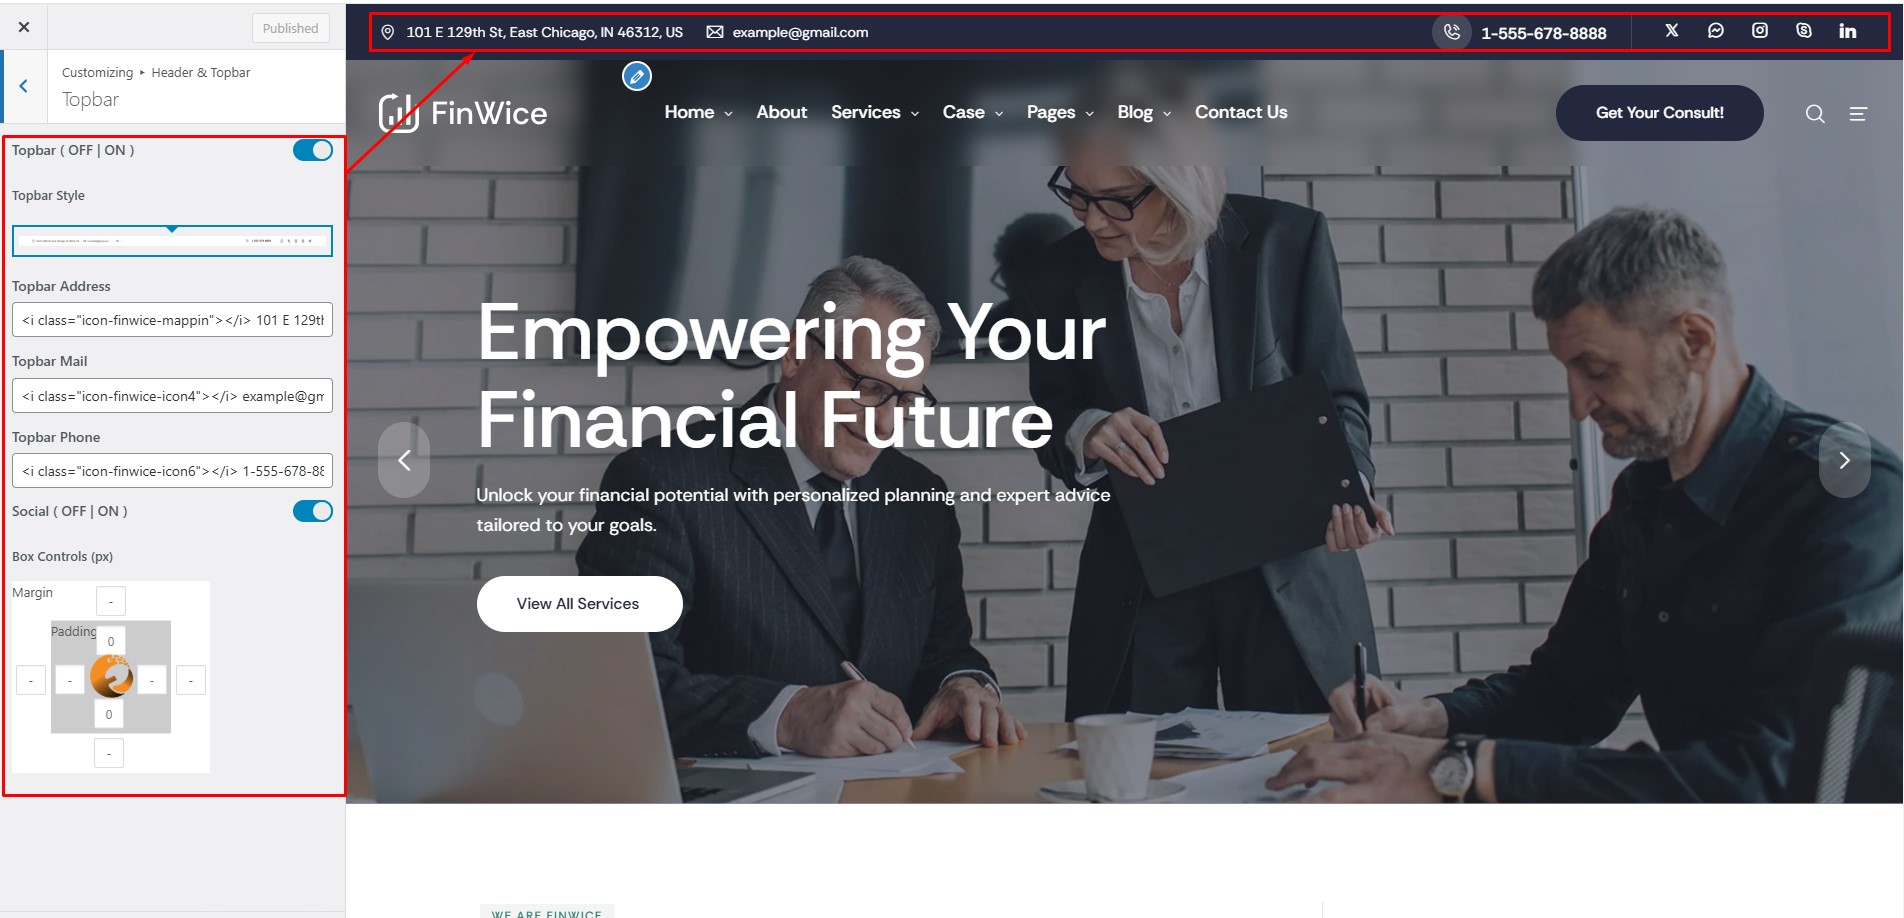
Topbar
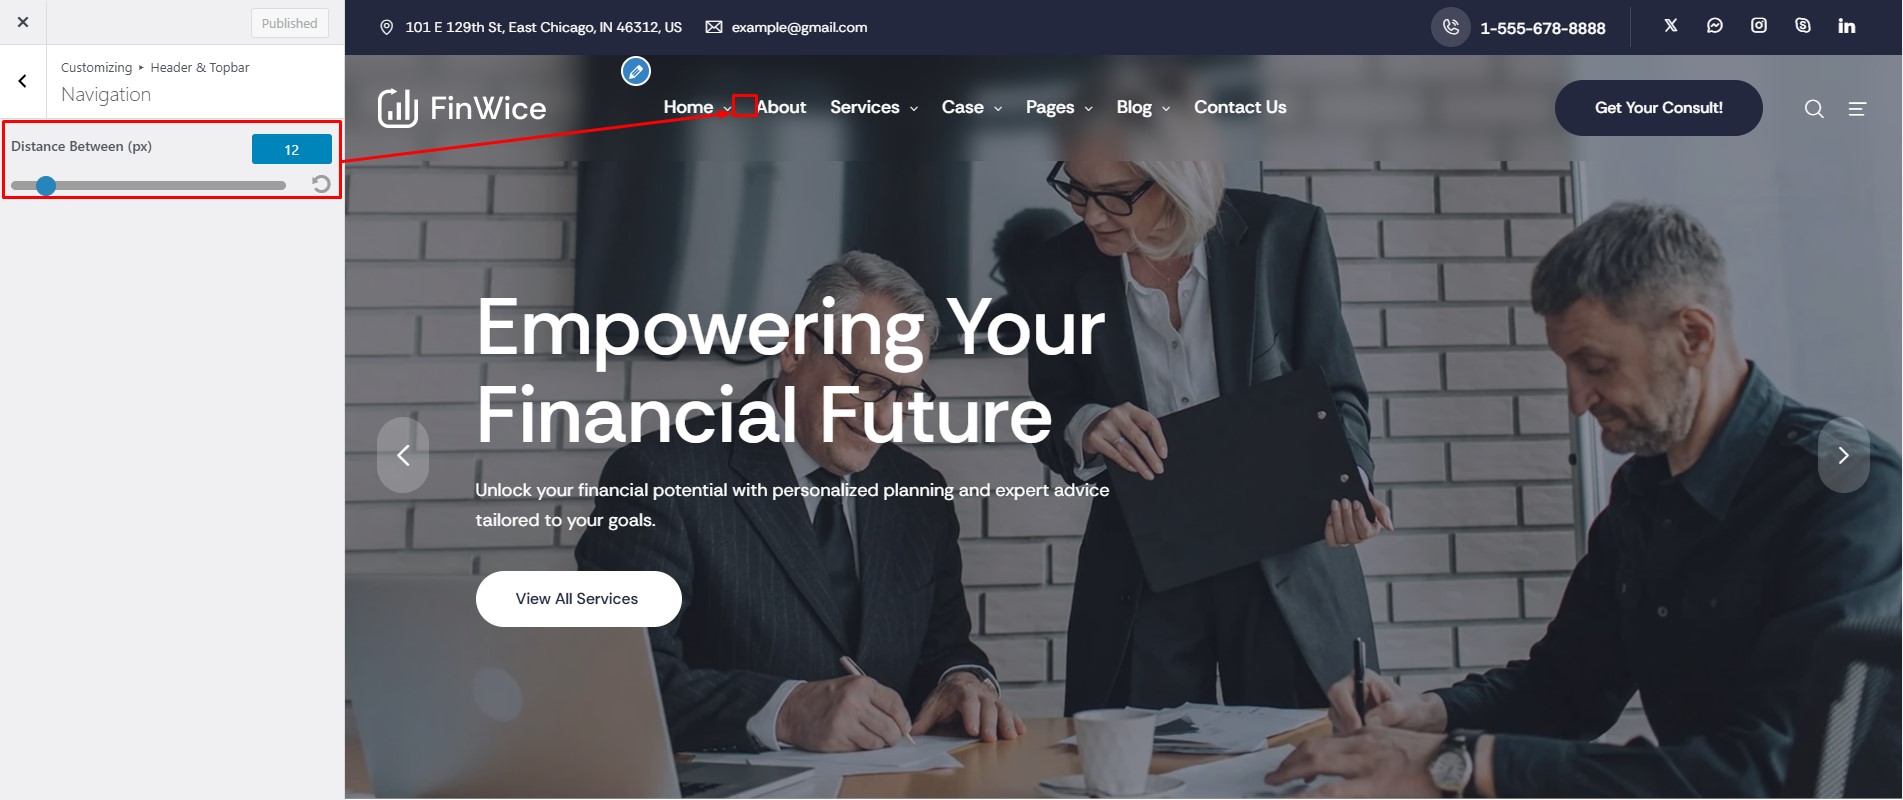
Distance Between Menu
Header Options
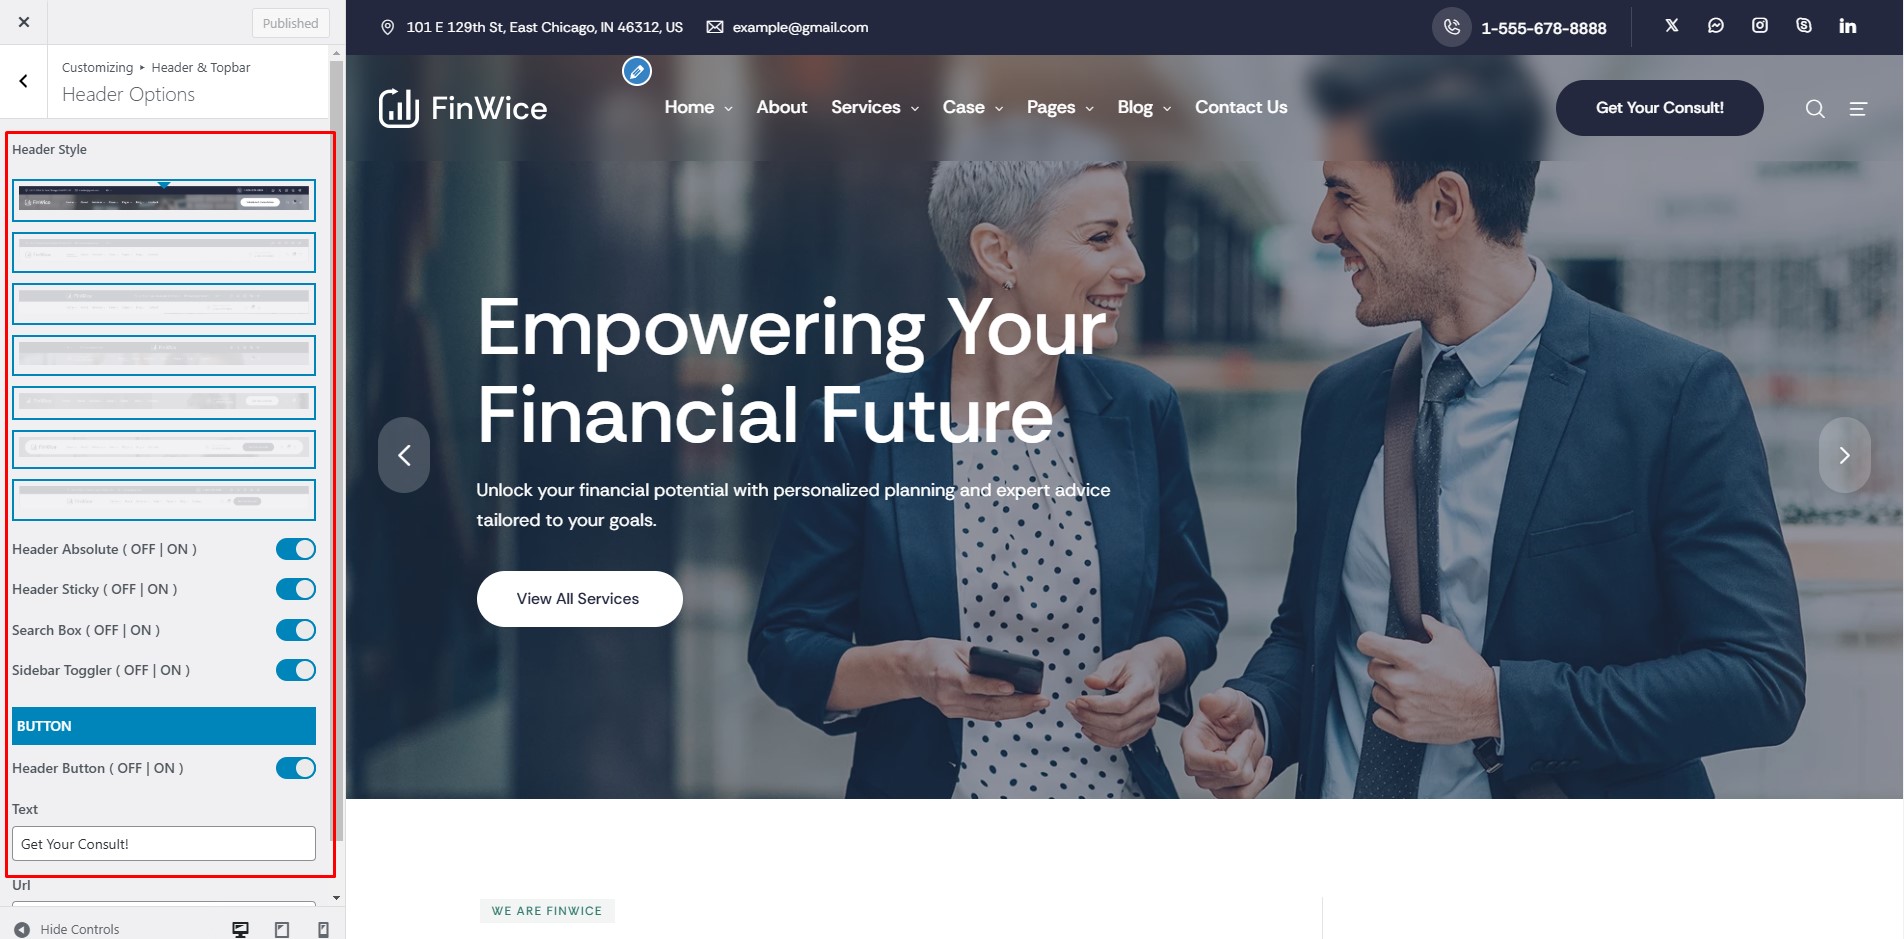
Header Style chooses the default header, Header Sticky enables the sticky header, Search Box shows the search box and Sidebar Toggler shows the sidebar toggle button.
Create a Menu
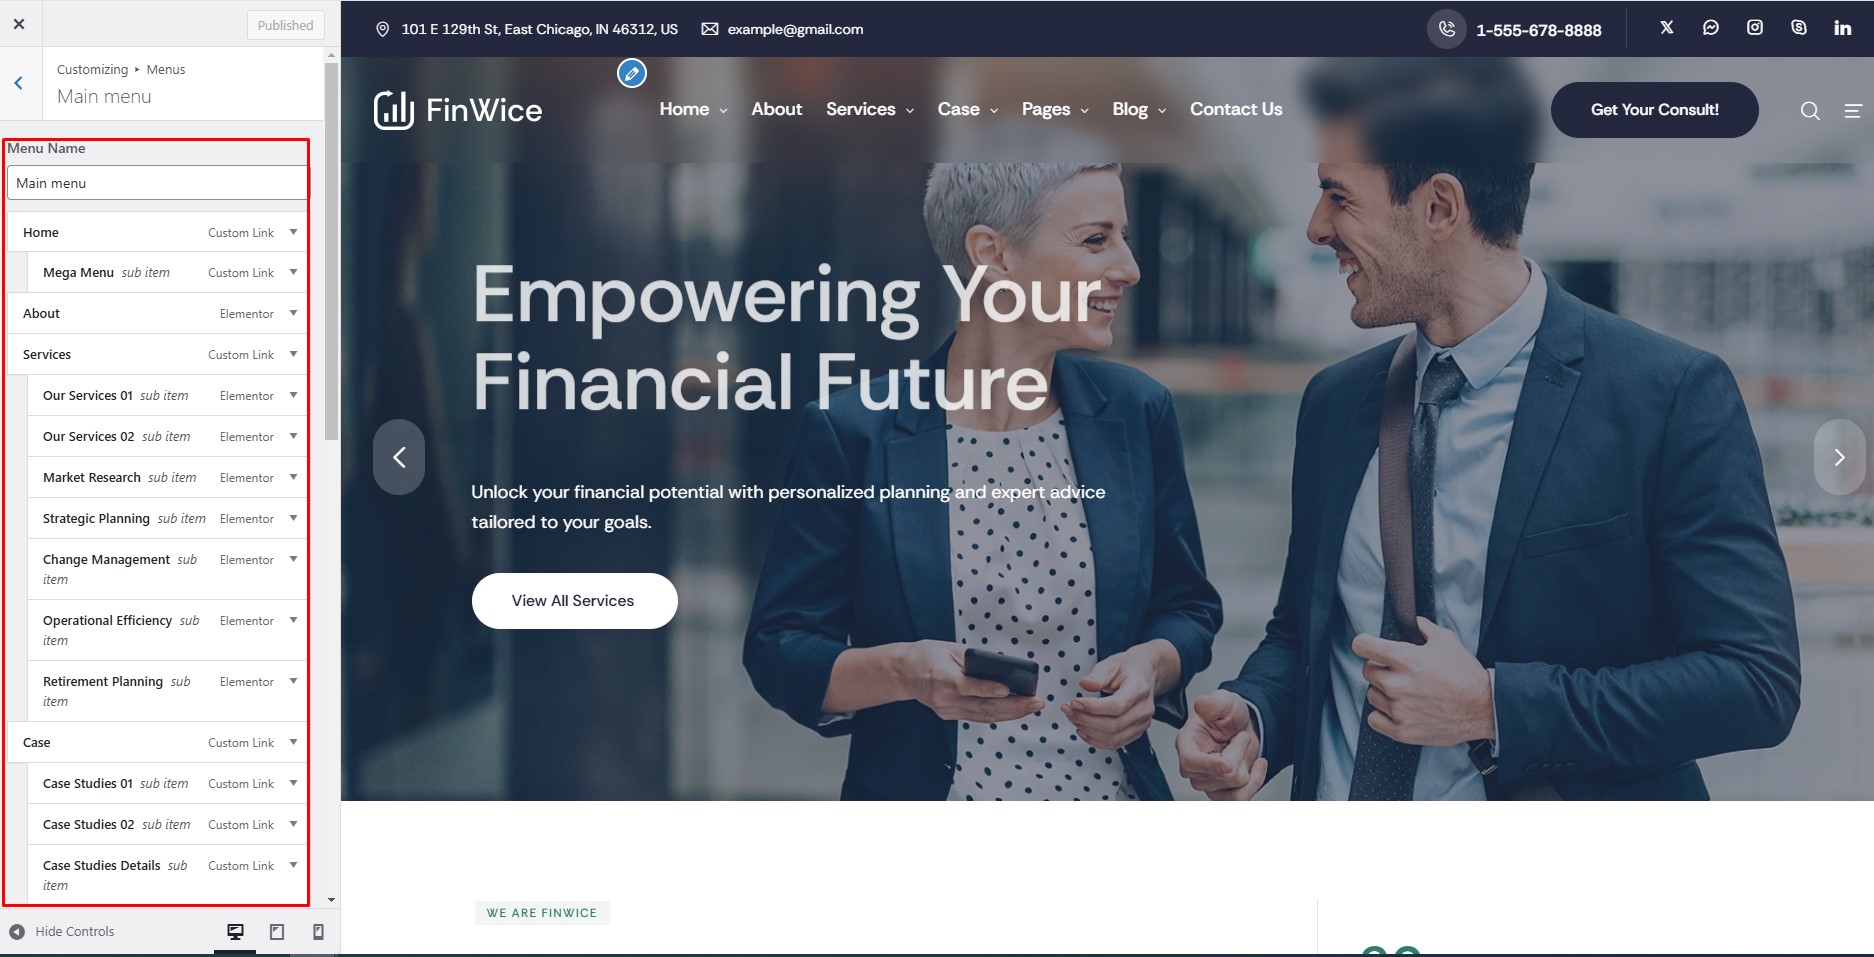
Go to Appearance > Customize > Menus, select a menu to edit or create a new one.
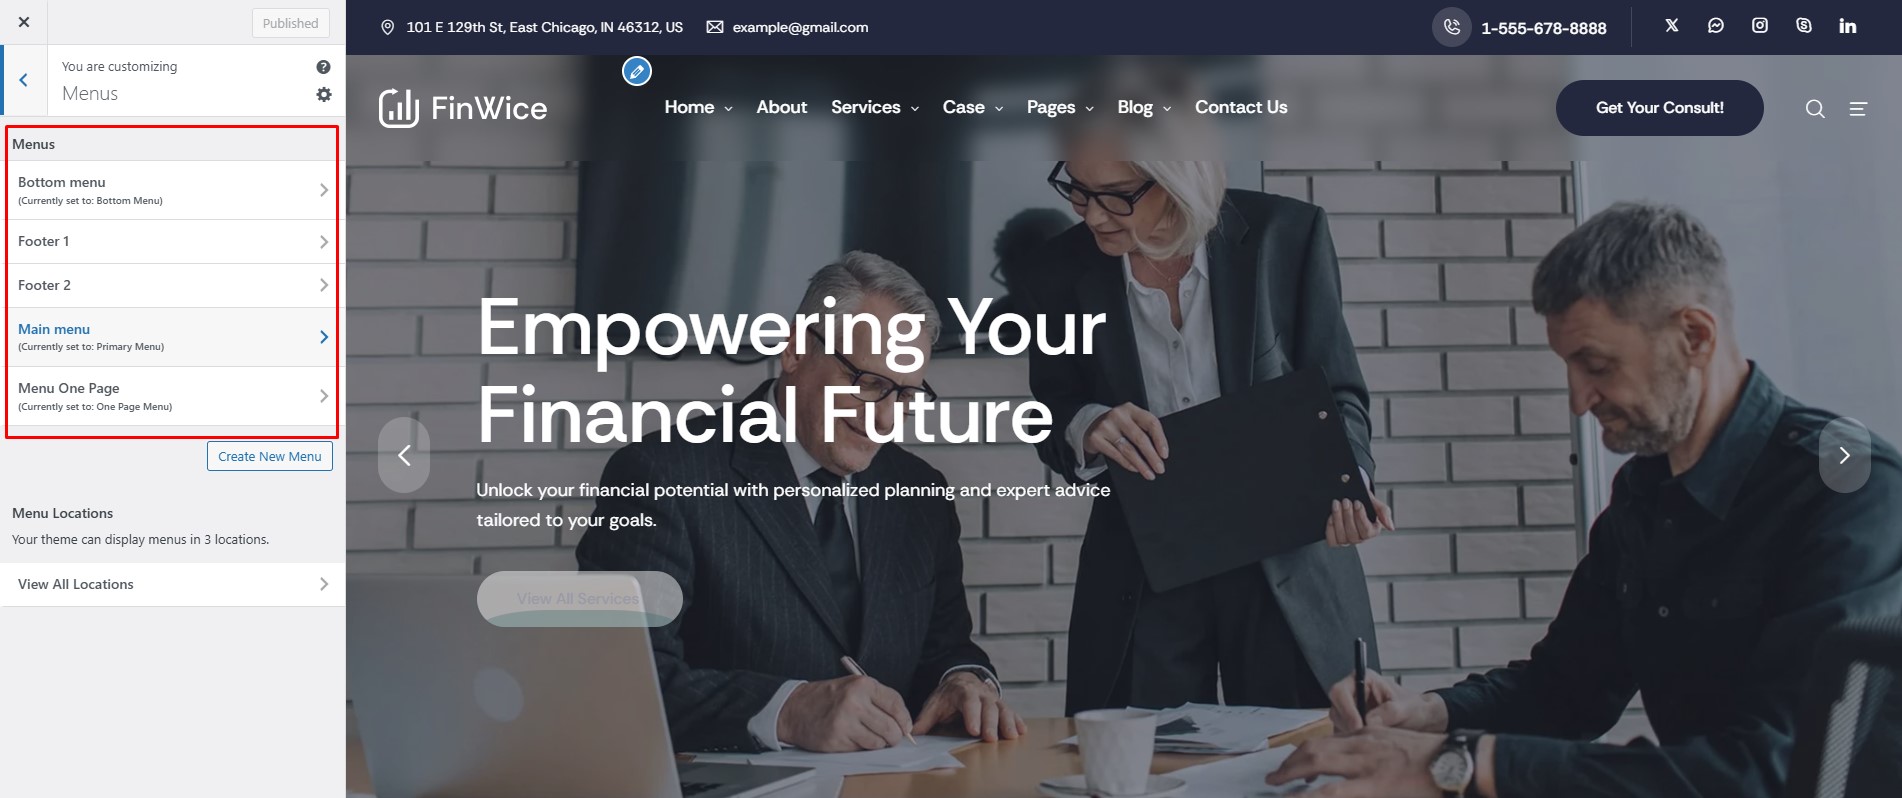
Drag and drop the items to change the menu order.
Other Header Styles
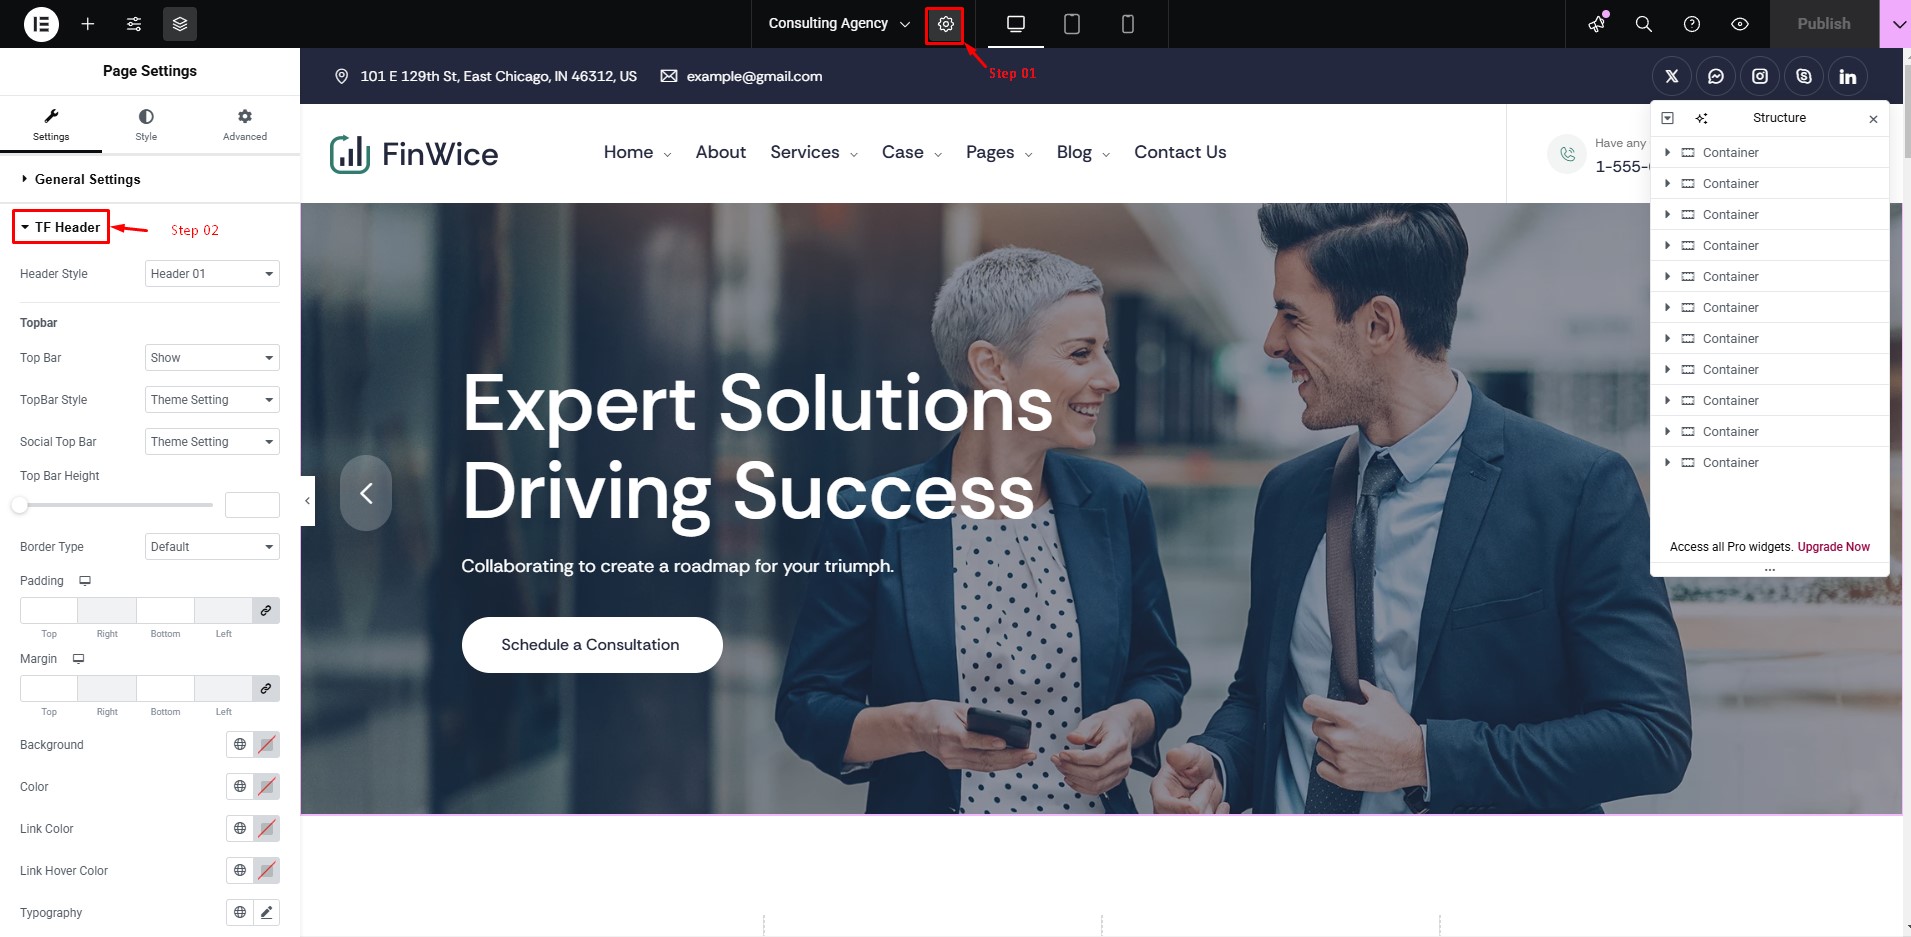
Edit the page with Elementor, then go to Page Settings > TF Header. You can choose a different header for each home page.
Change the logo here:
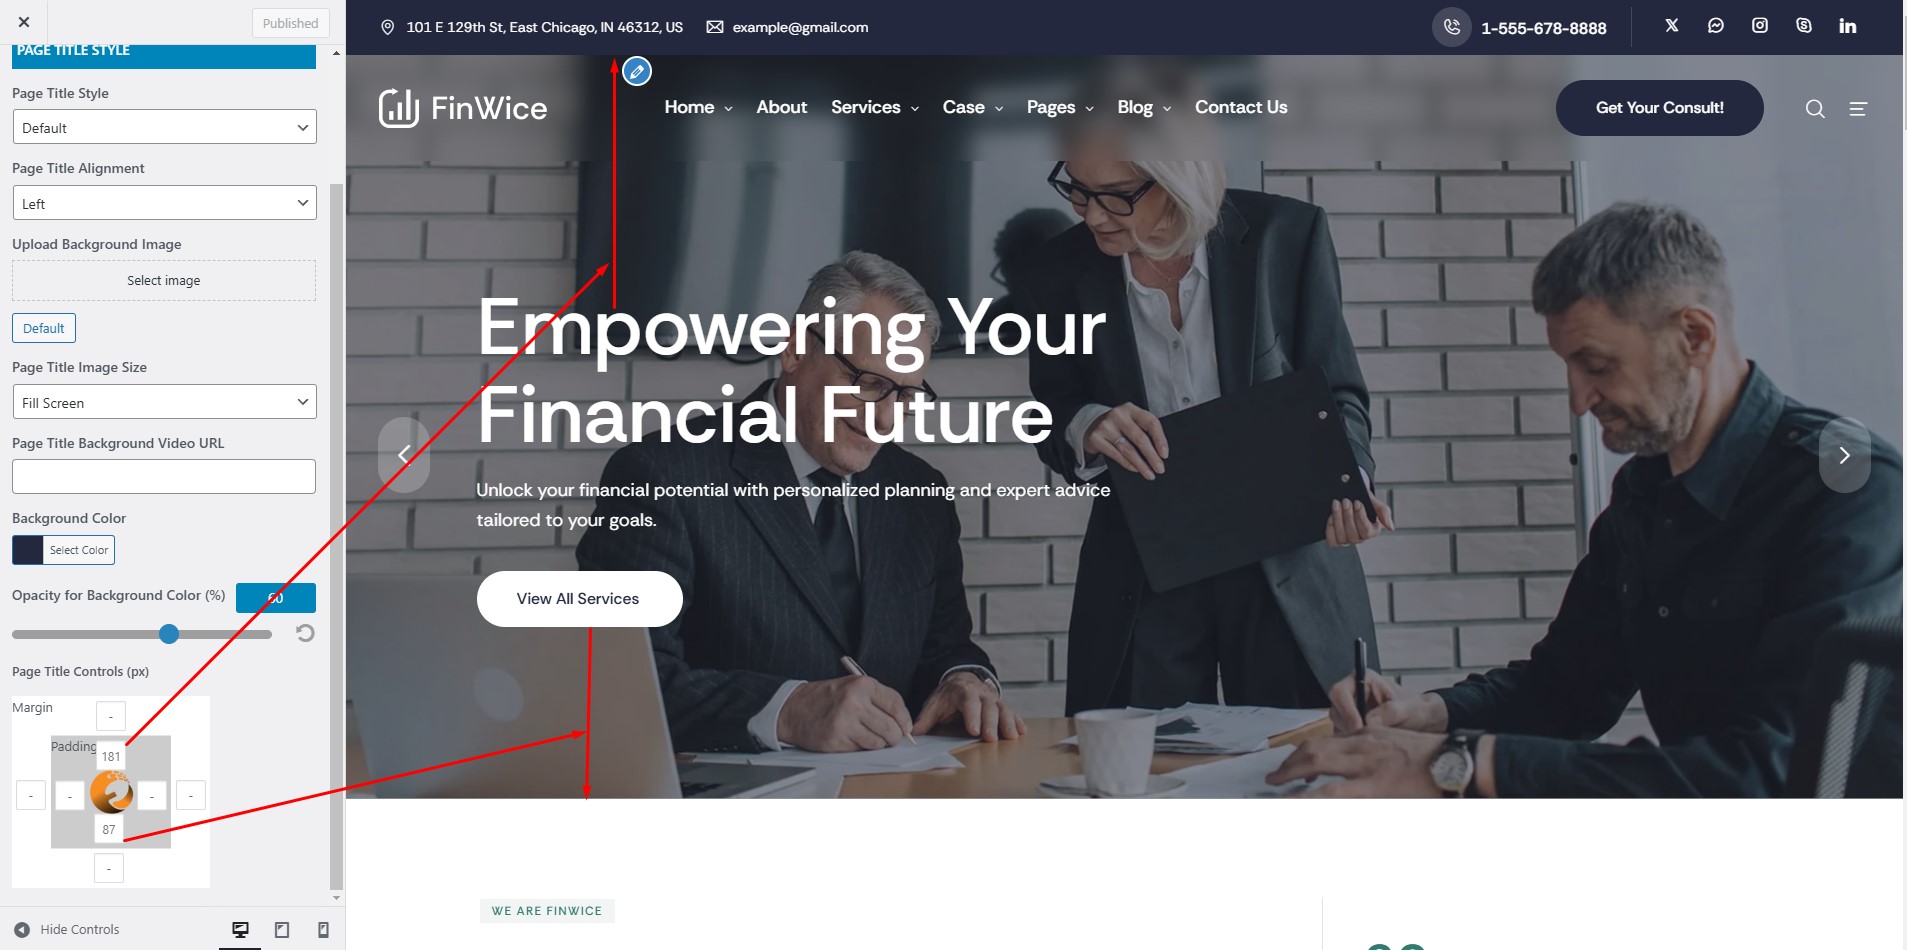
Page Title Style
Go to Appearance > Customize > Page Title > Page Title.
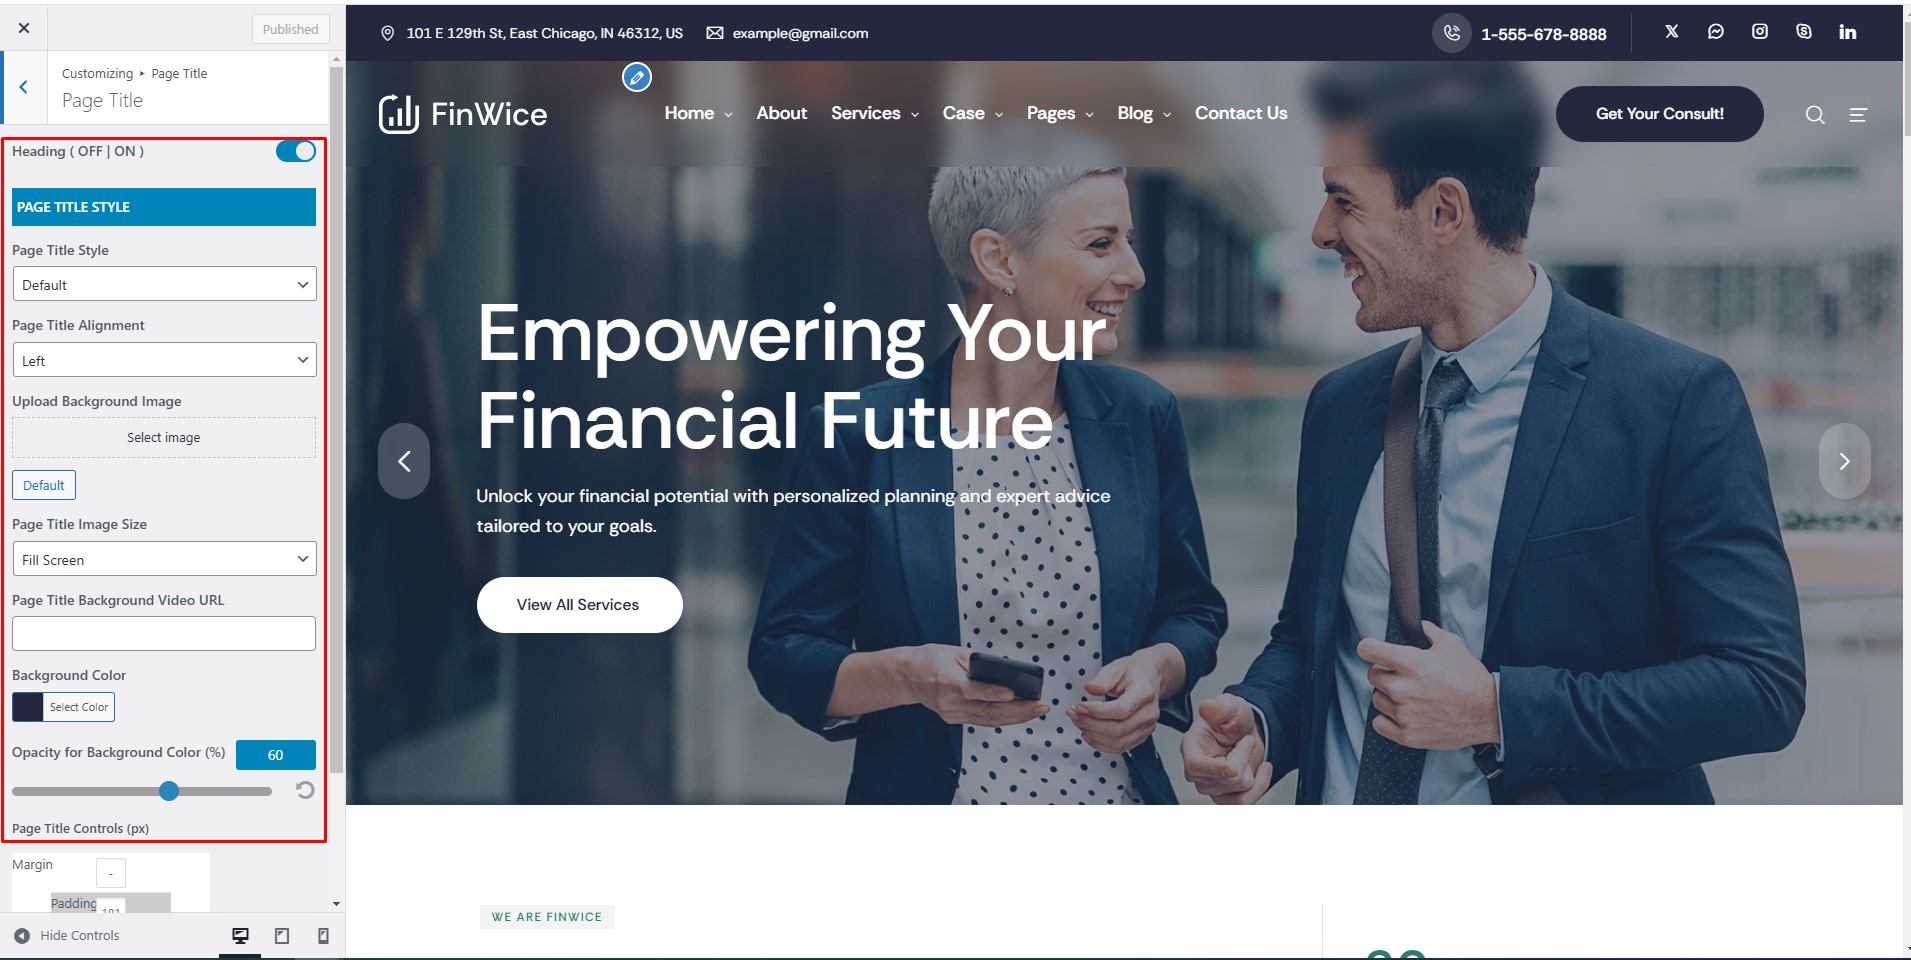
Edit the page title controls here:
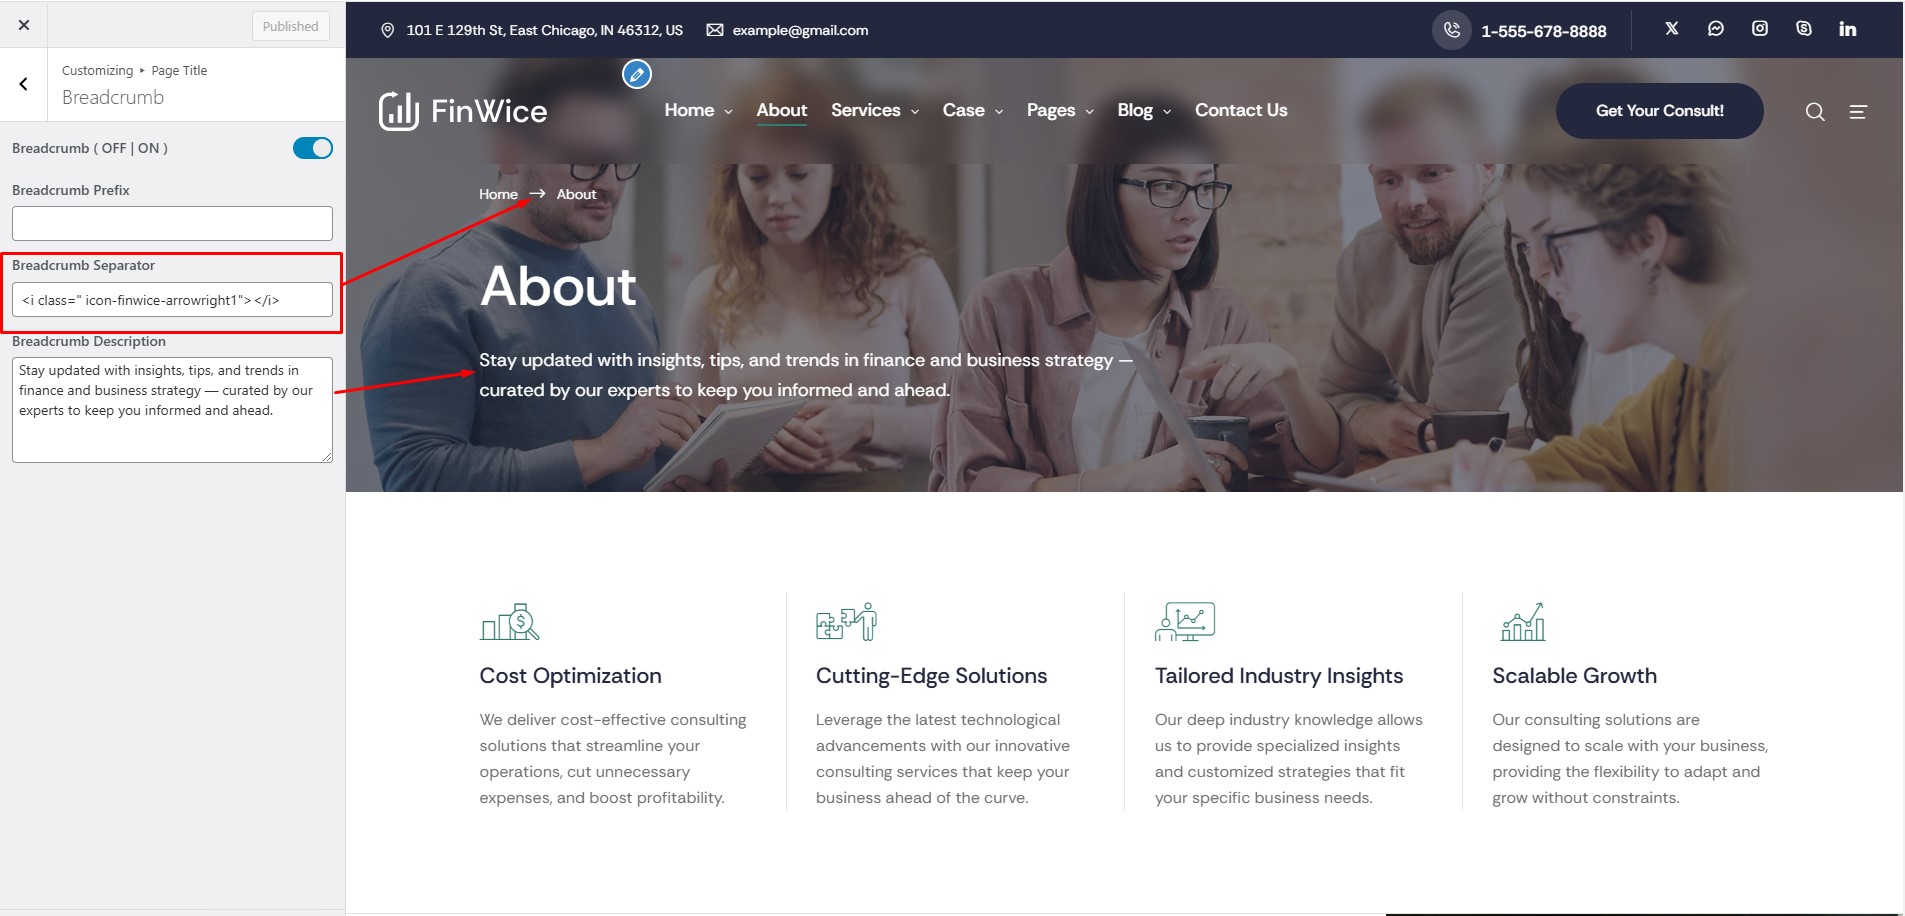
Breadcrumb
Enable Breadcrumbs turns the breadcrumbs on or off.
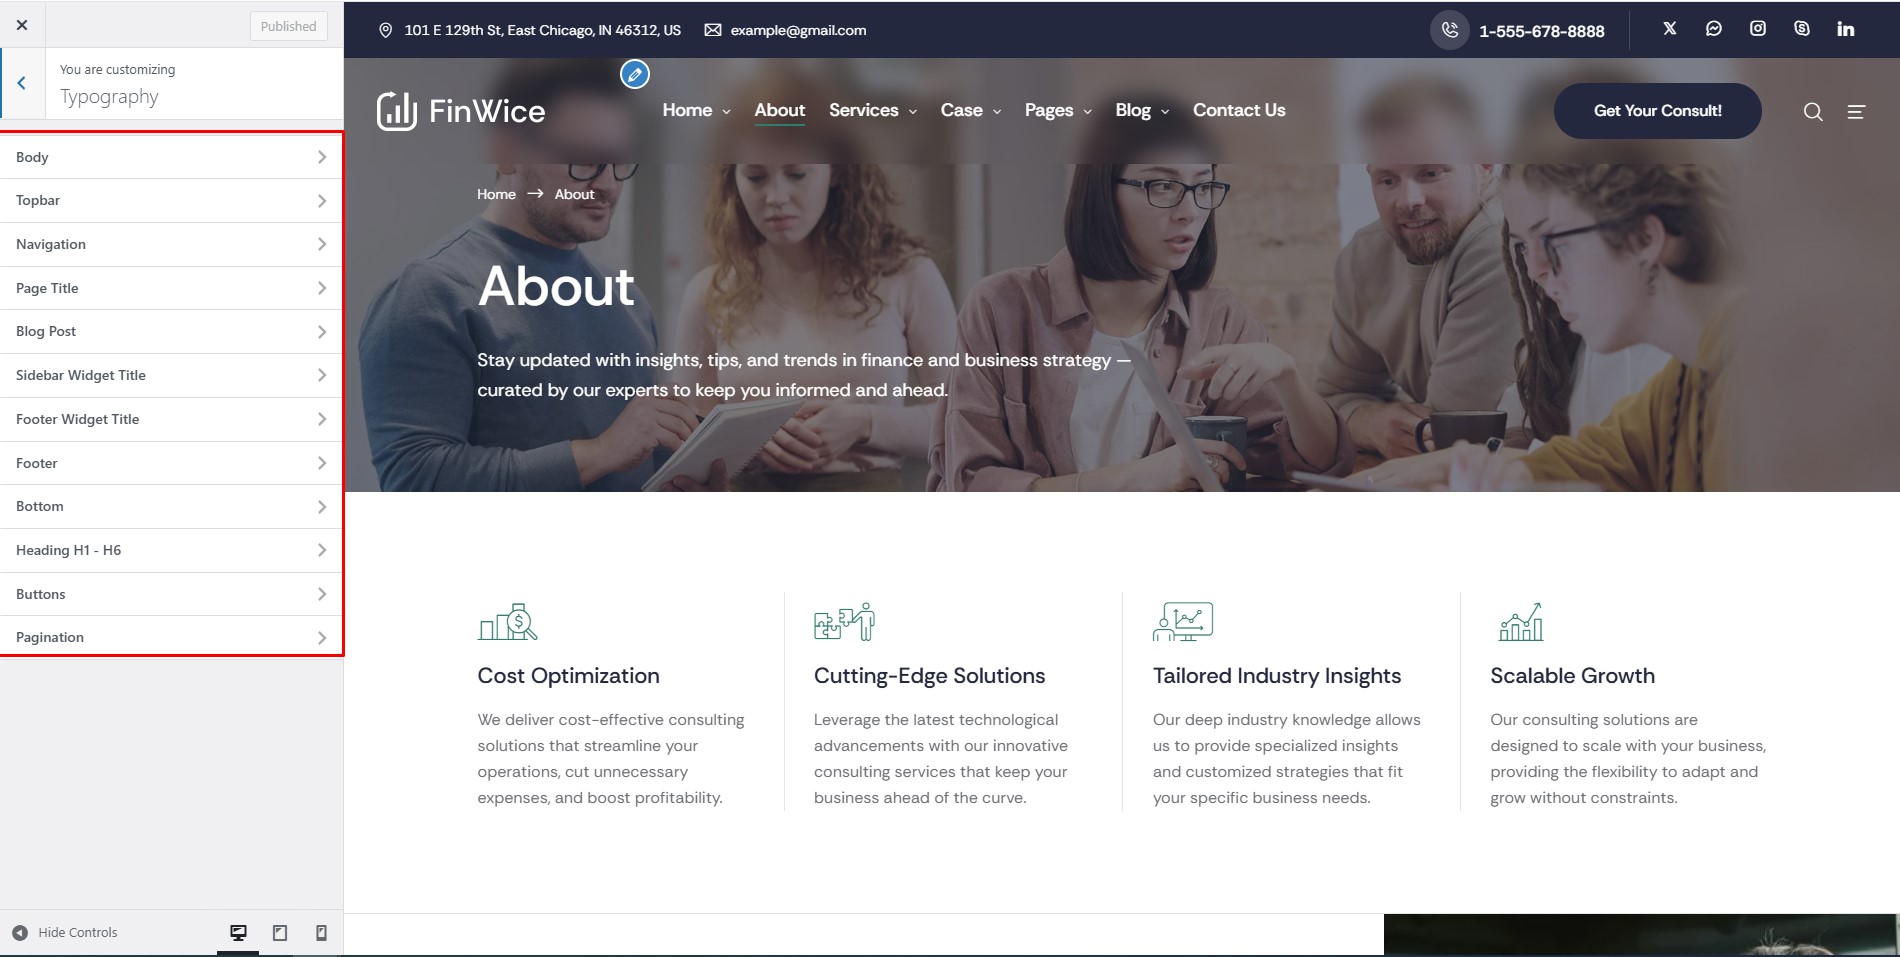
Go to Appearance > Customize > Typography.
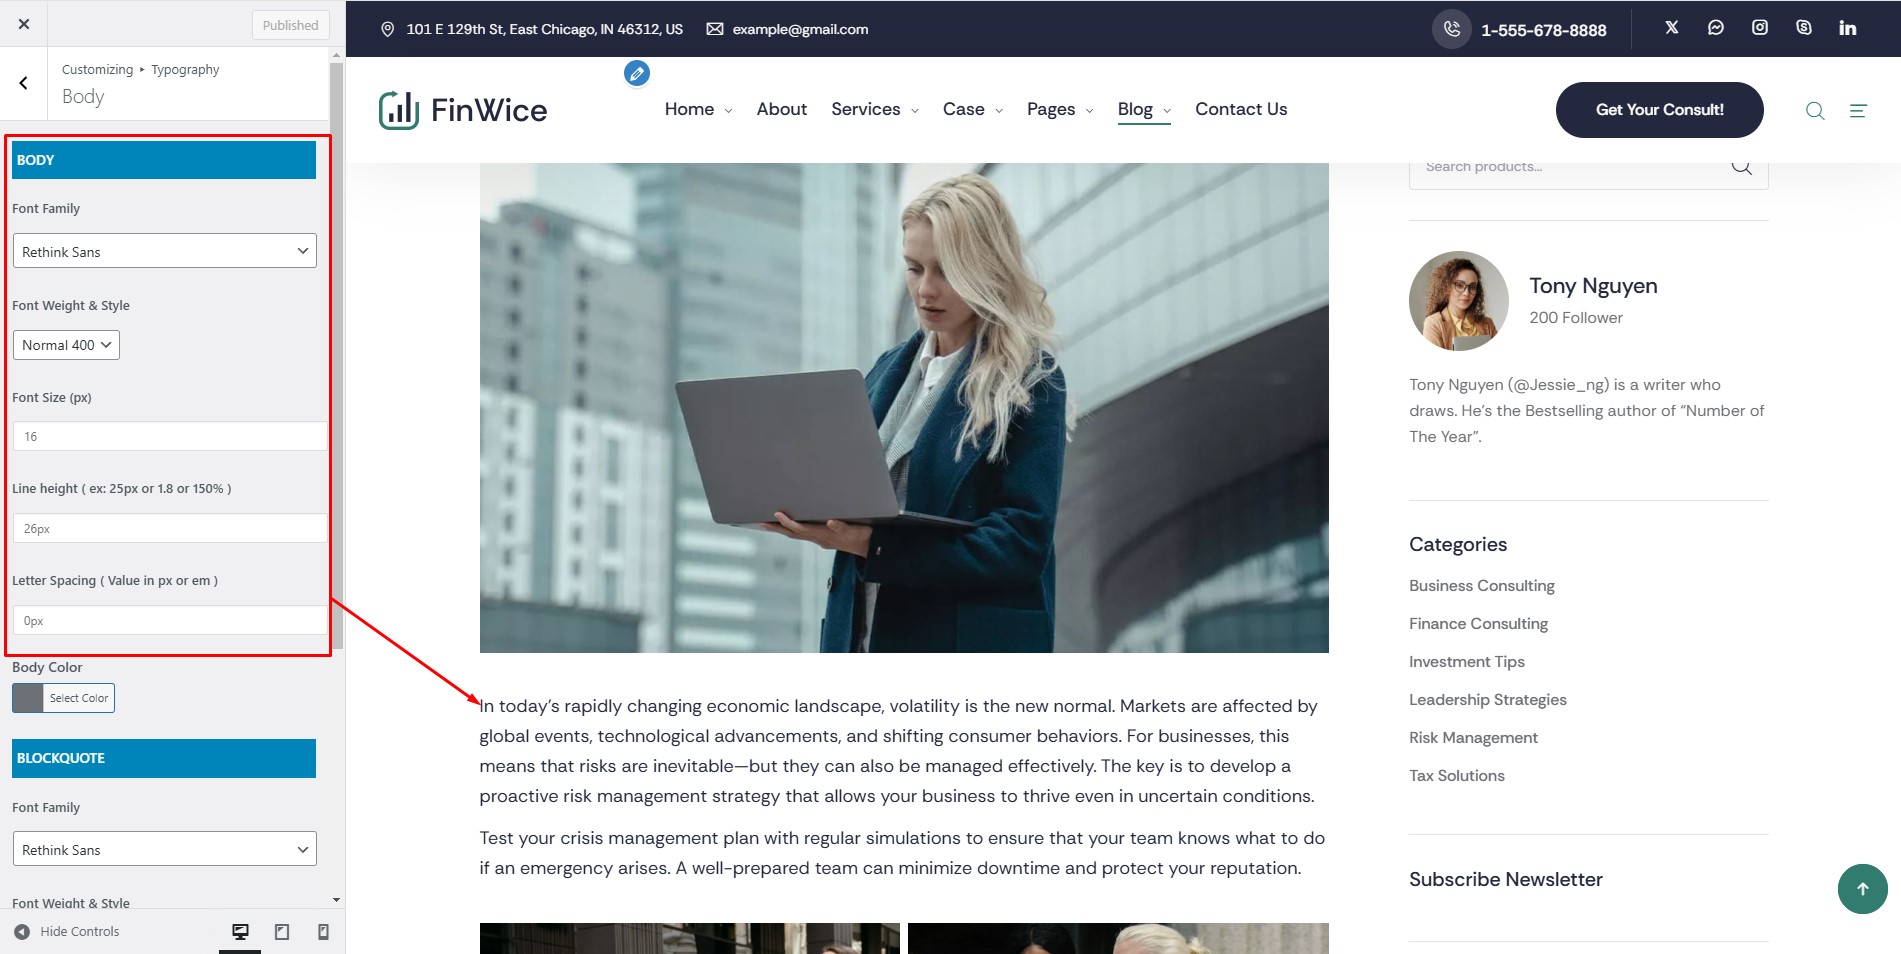
Body Font
Choose the font family, size, weight and color of the body text.
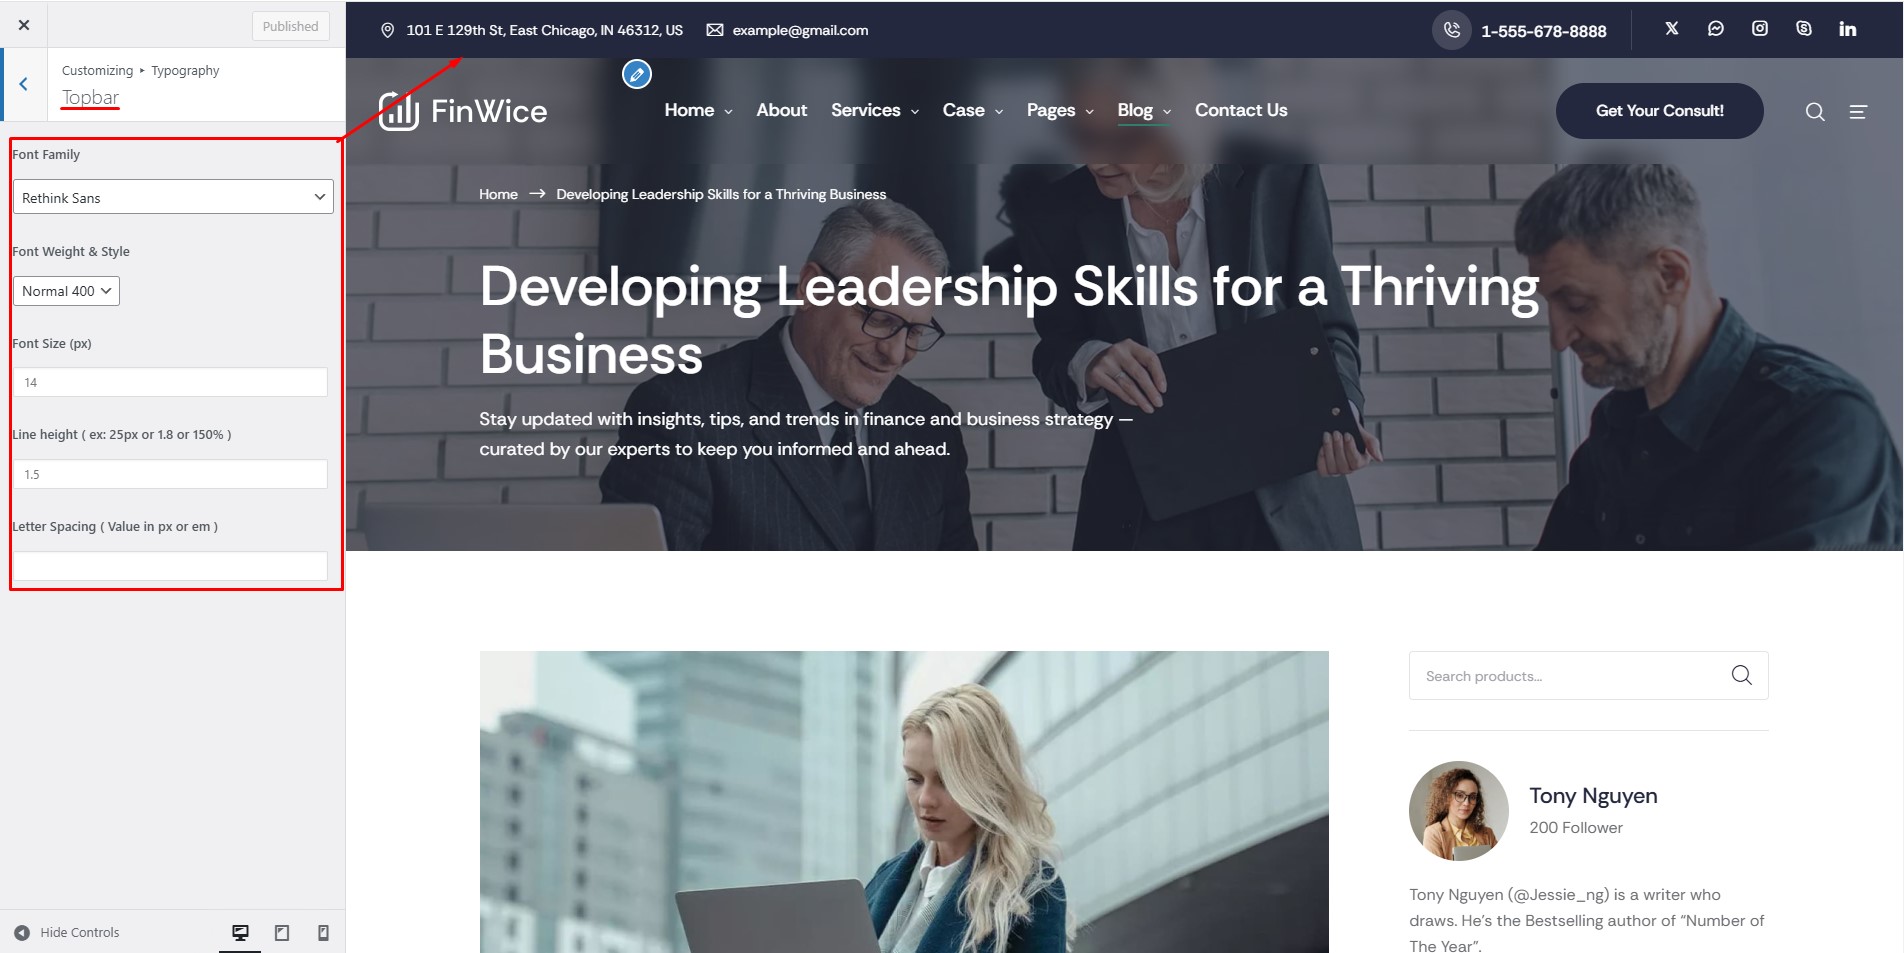
Topbar Font
Choose the font of the topbar text.
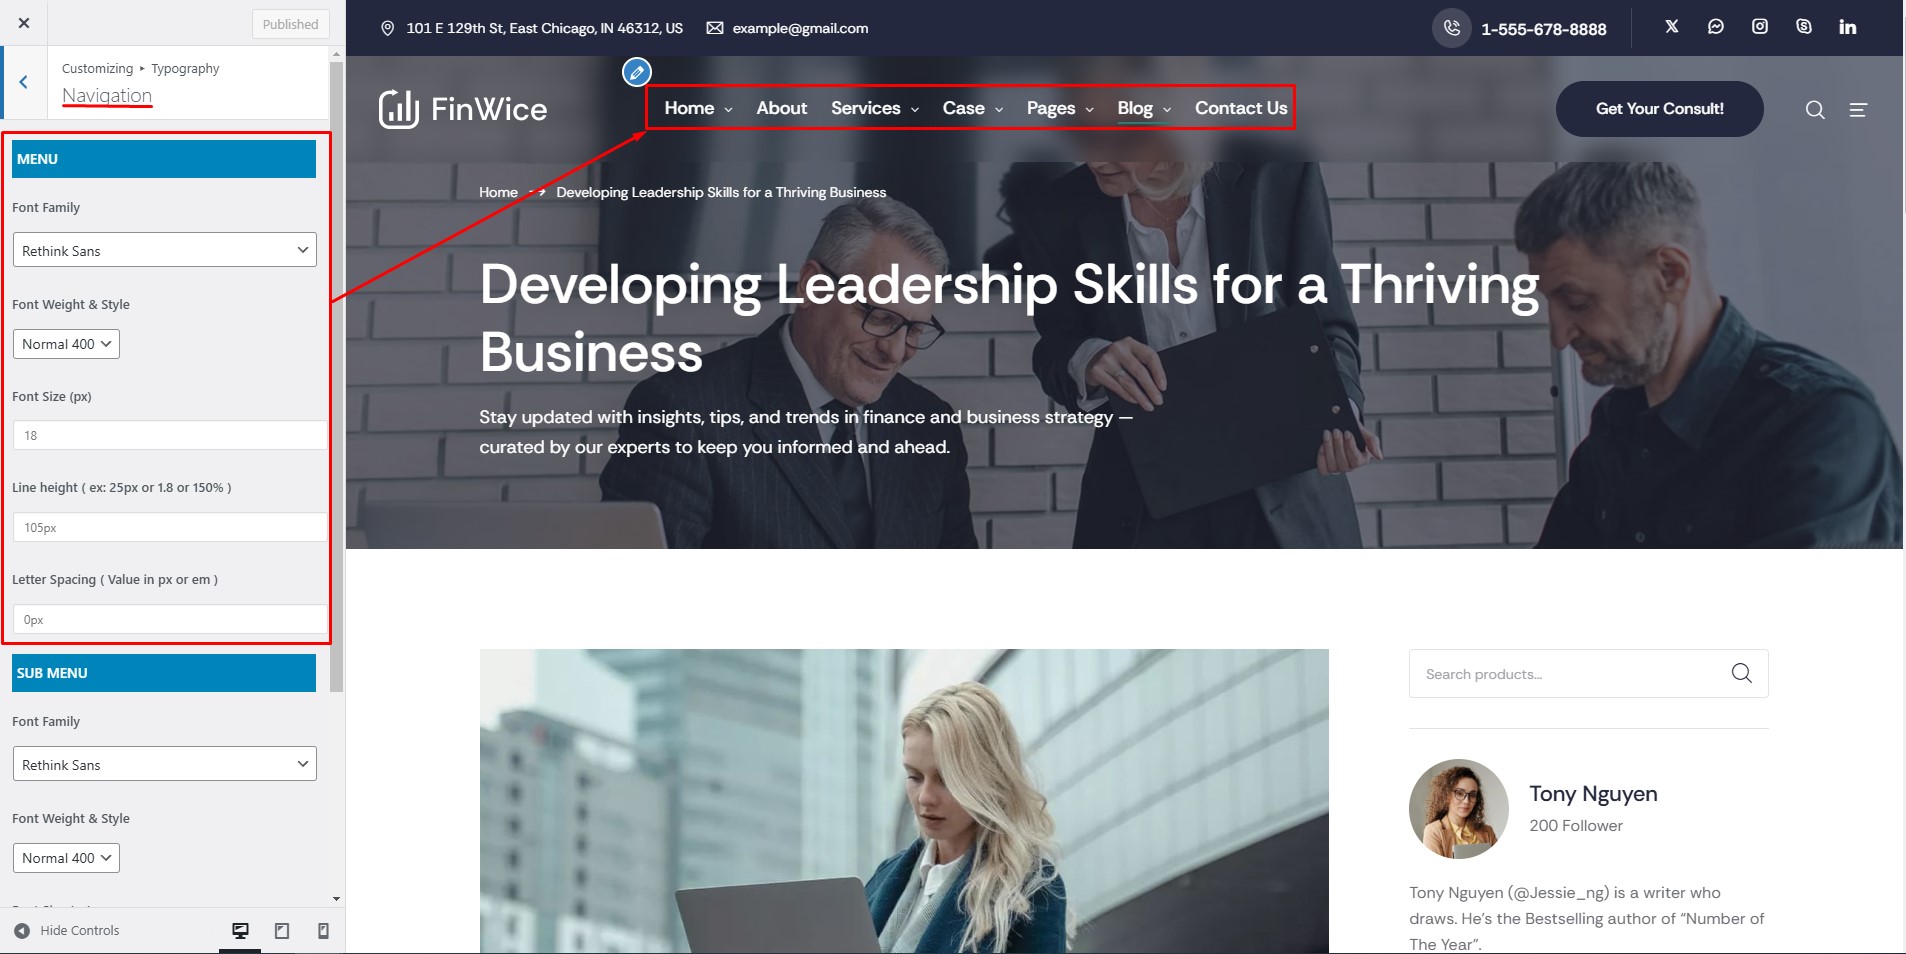
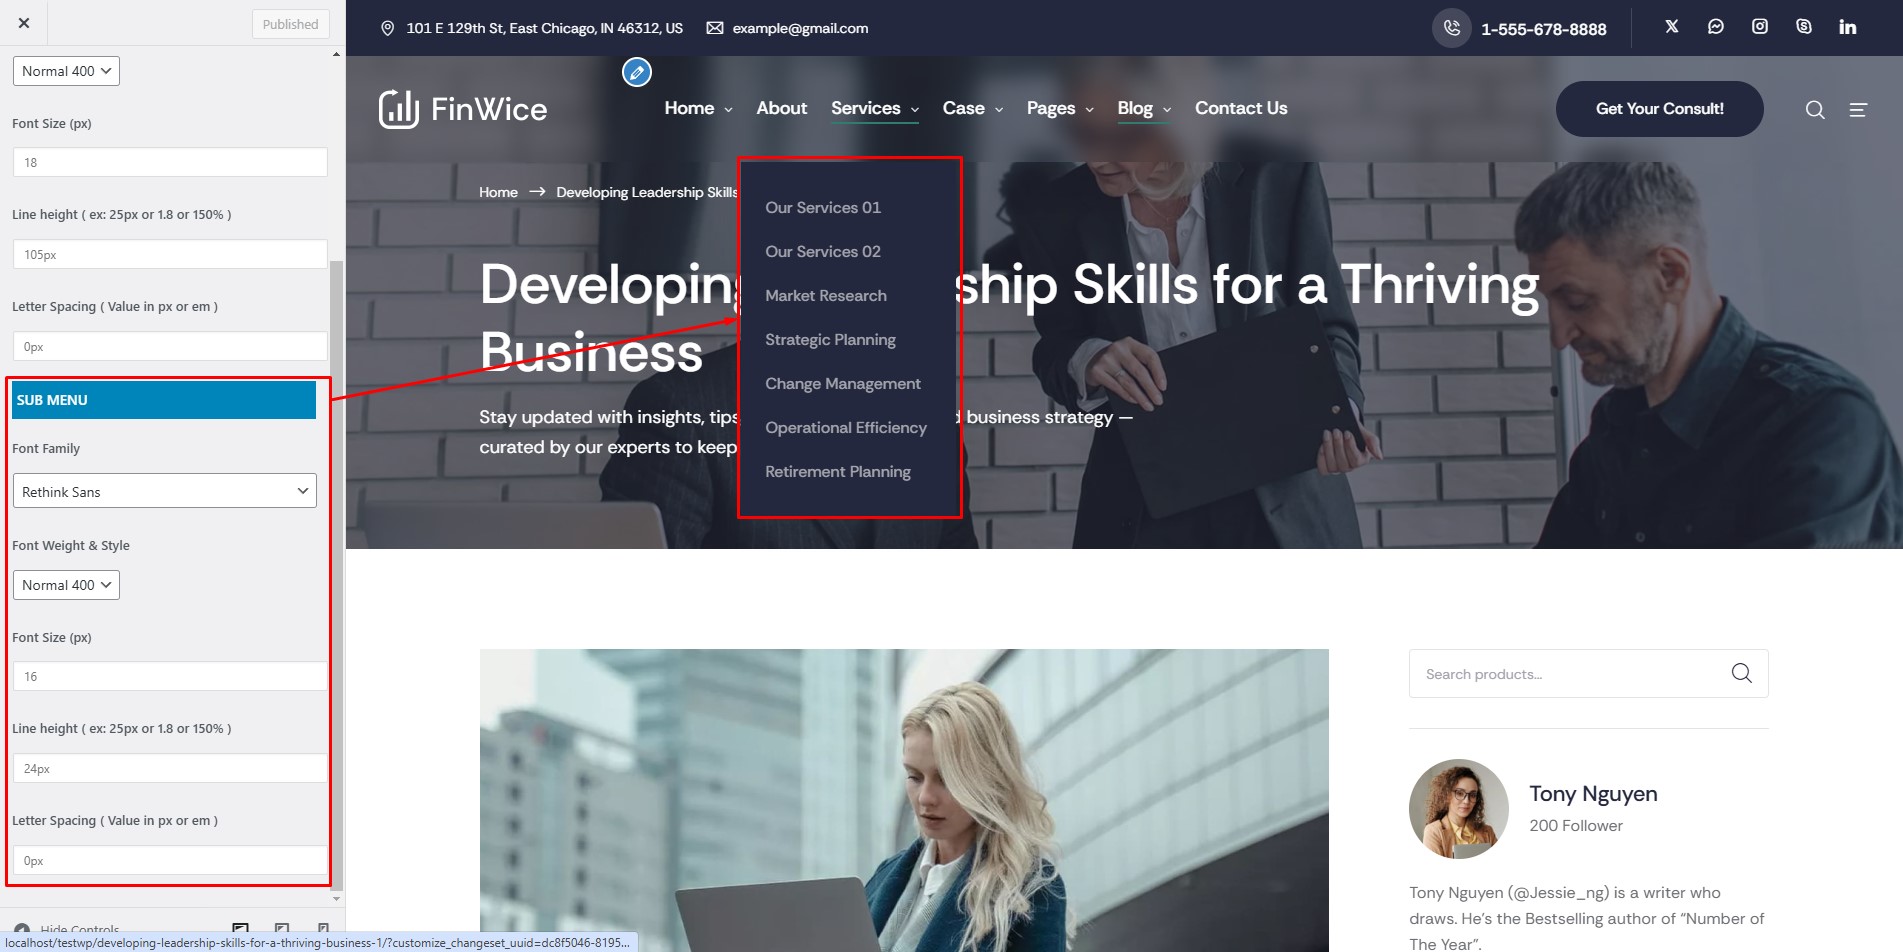
Menu Font
Choose the font of the menu and the sub menu.
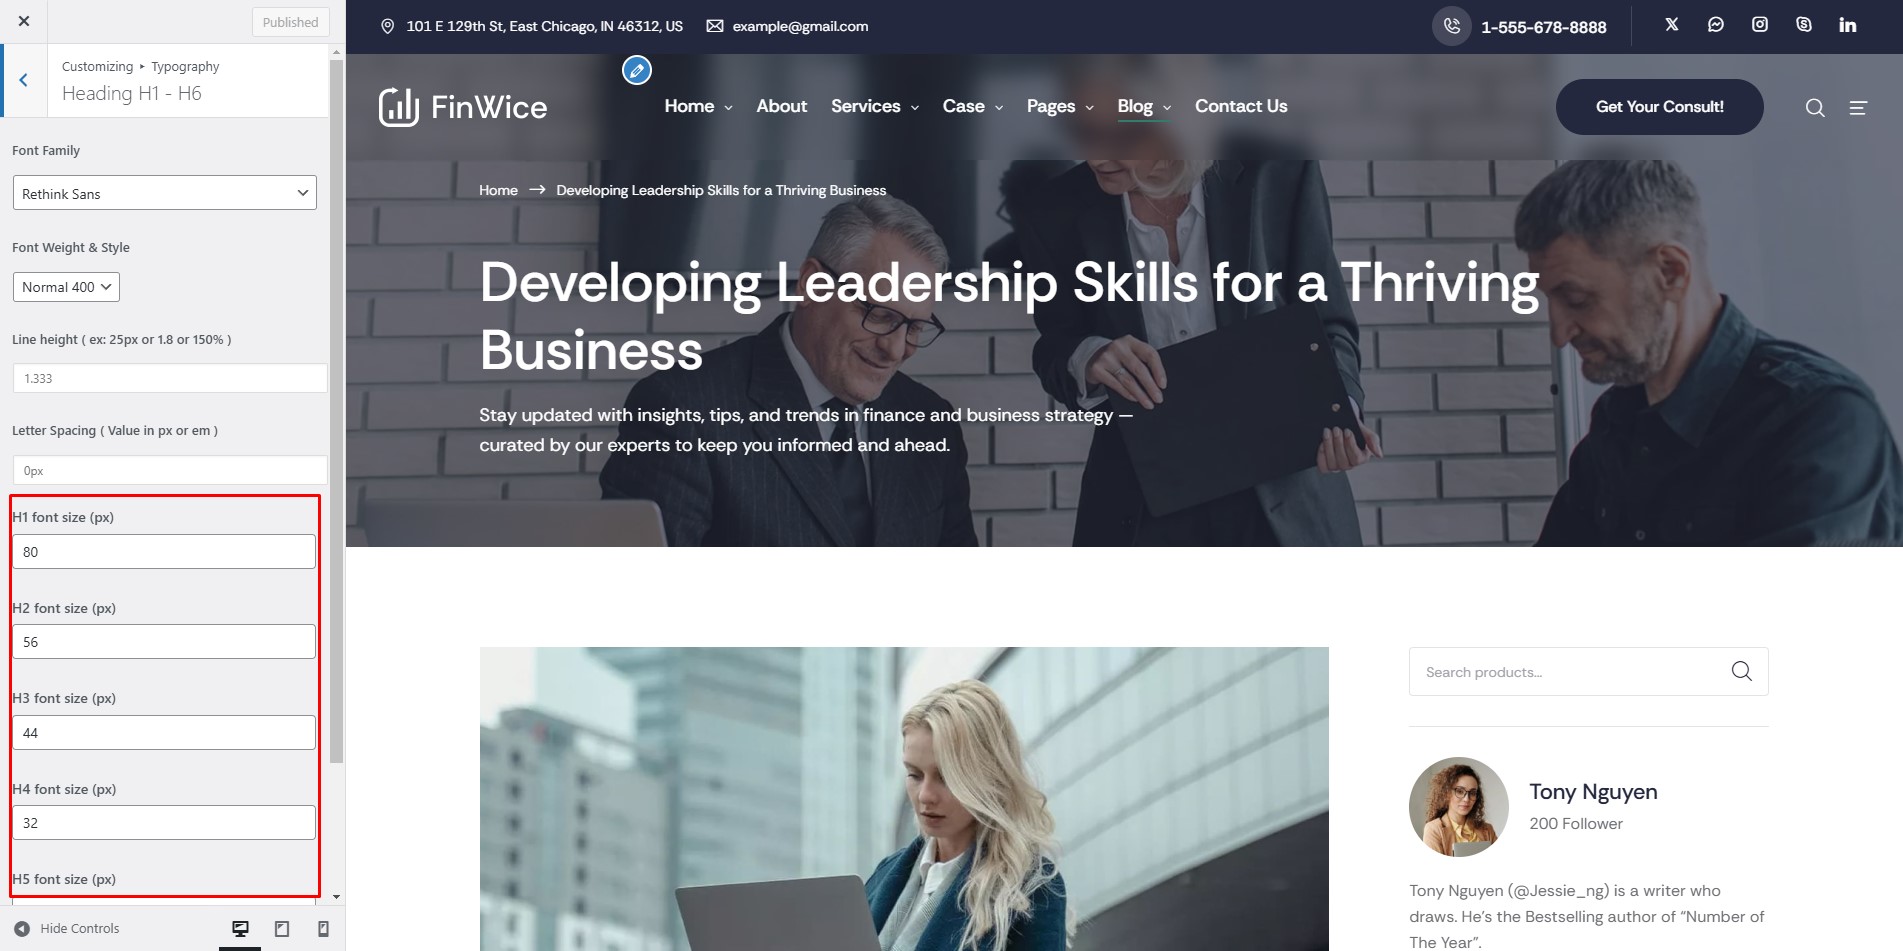
Heading Font
Scheme Color
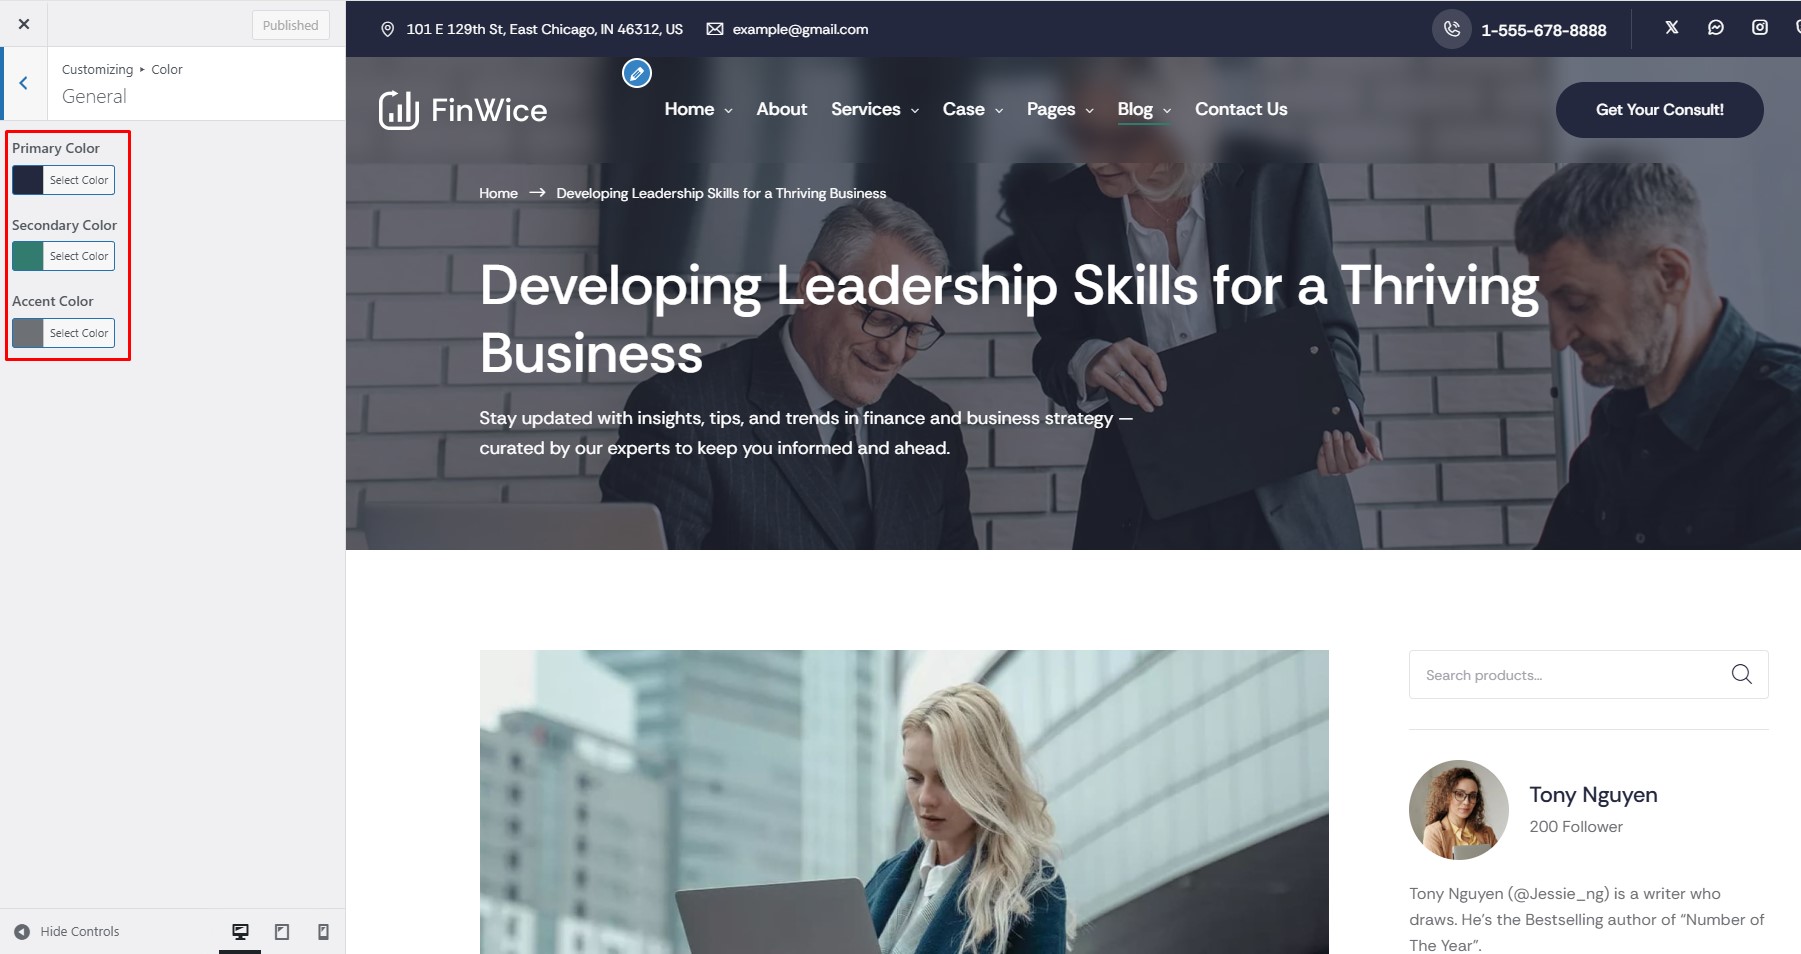
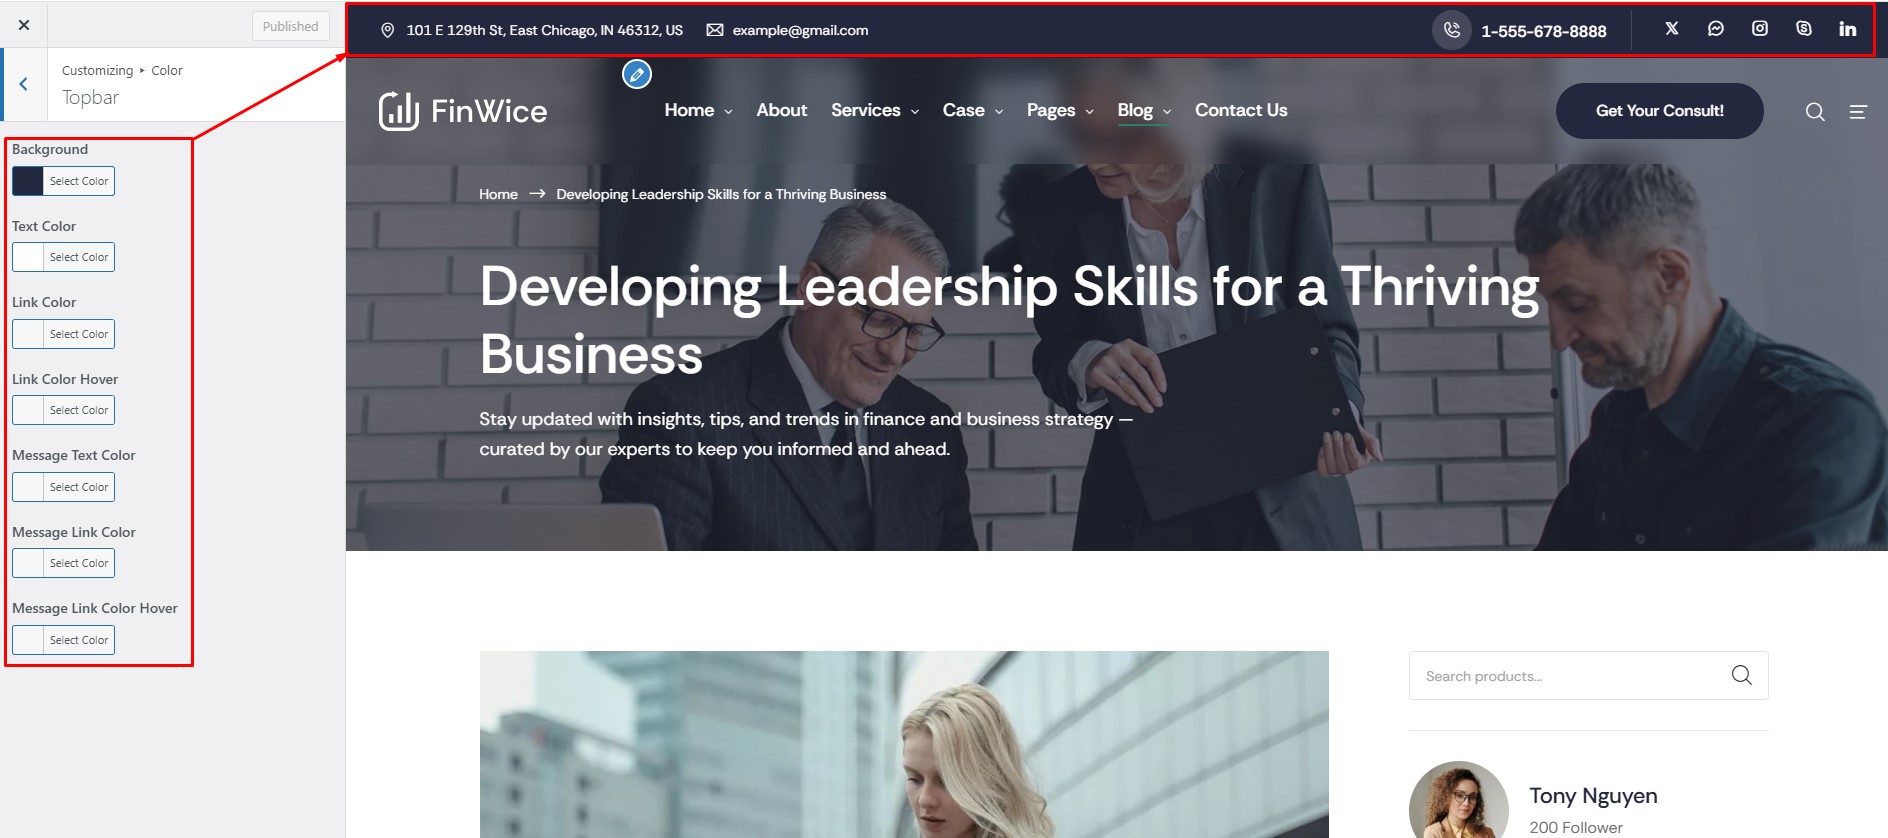
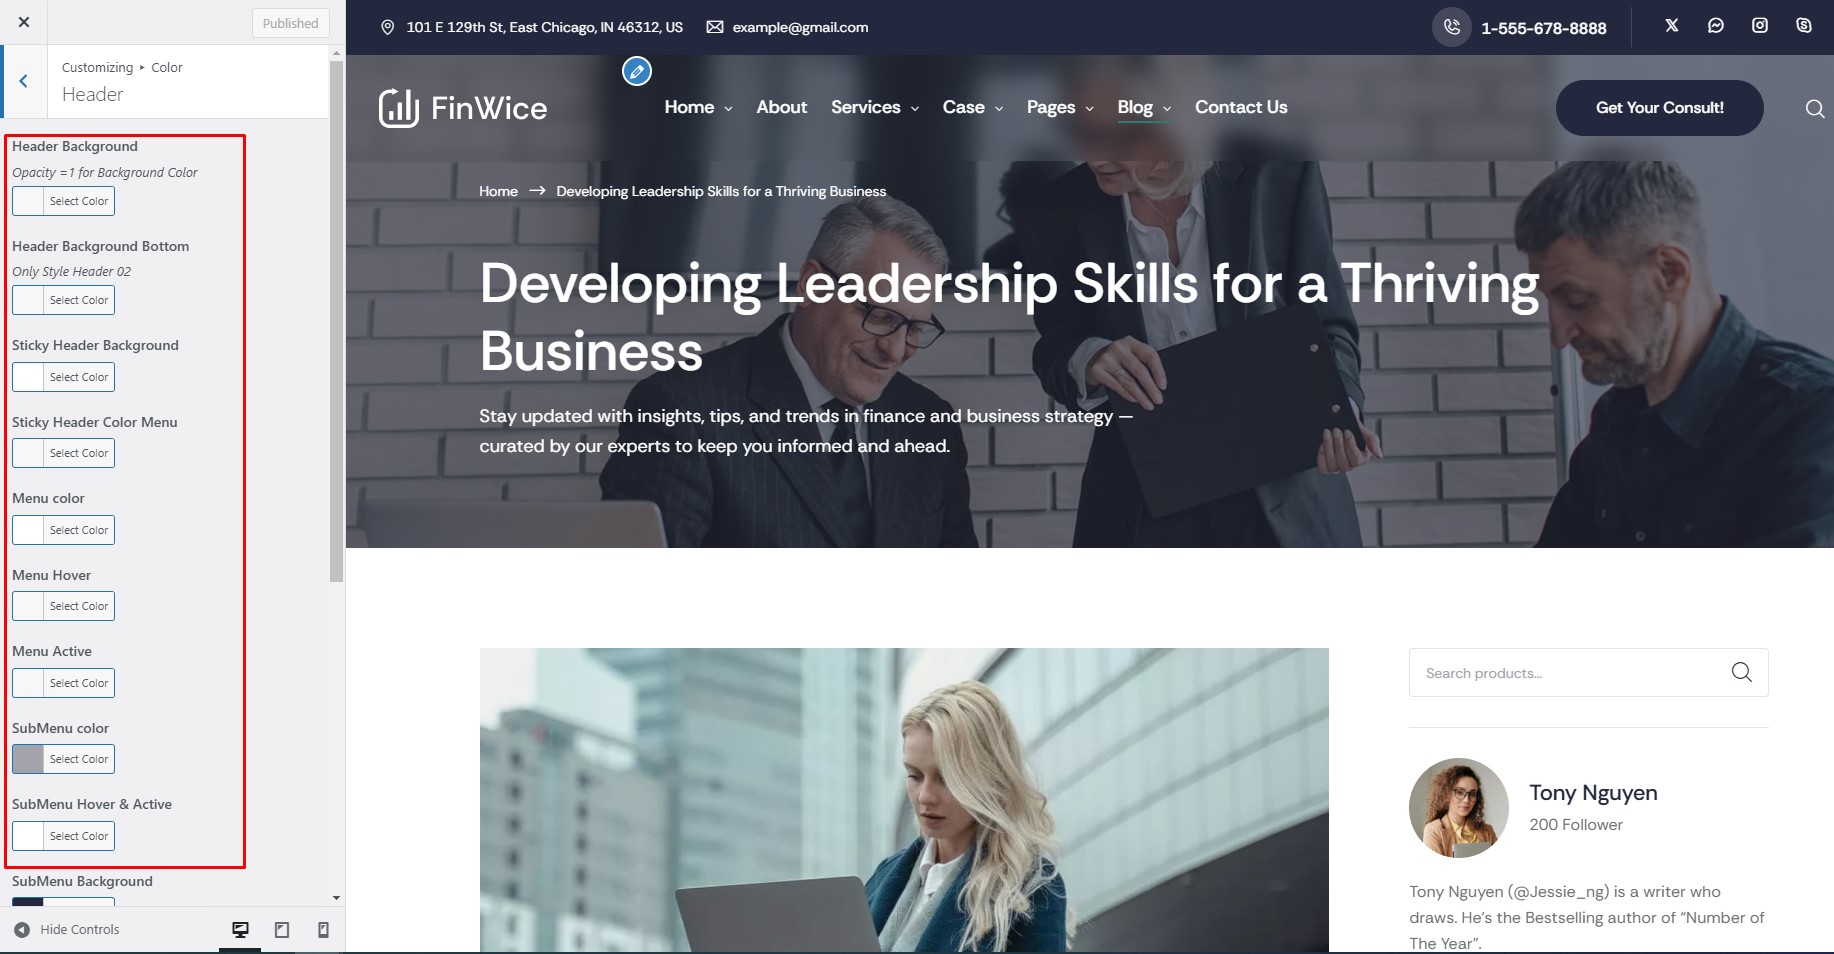
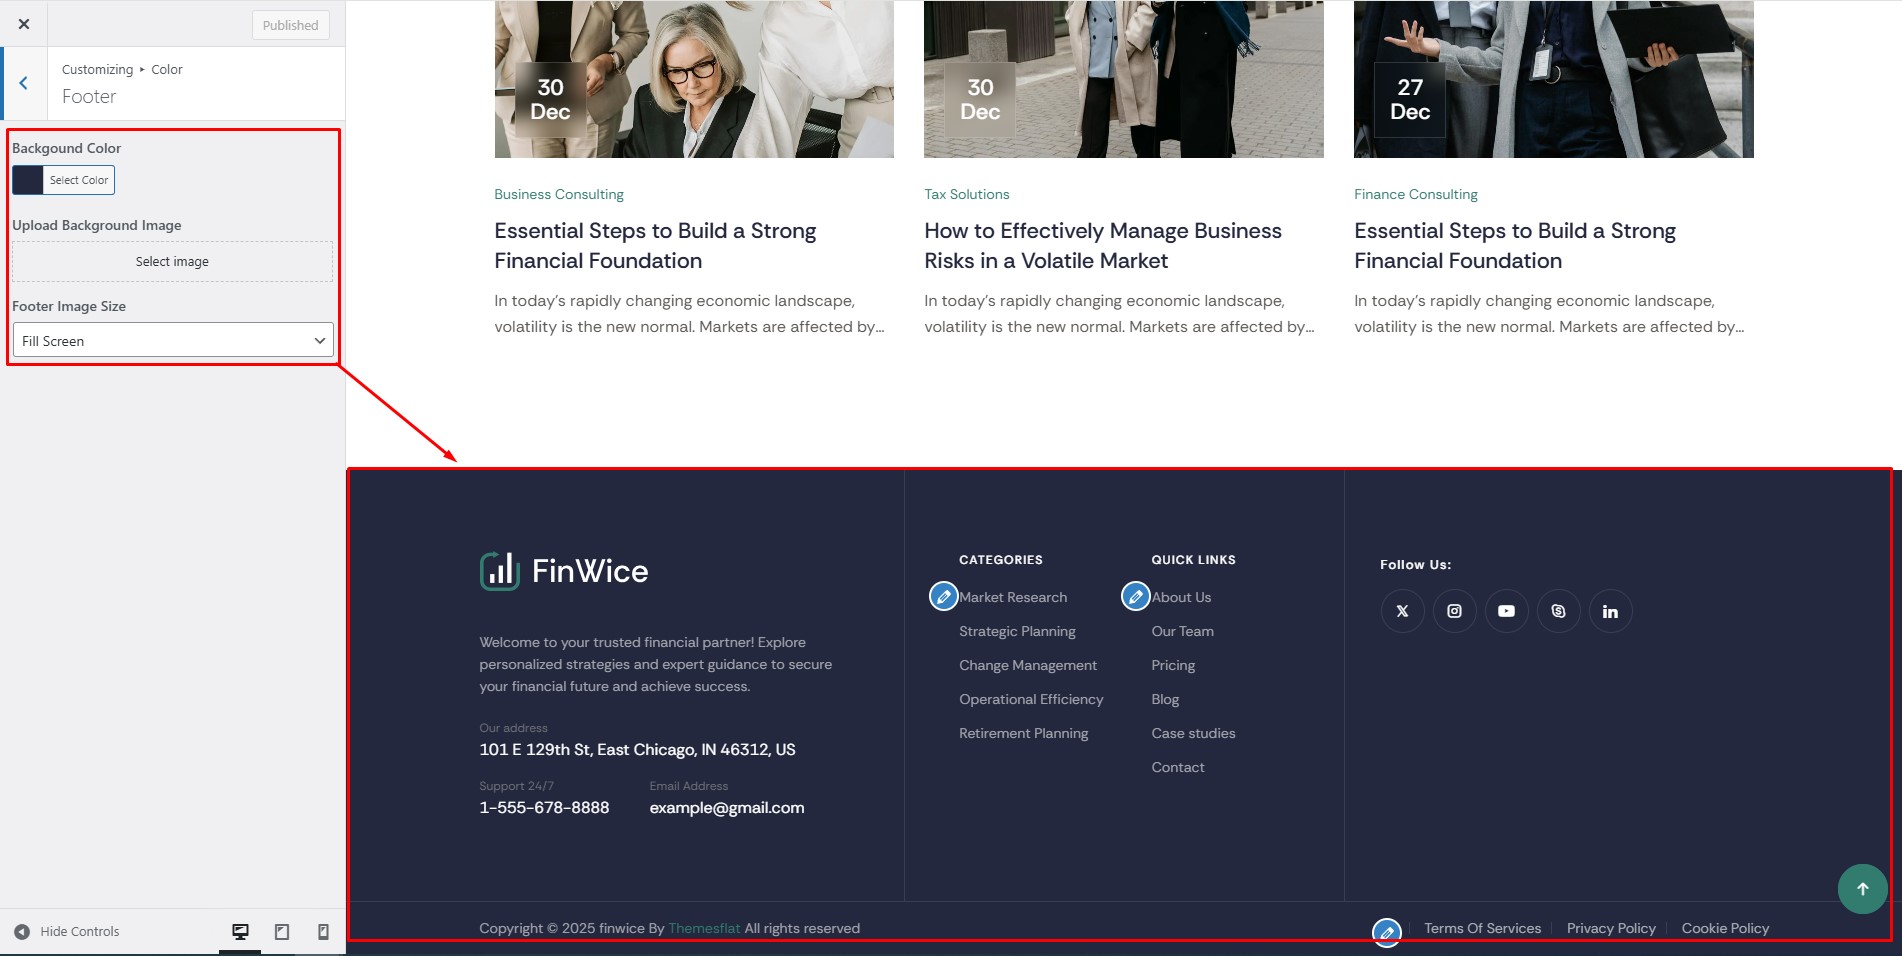
Go to Appearance > Customize > Color.
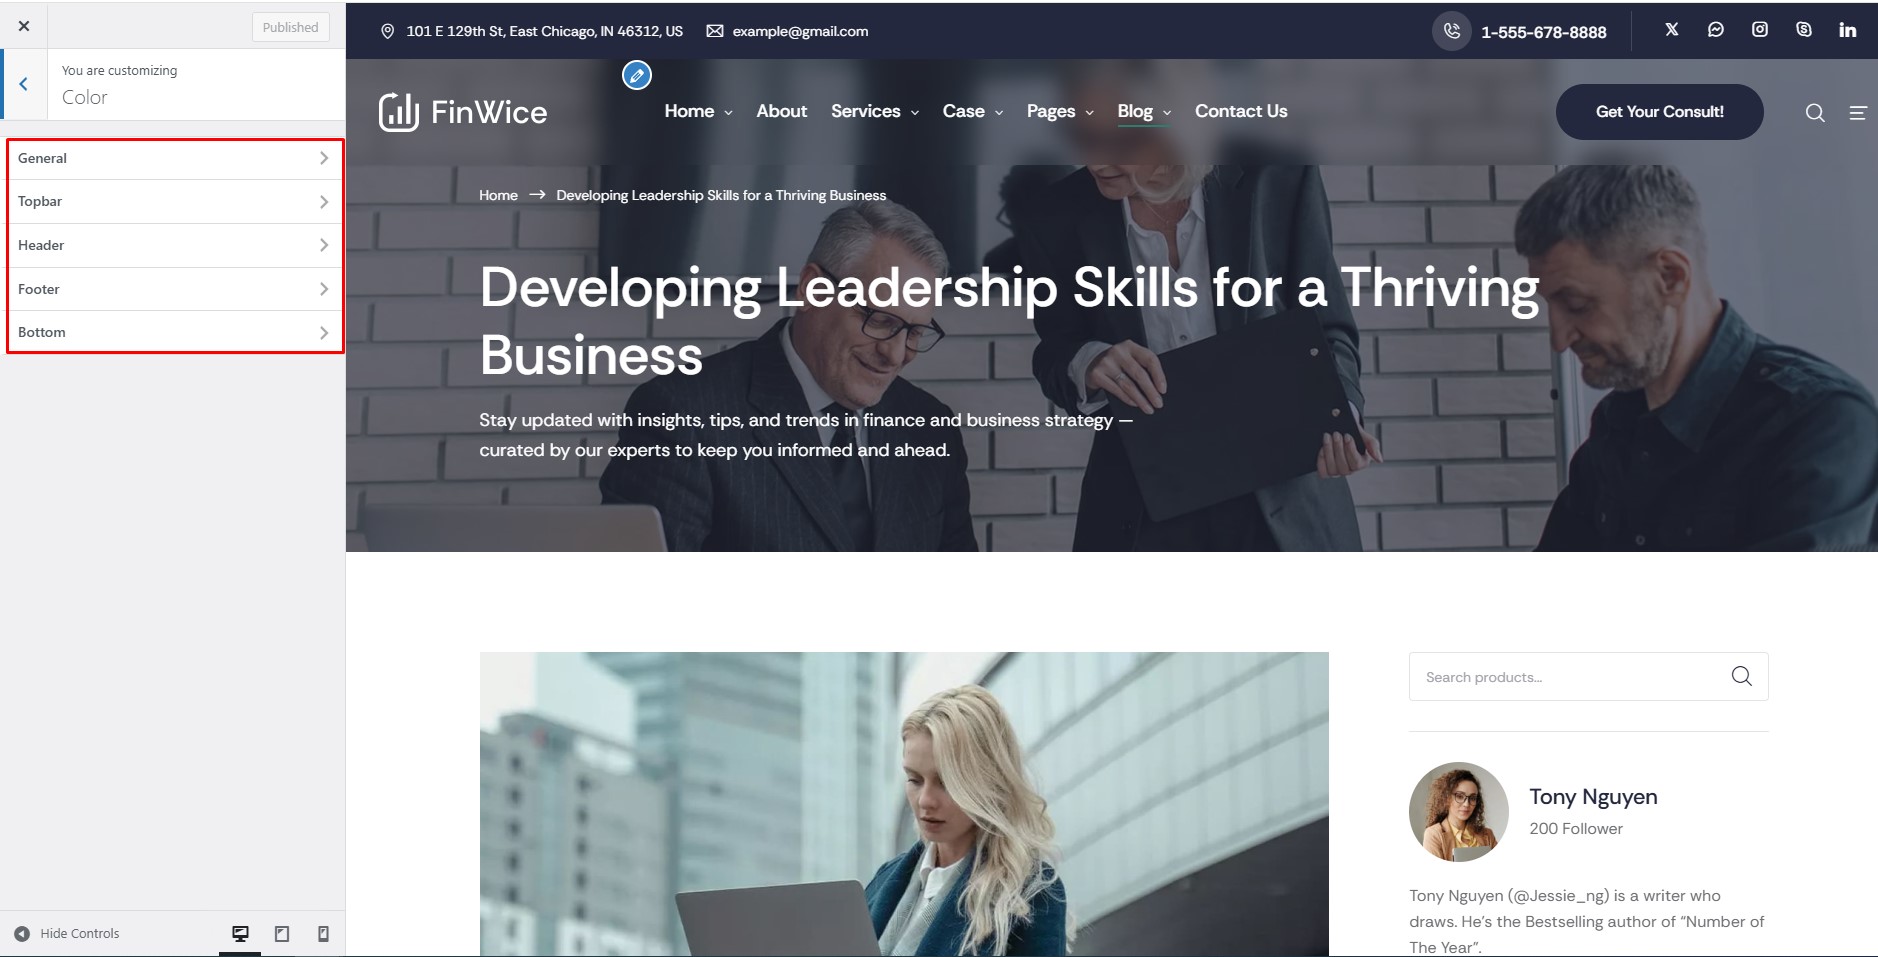
General: change the Primary, Secondary, Accent and Background colors.
Topbar: change the topbar colors.
Header: change the header colors.
Footer: change the footer colors.
Layout Style
Go to Appearance > Customize > Background Image to set the background image.

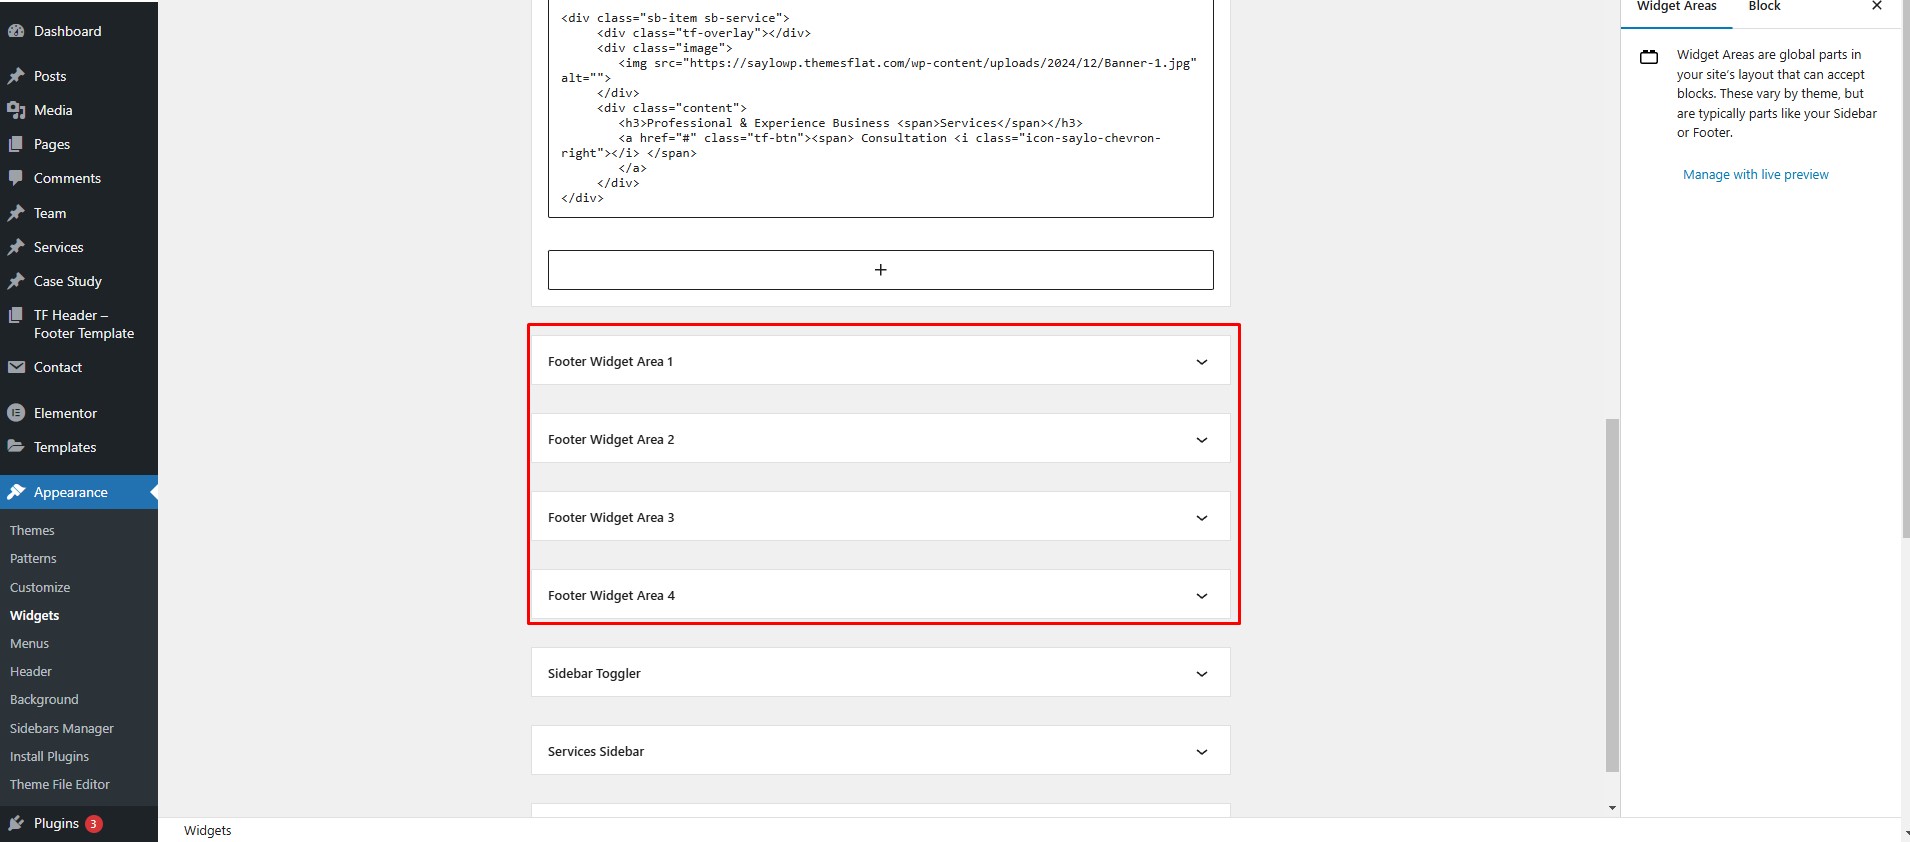
Go to Appearance > Widgets to edit the widgets.
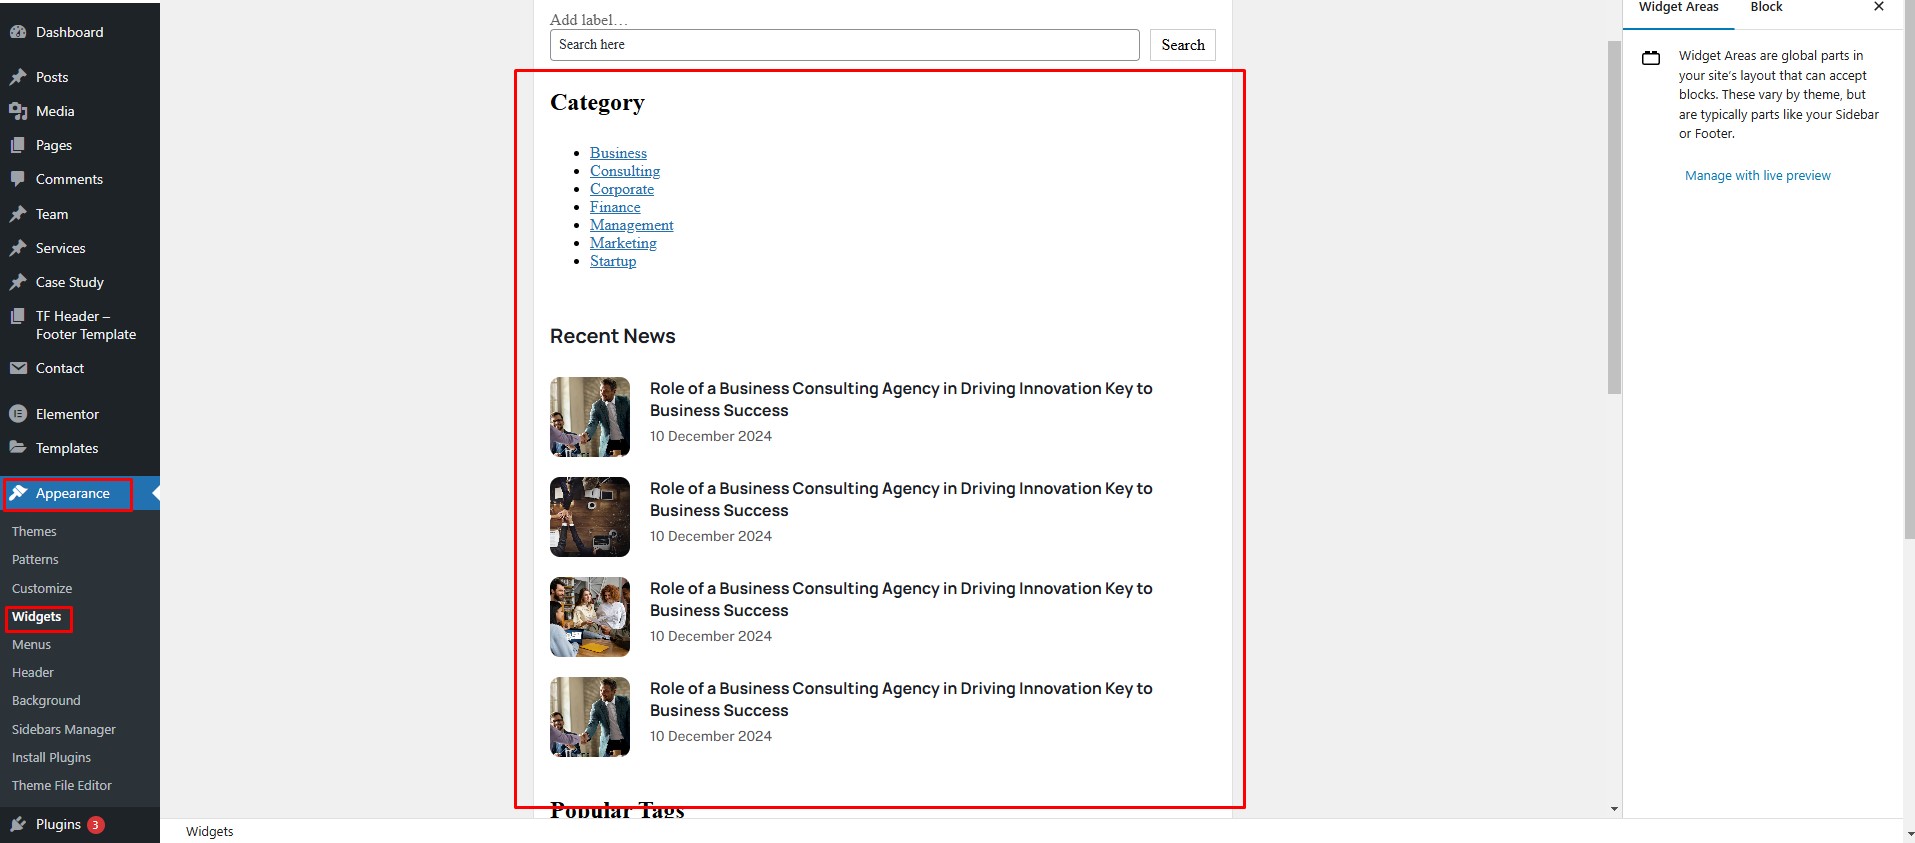
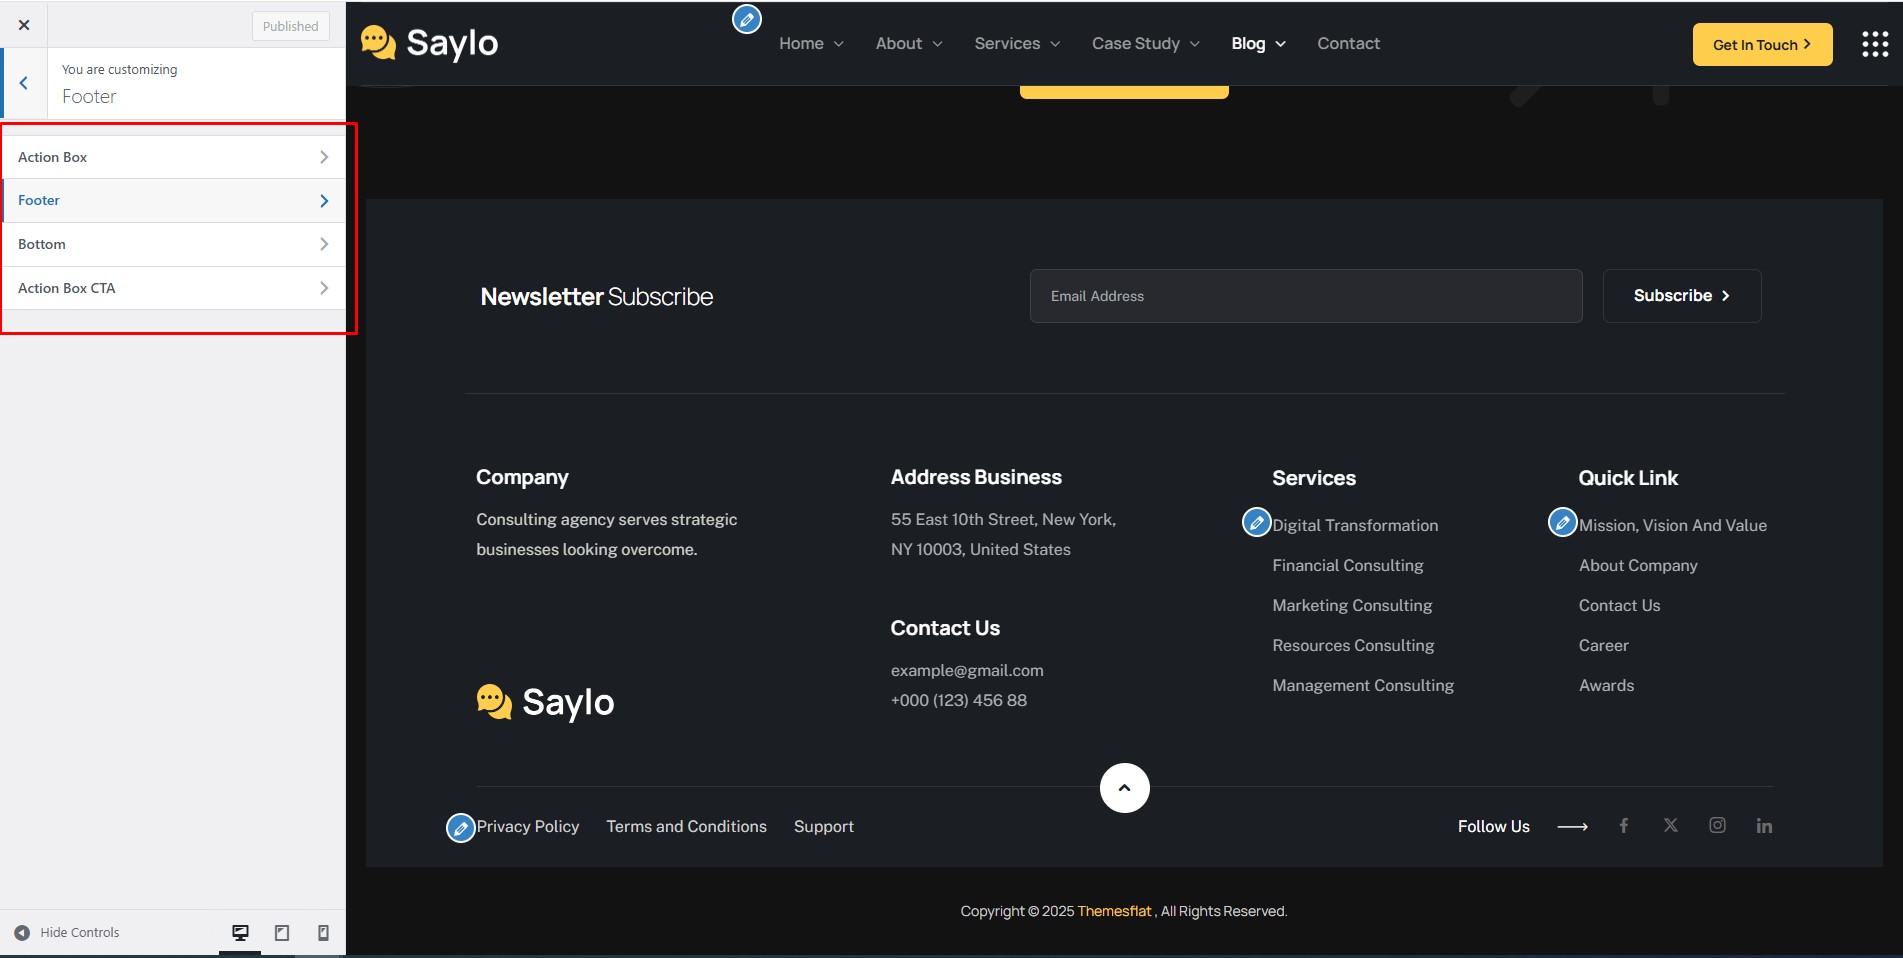
Edit Footer
Go to Appearance > Customize > Footer to edit the default footer.
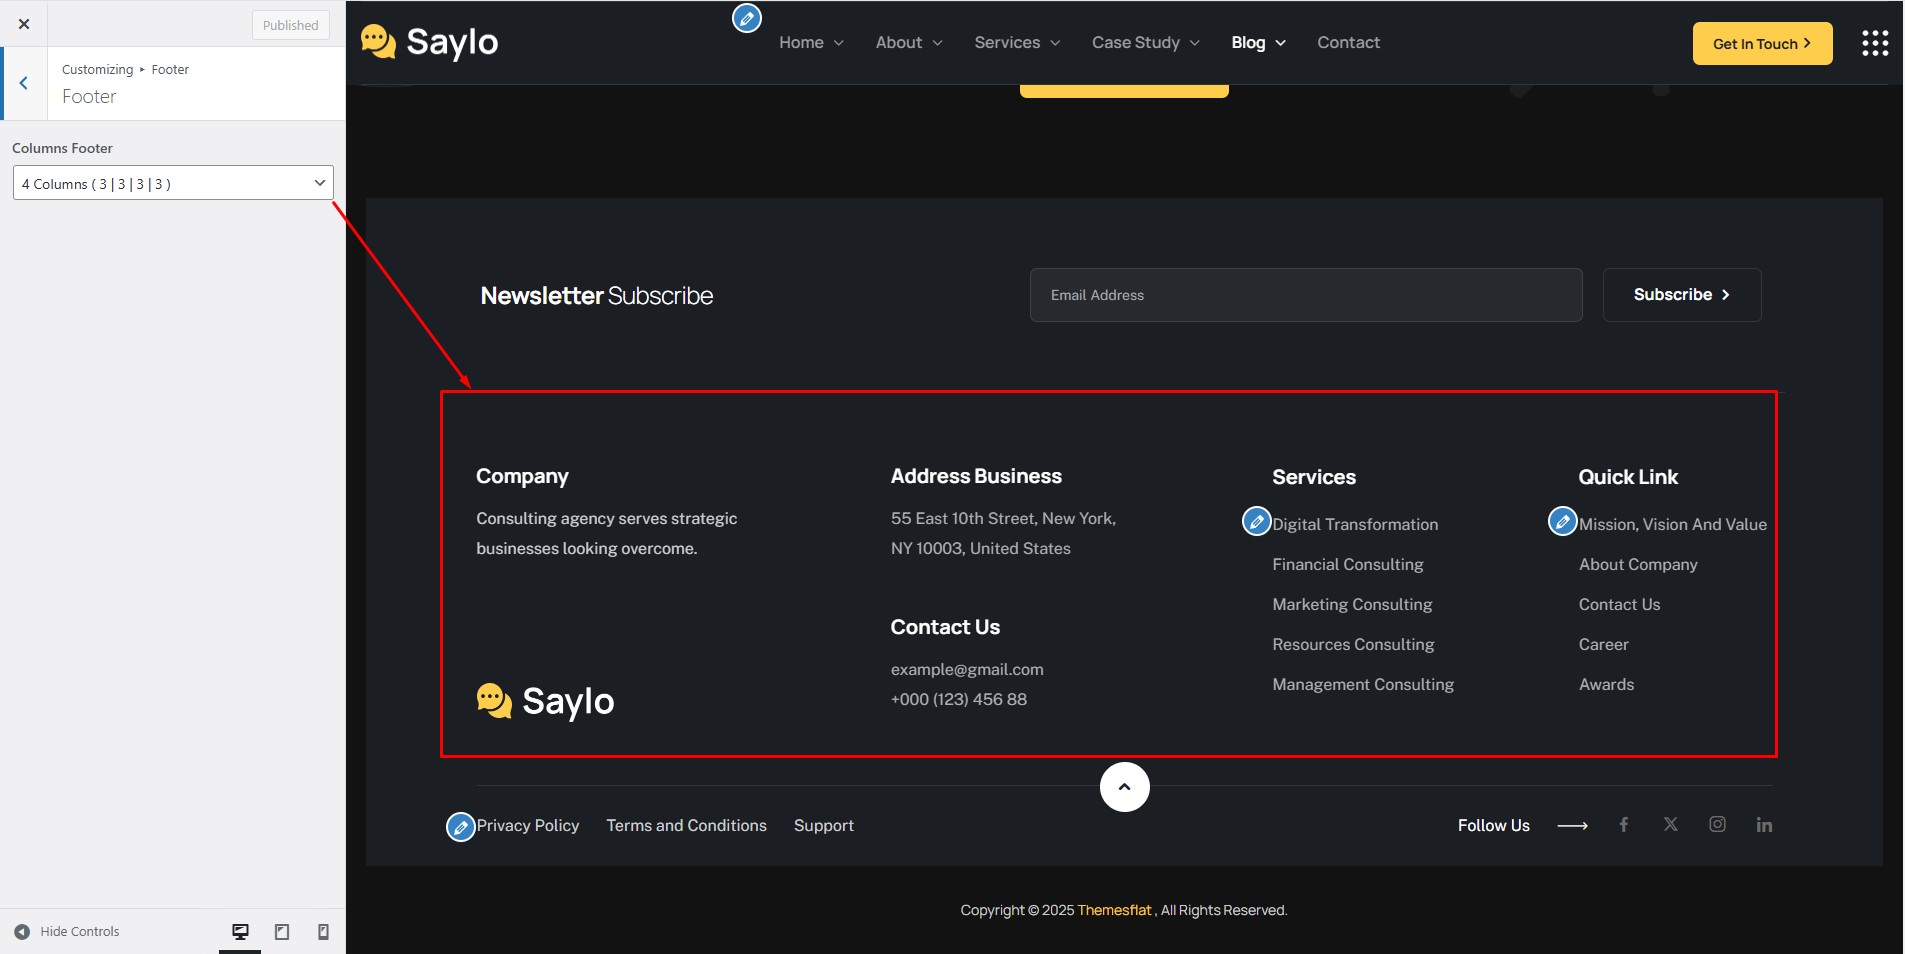
Columns Footer
Edit the footer columns here. Go to Appearance > Widgets to edit the content of each column.
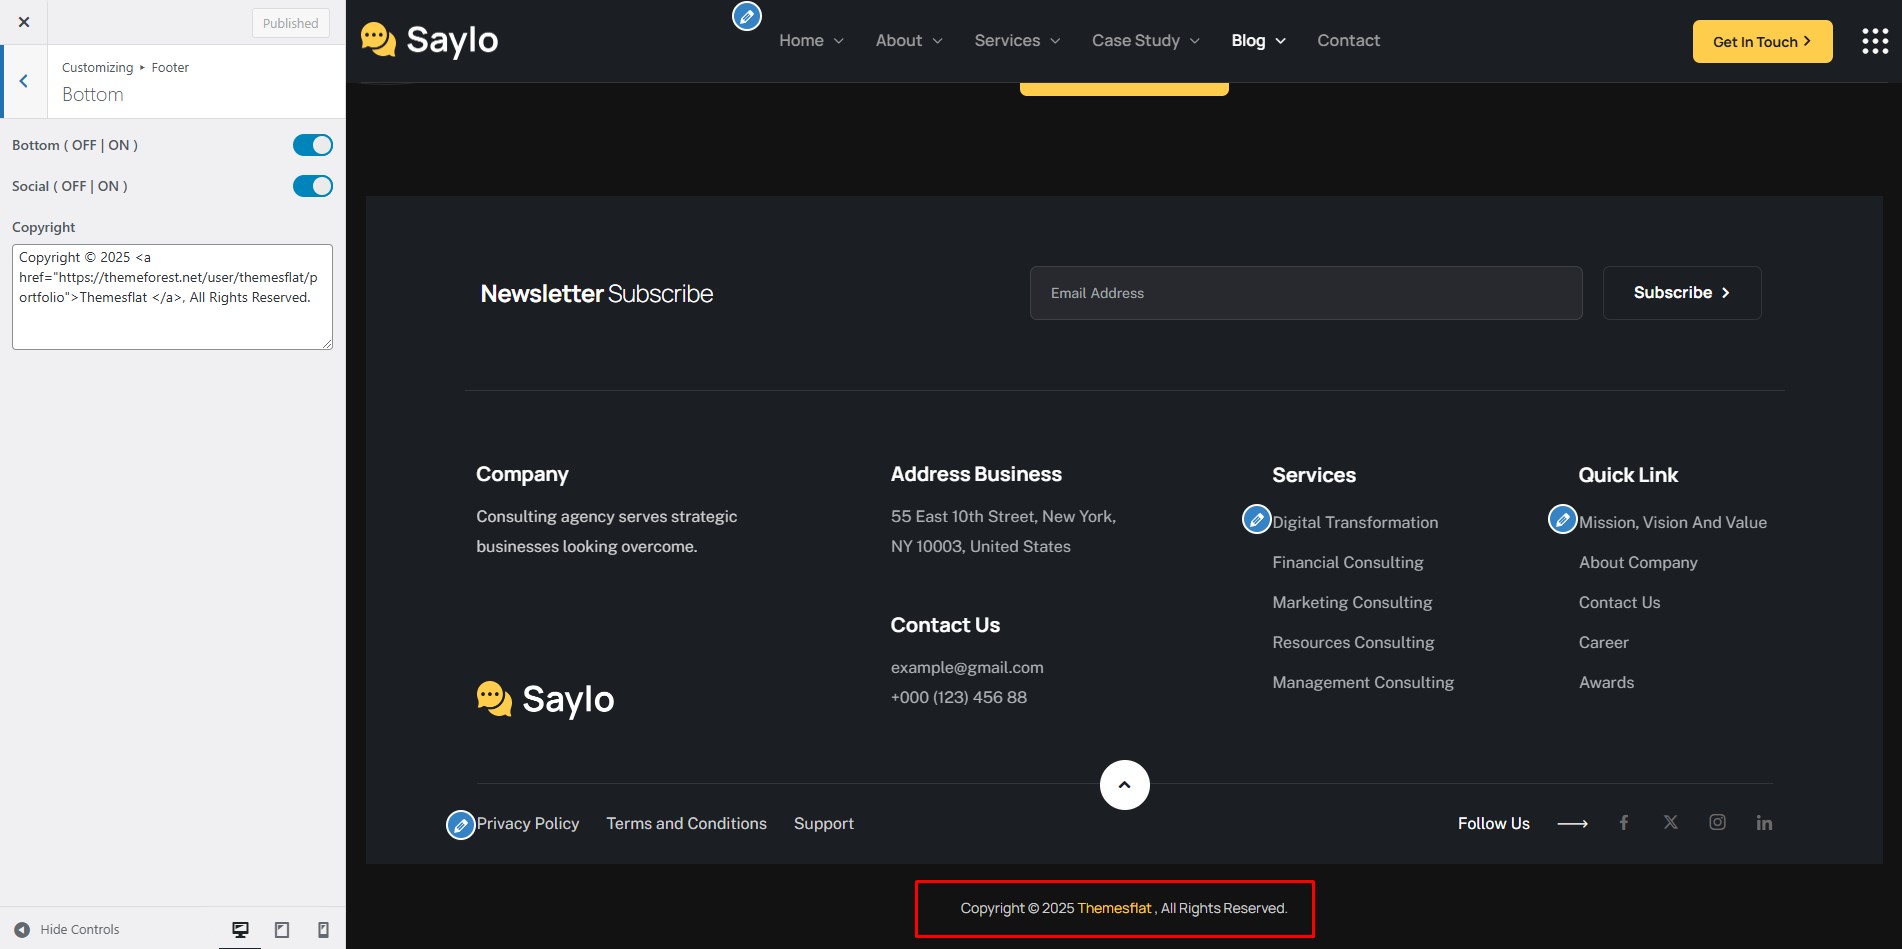
Bottom
Edit the bottom bar of the footer.
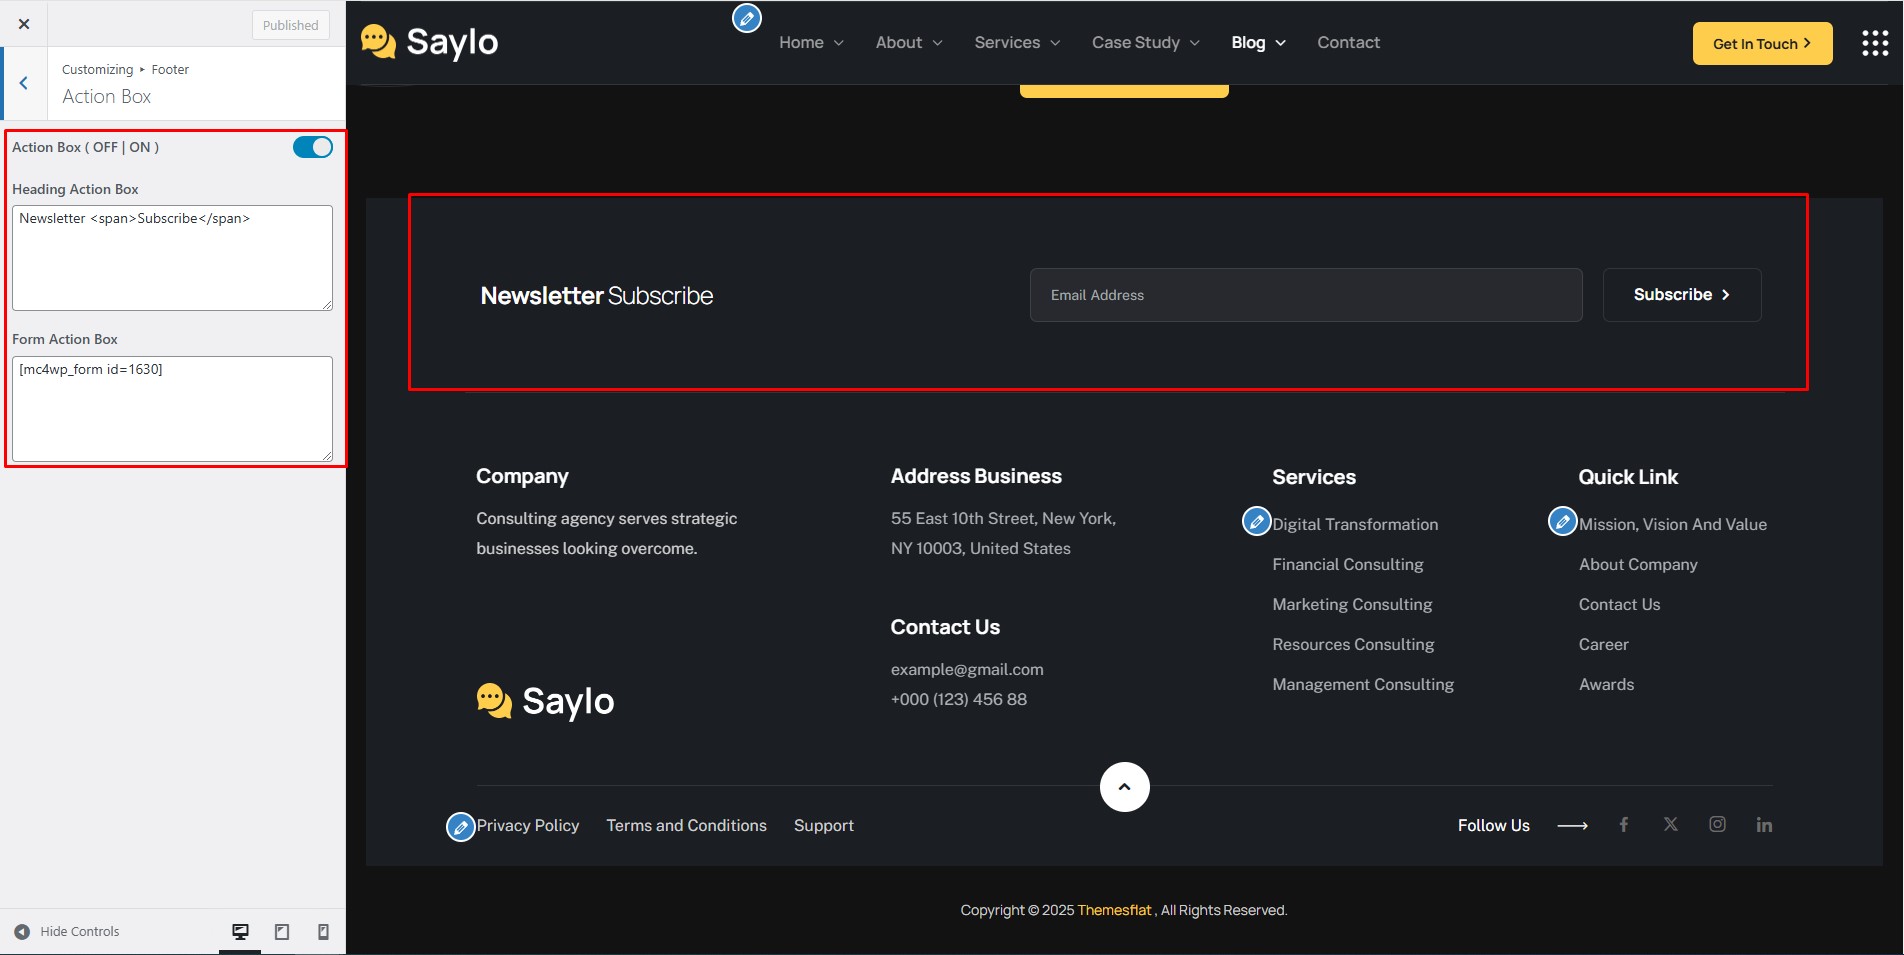
Action Box
Edit the action box above the footer.
Other Footer Styles
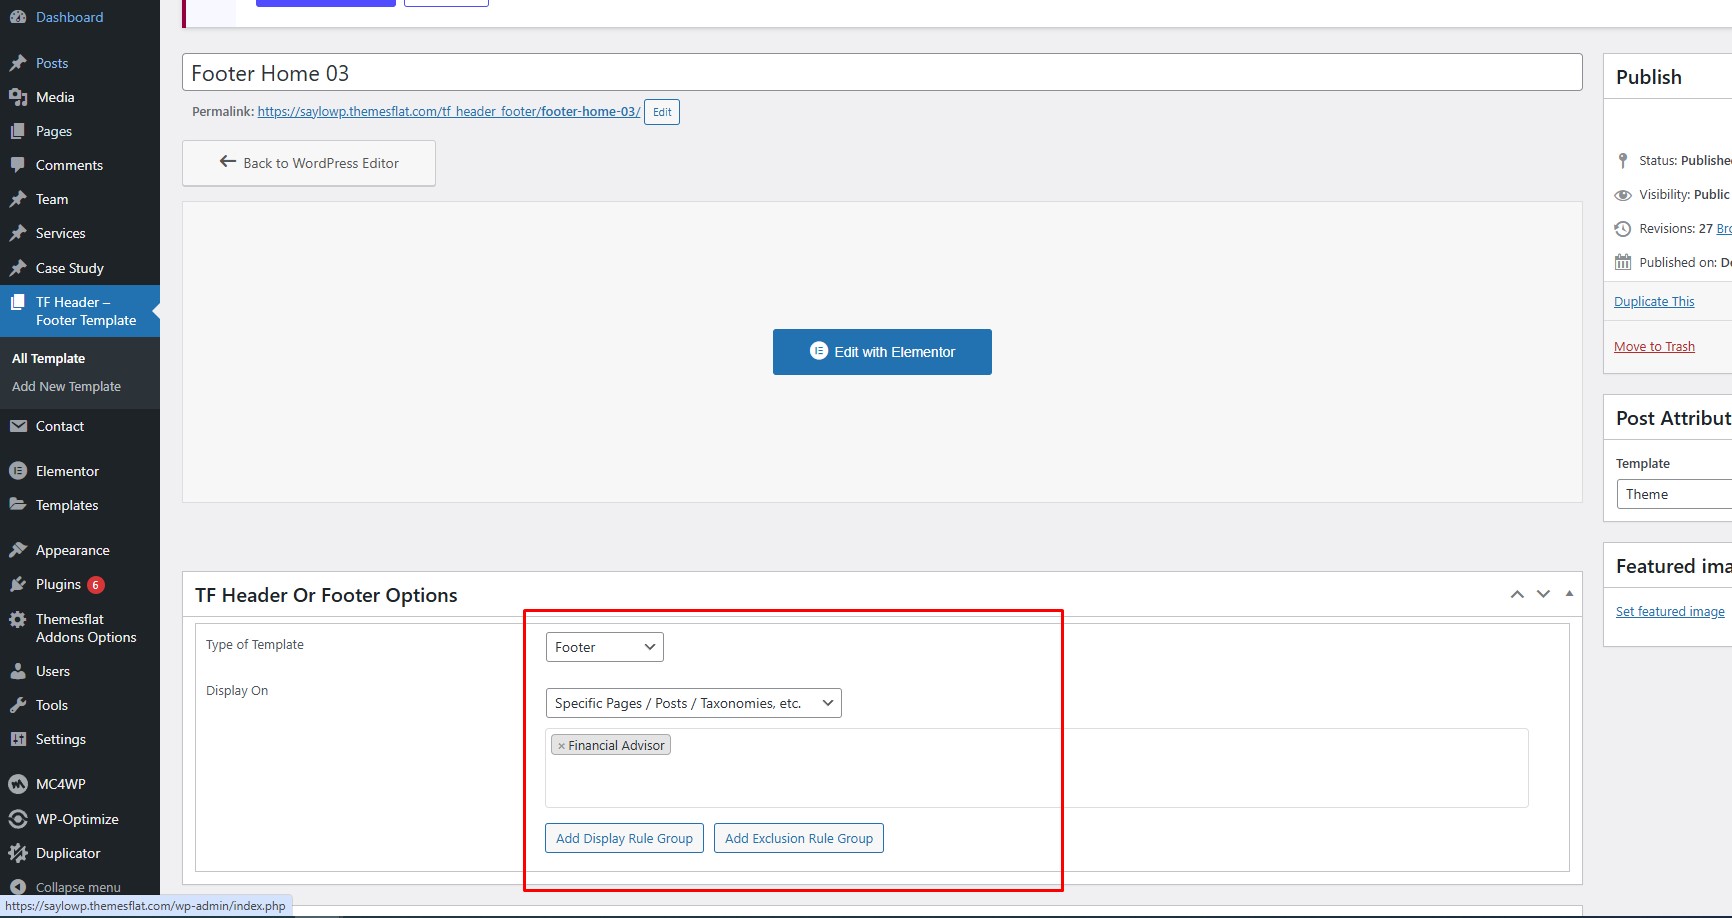
Go to Dashboard > TF Header Footer Template to edit the other footer styles.
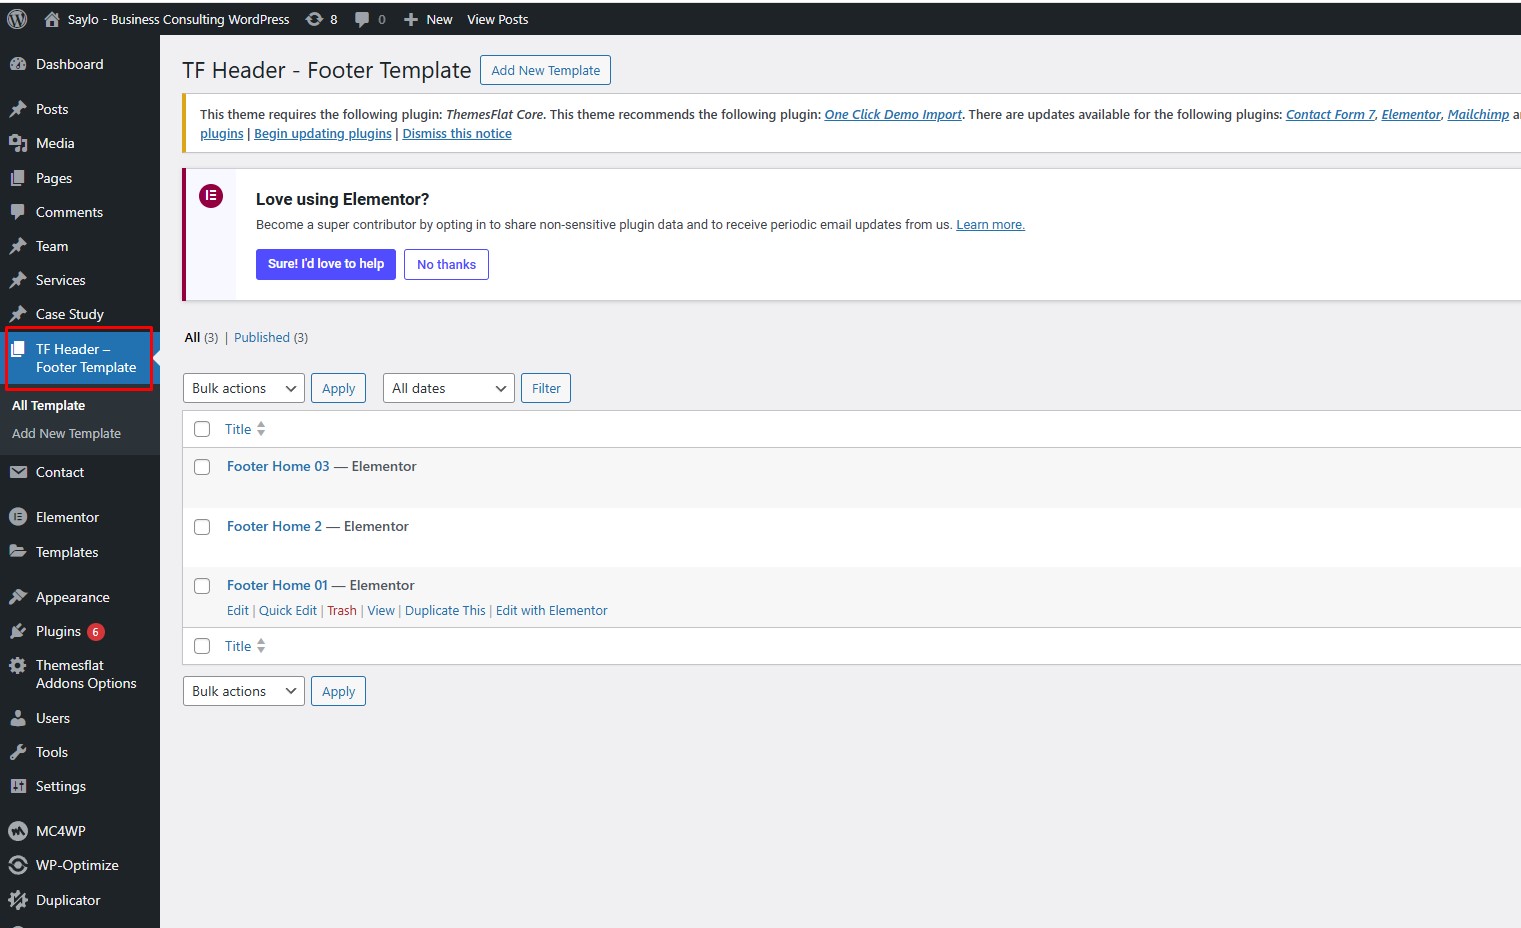
Click Edit to customize the footer for each page.
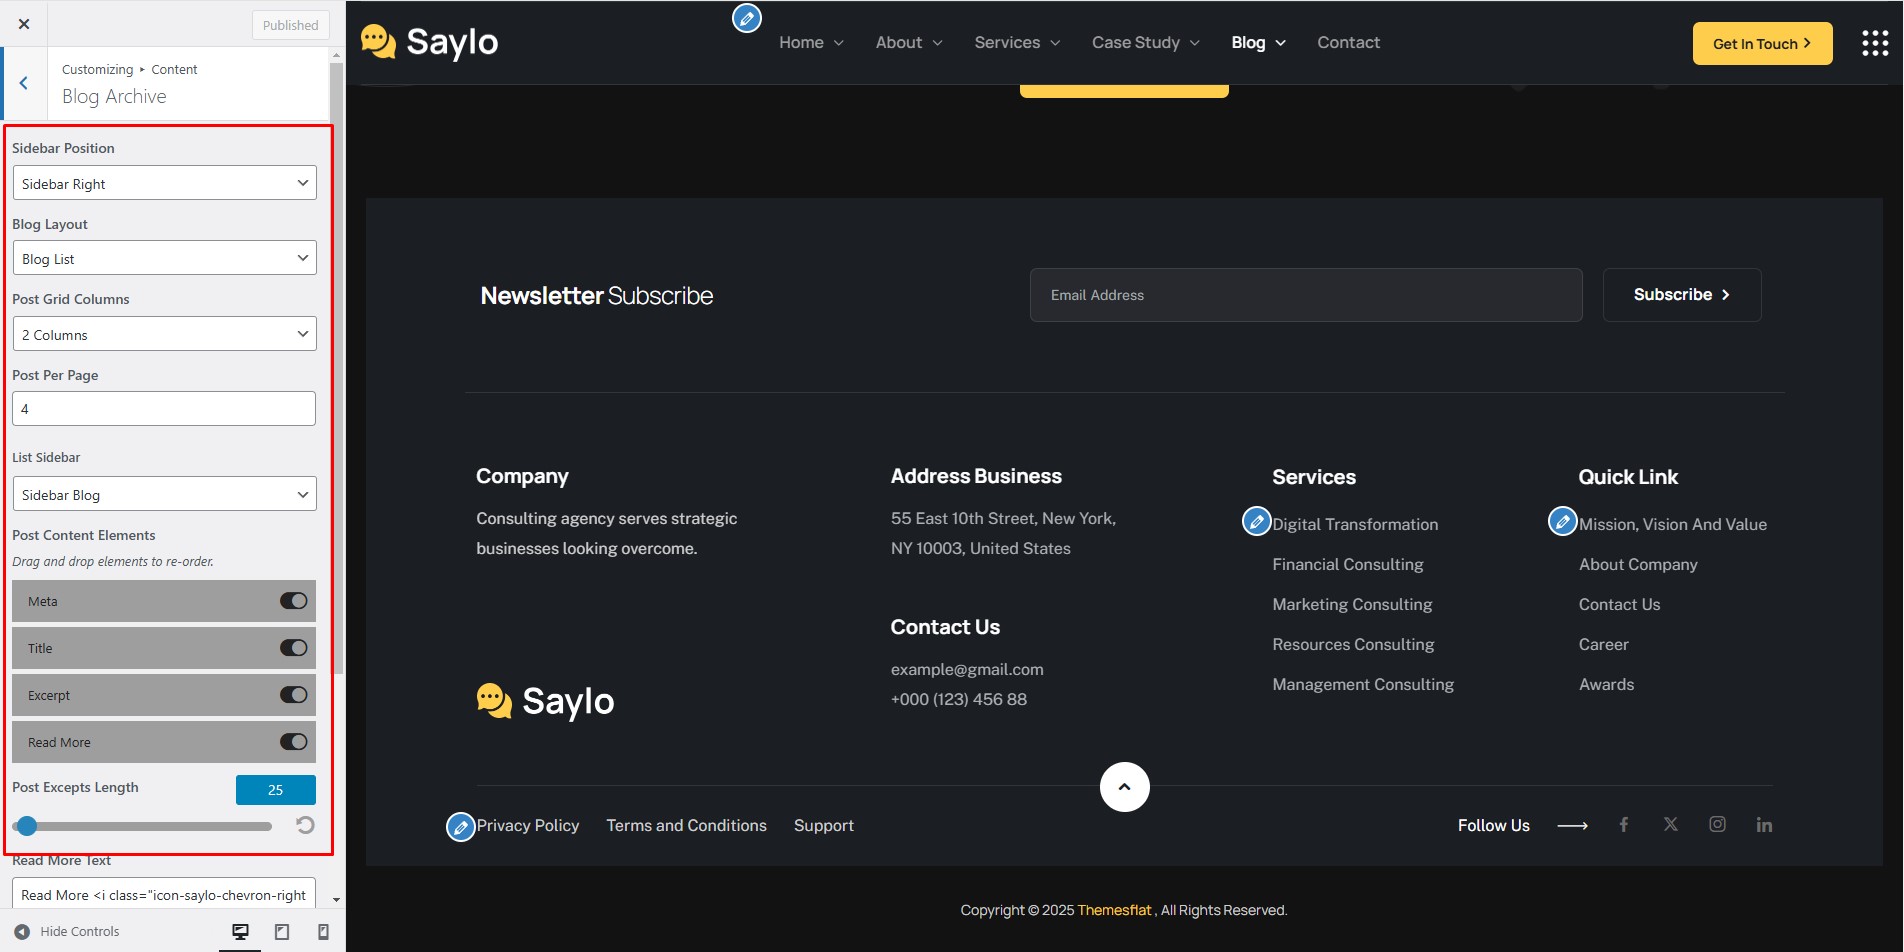
- Sidebar Position: No Sidebar, Left or Right on the posts page
- Blog Layout: List or Grid
- Post Grid Columns: number of columns
- List Sidebar: the sidebar shown on the posts page
- Post Content Elements: drag and drop to re-order
- Post Excerpt Length: limits the text length when Auto Post Excerpt is on
- Social Share: enable or disable
- Readmore Text: text of the Read more button
- Meta Elements: drag and drop to re-order
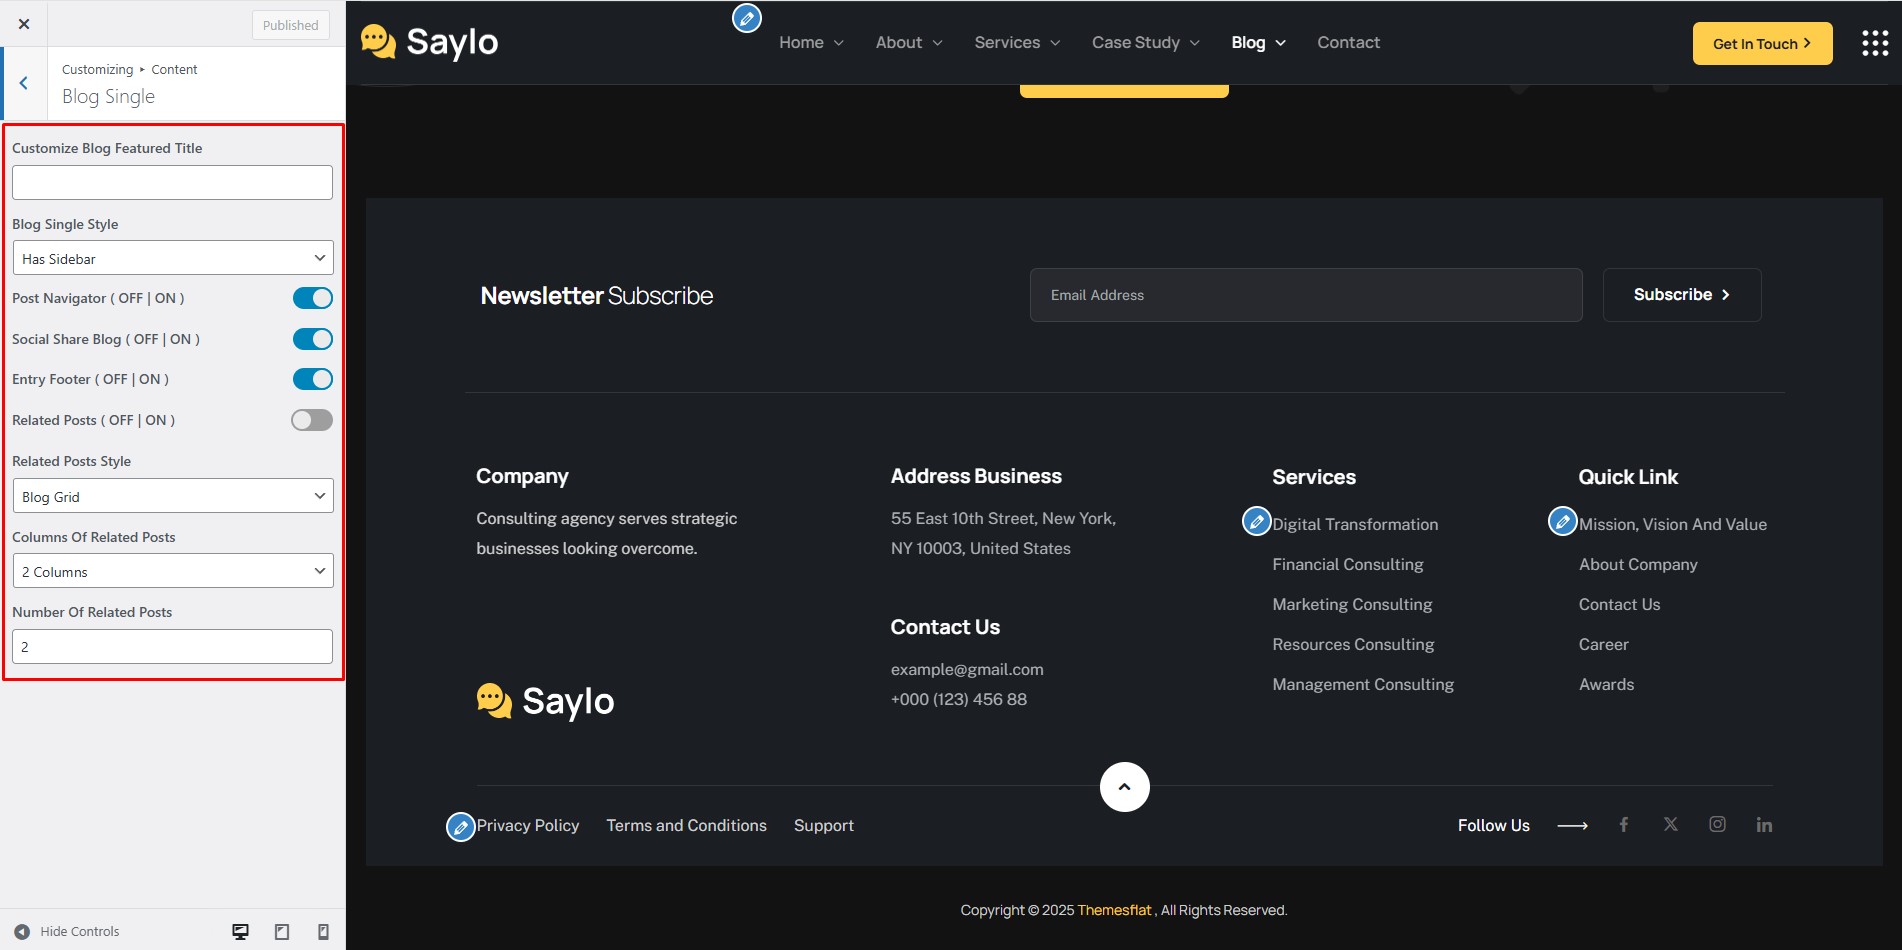
- Post Navigator: show or hide
- Related Posts: show or hide
- Related Posts Style: Blog List or Blog Grid
- Columns Of Related Posts: 2, 3 or 4
- Number Of Related Posts: how many posts to show
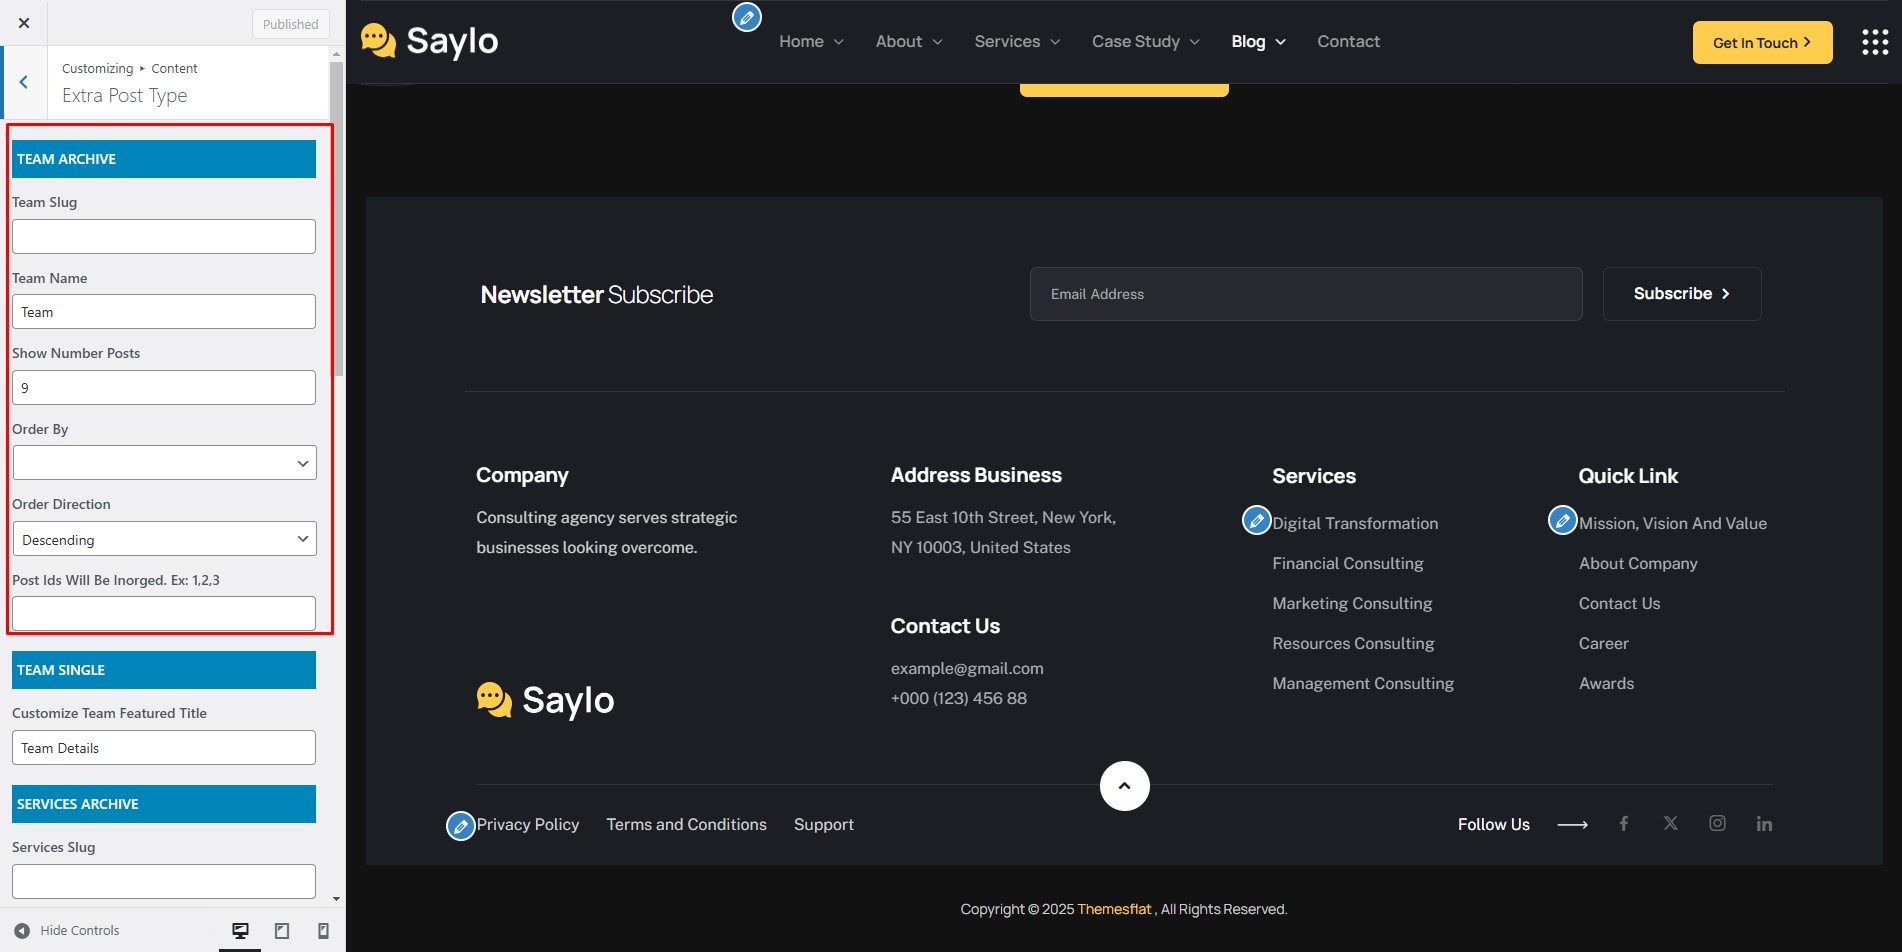
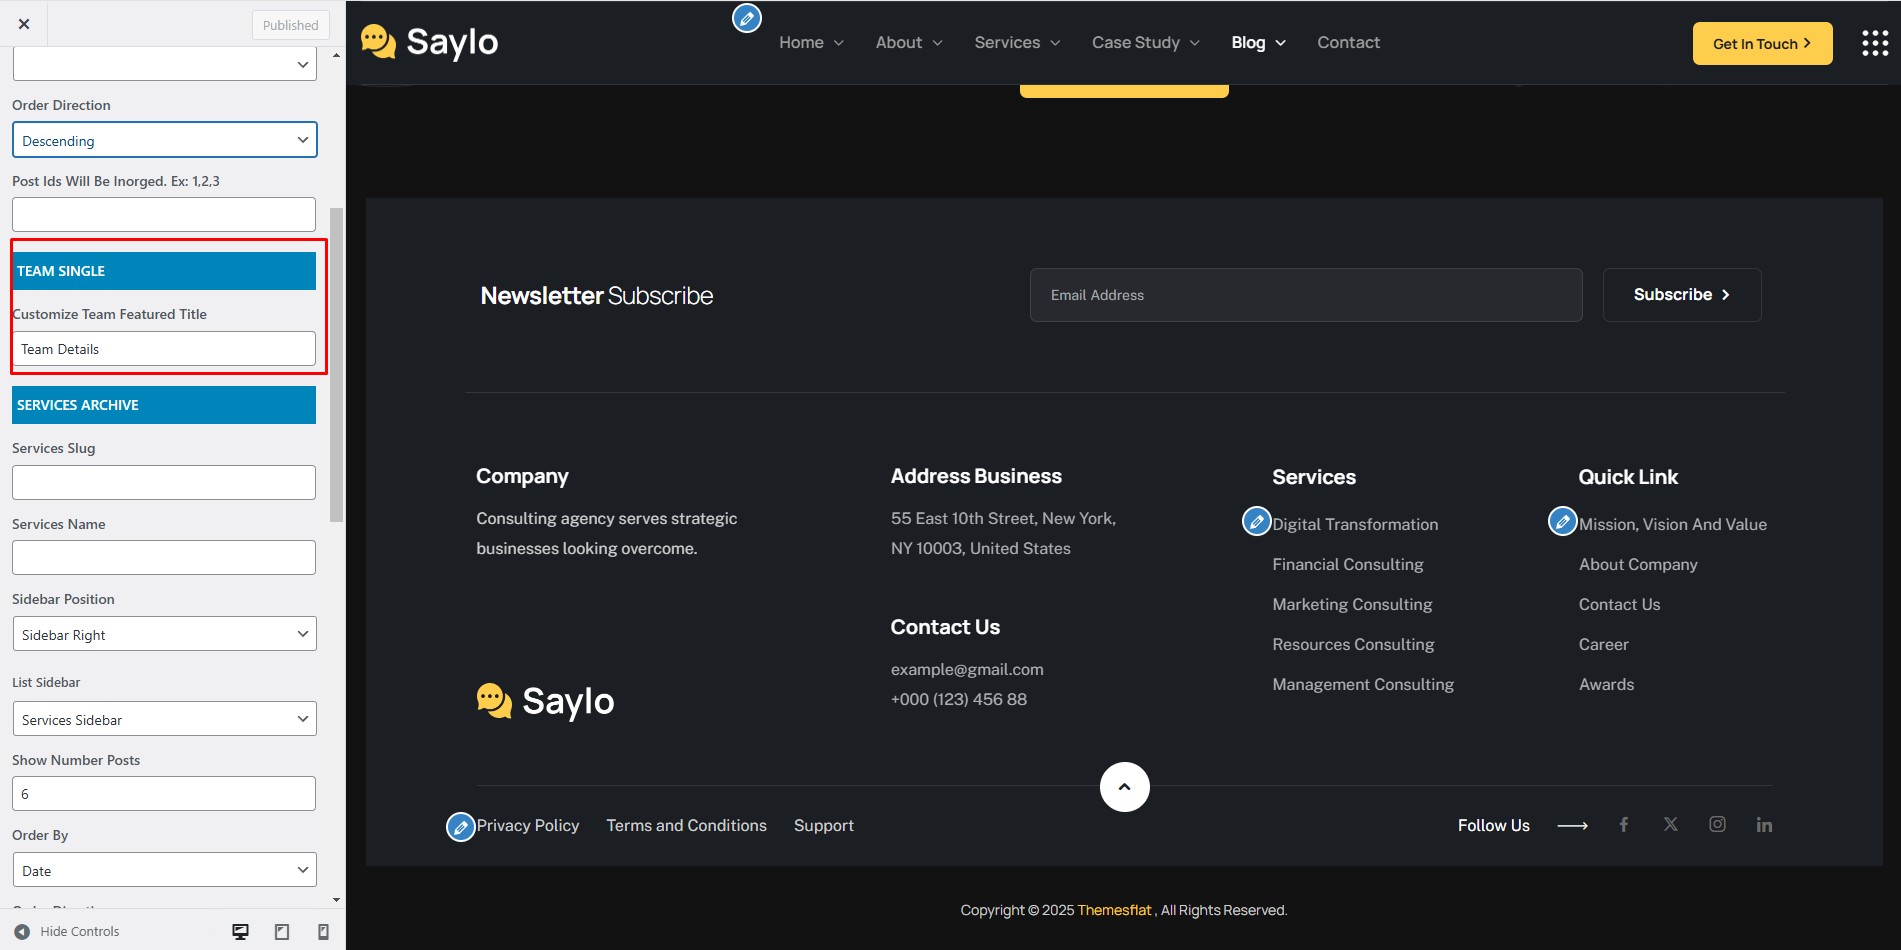
- Team Slug and Team Name: change the URL slug and the name
- Show Number Posts: posts per page
- Order By and Order Direction: sort by id, date … ascending or descending
- Post Ids Will Be Ignored: hide posts by id
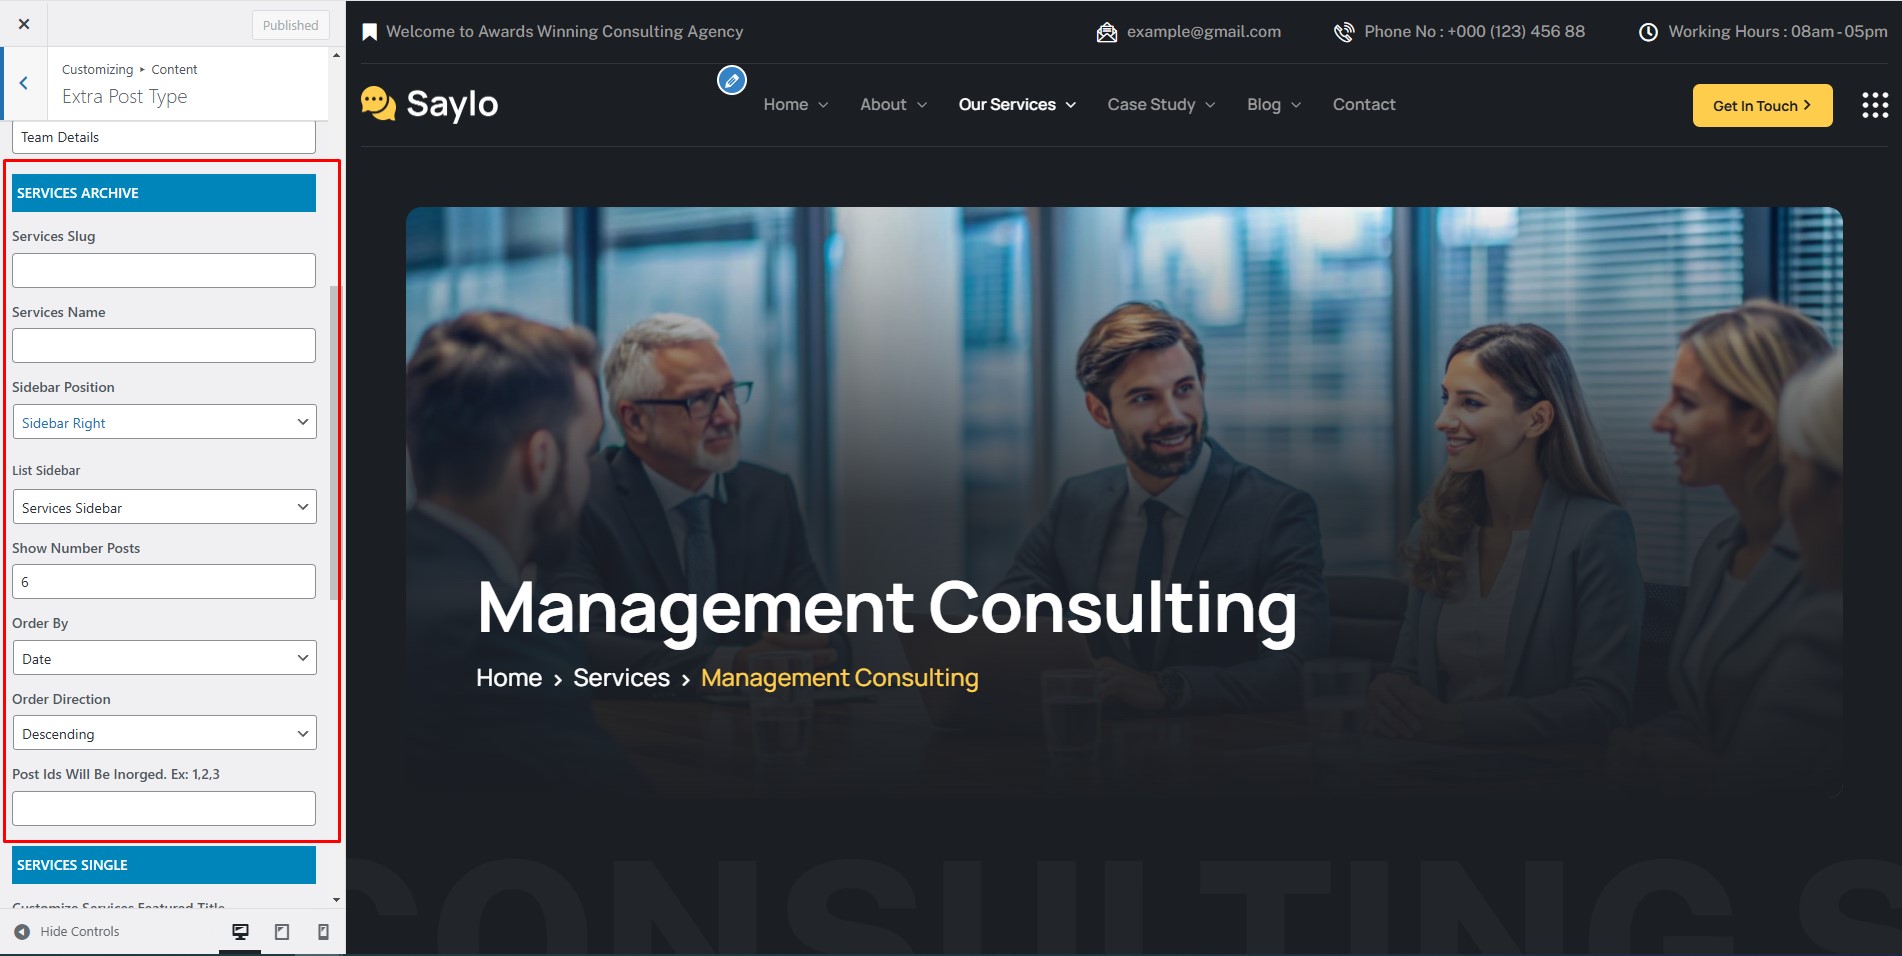
- Services Slug and Services Name: change the URL slug and the name
- Sidebar Position and List Sidebar: choose the sidebar style
- Columns Of Related Posts and Number Of Related Posts: related services
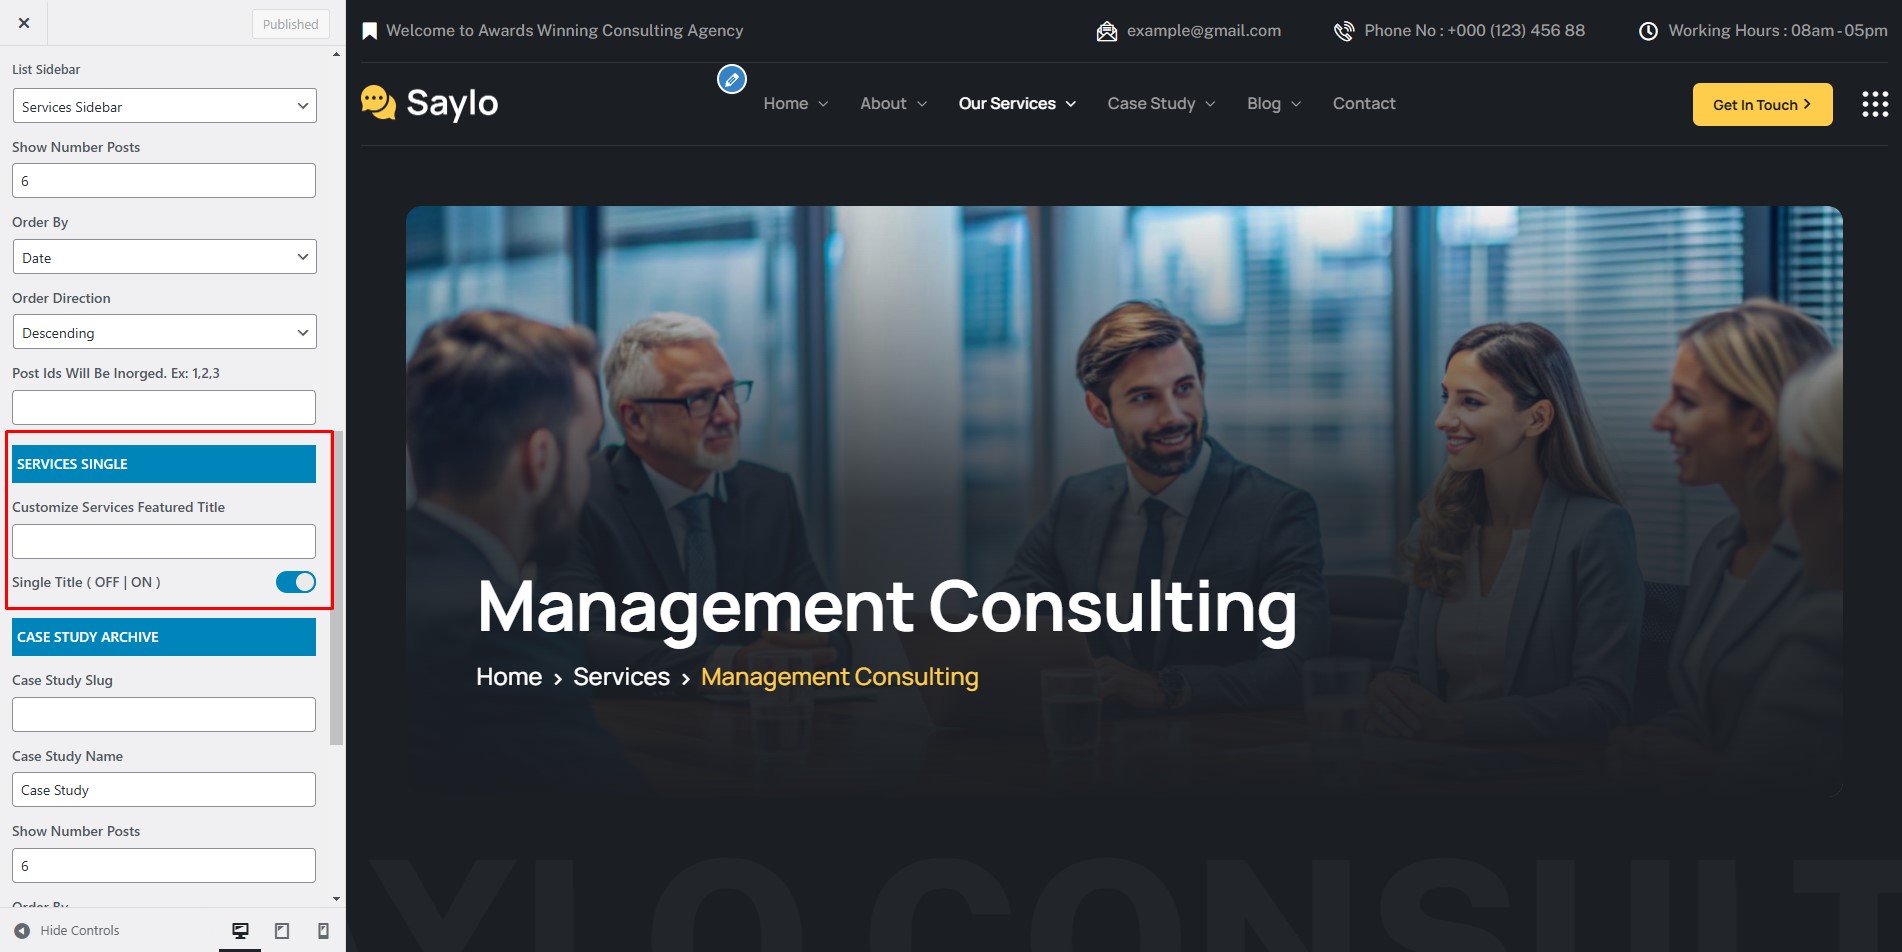

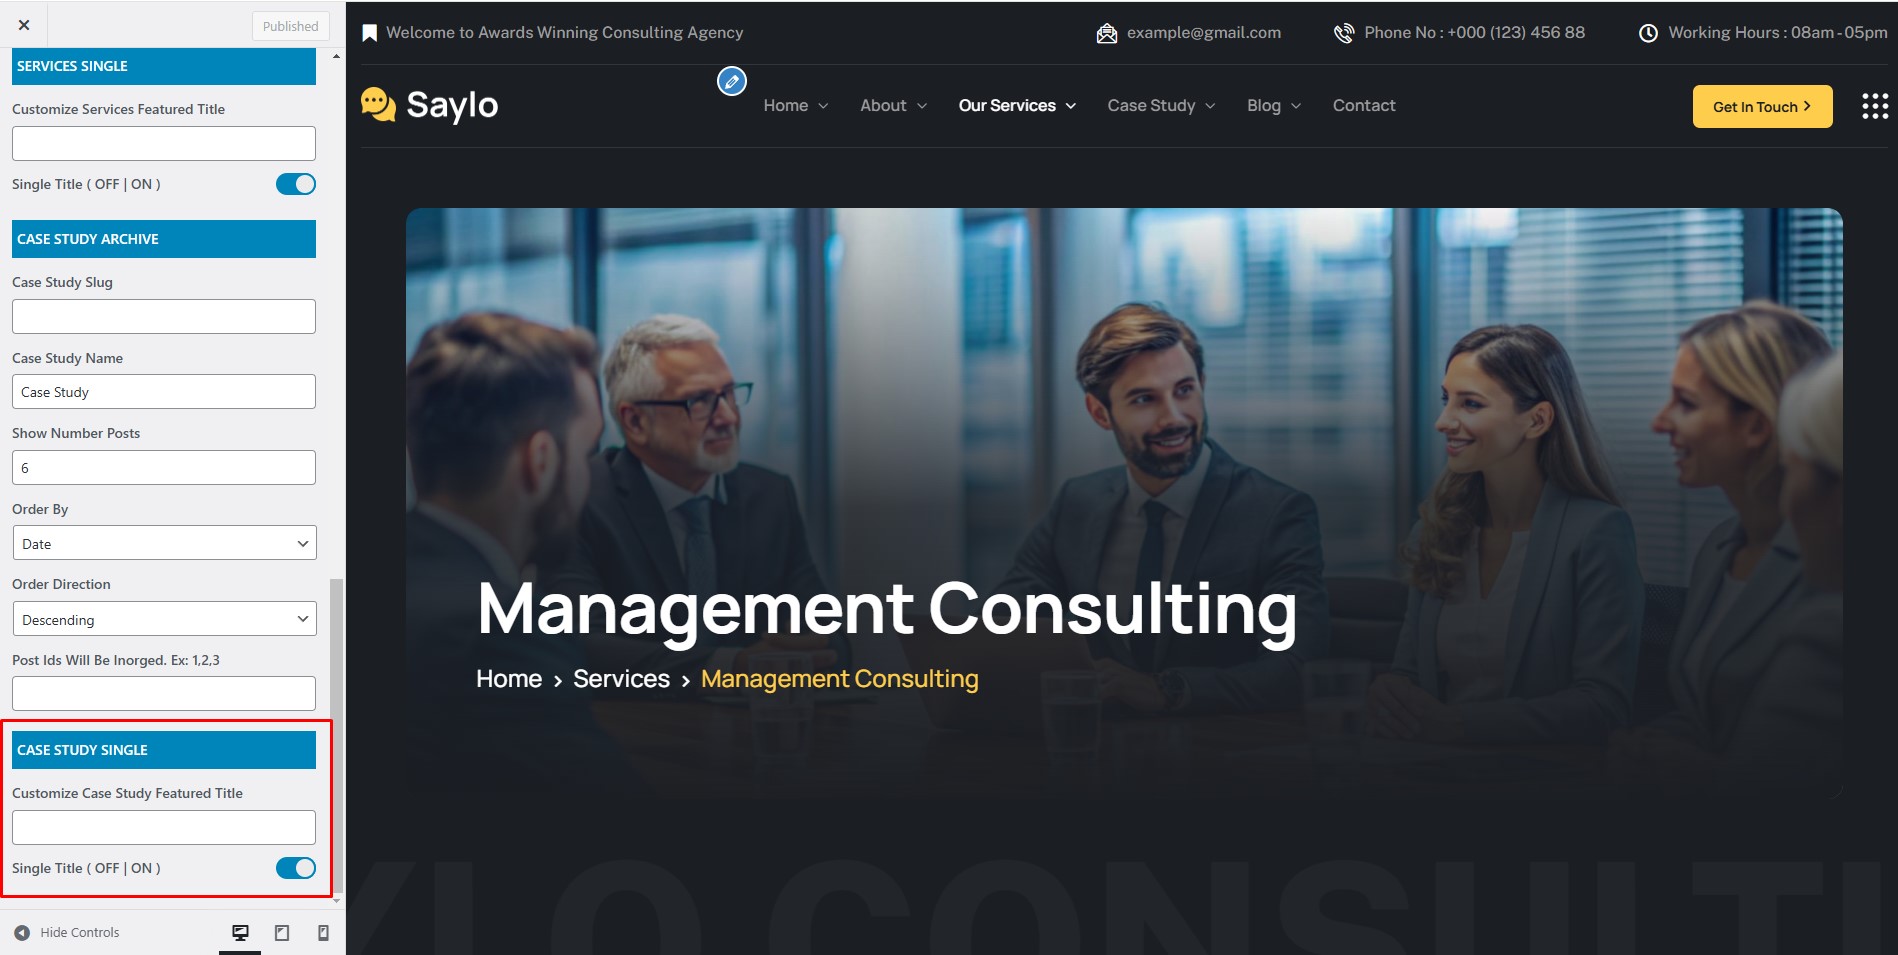
- Case Study Slug and Case Study Name: change the URL slug and the name
- Show Number Posts, Order By and Order Direction: same options as Team
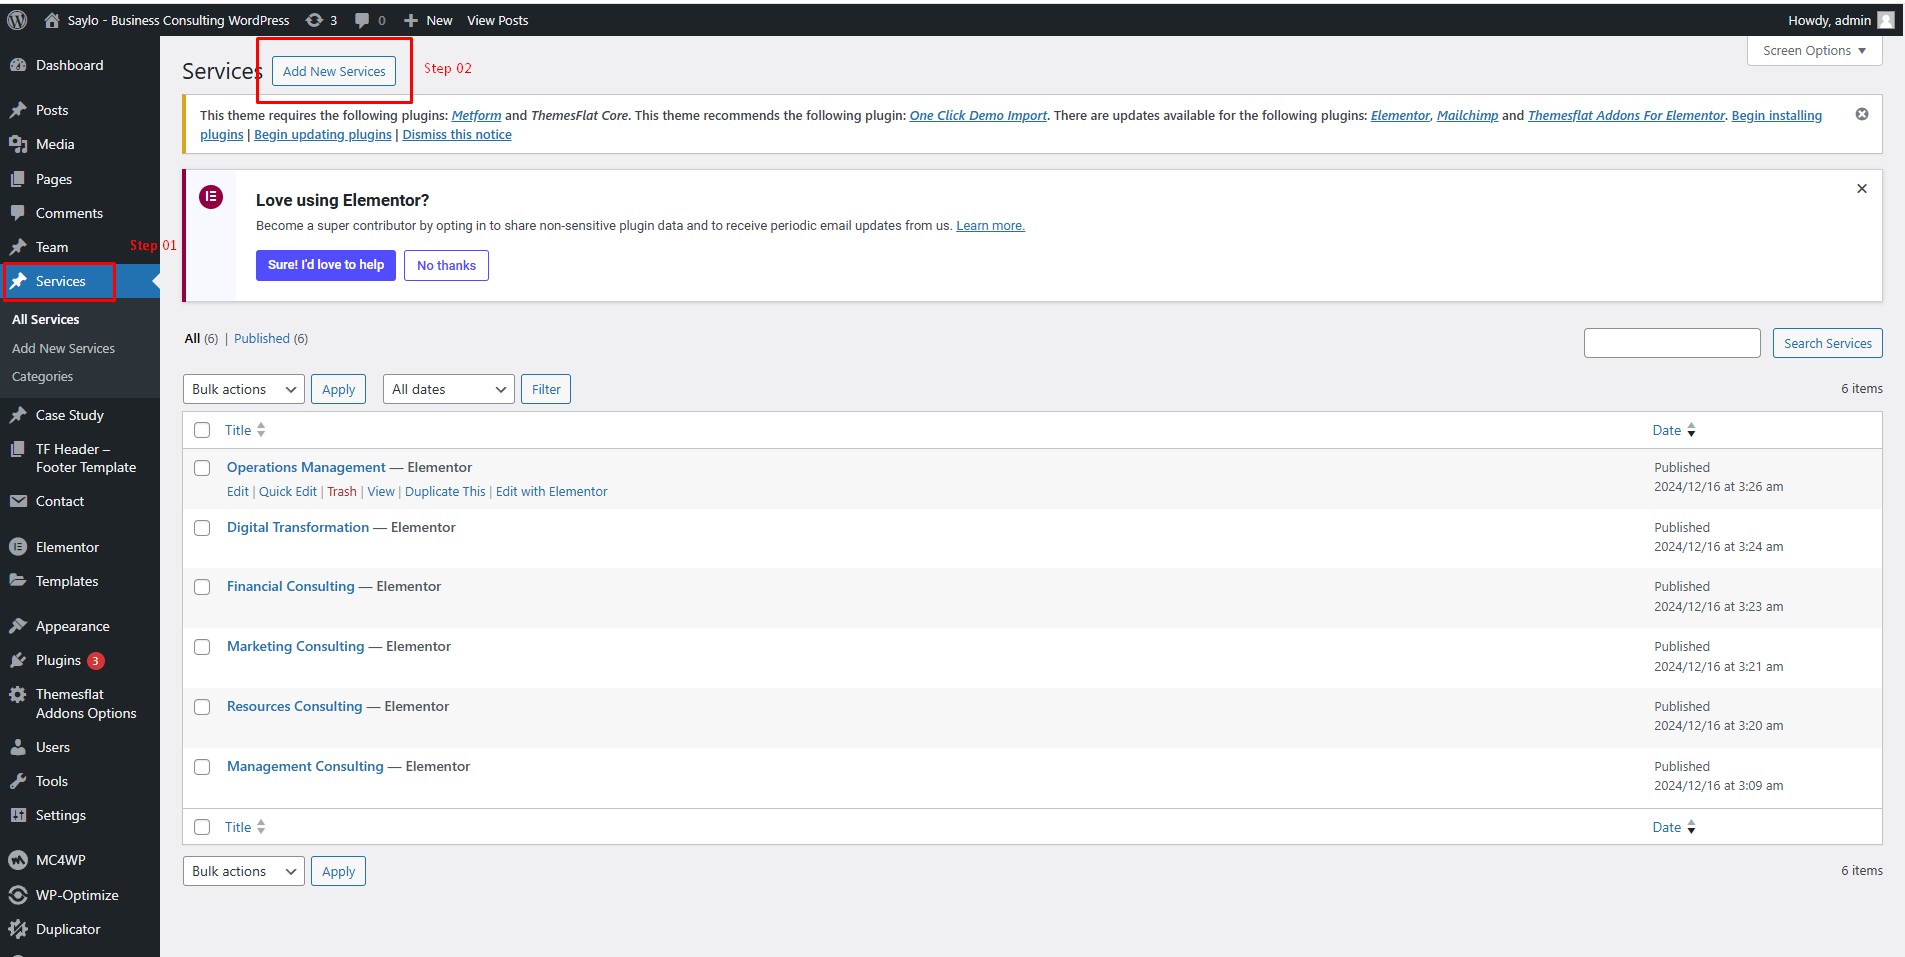
Go to Dashboard > Services, edit an existing service or click Add New.
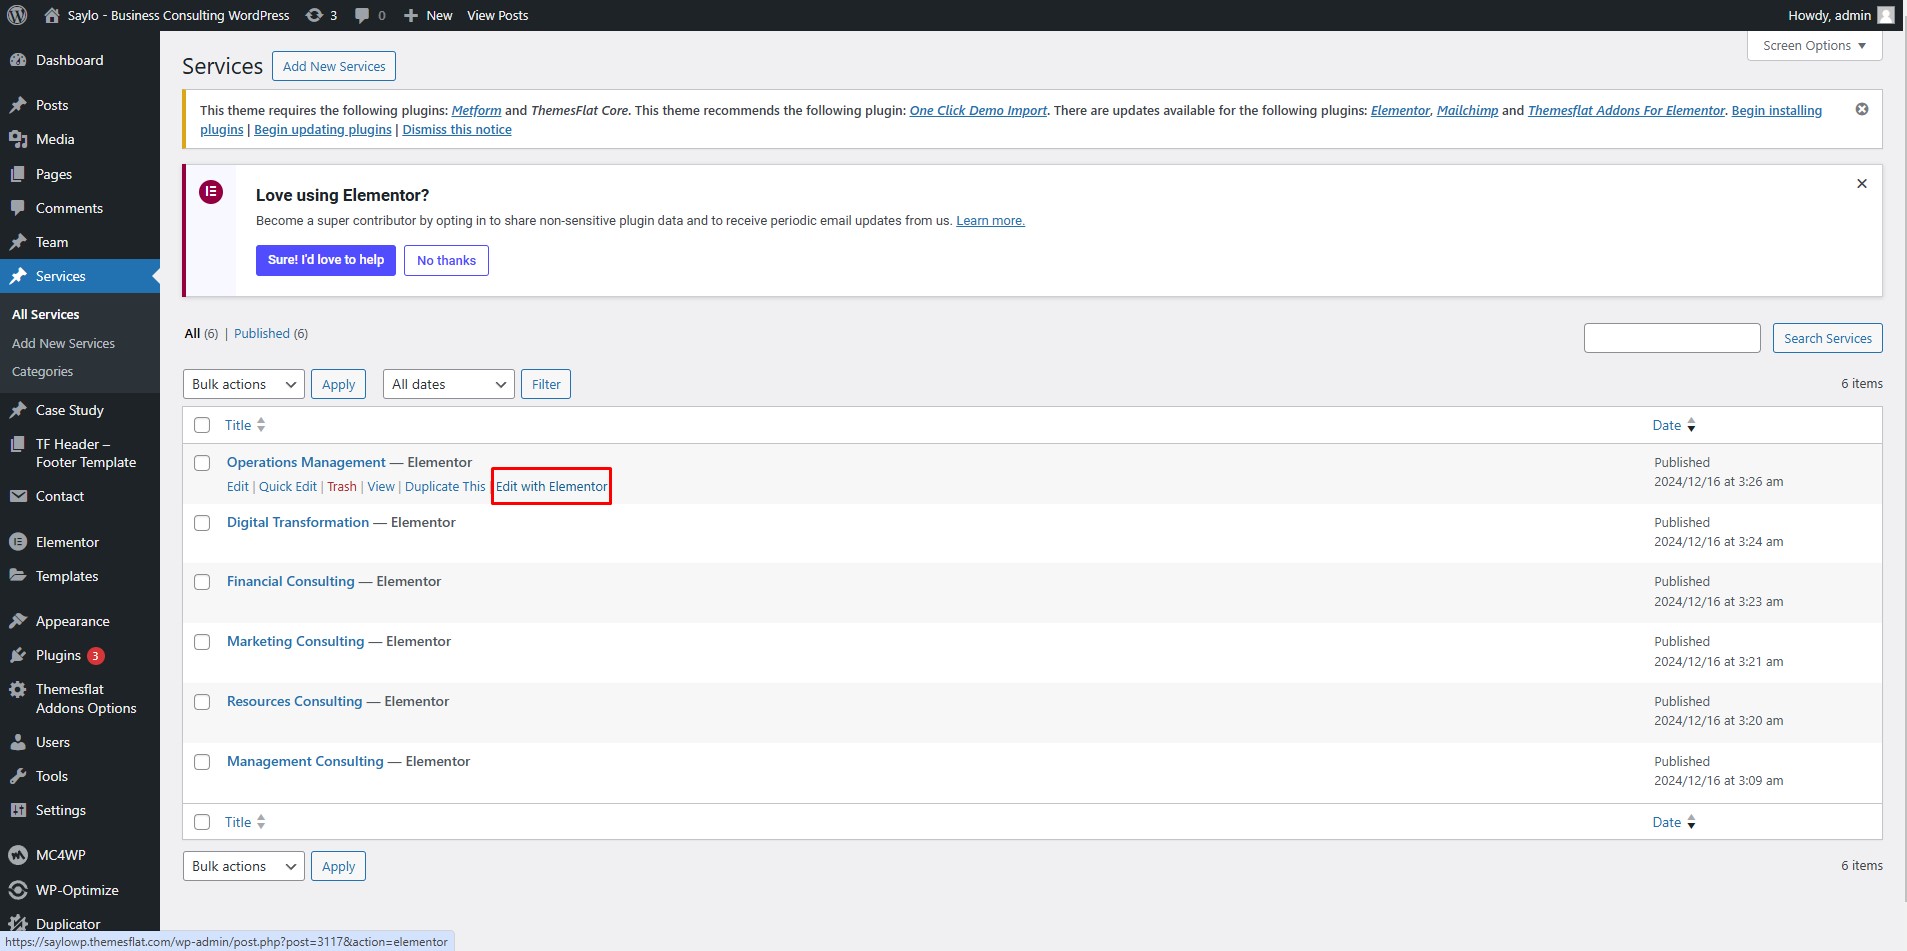
To change the icon of a service, go to Dashboard > Services > Edit with Elementor.
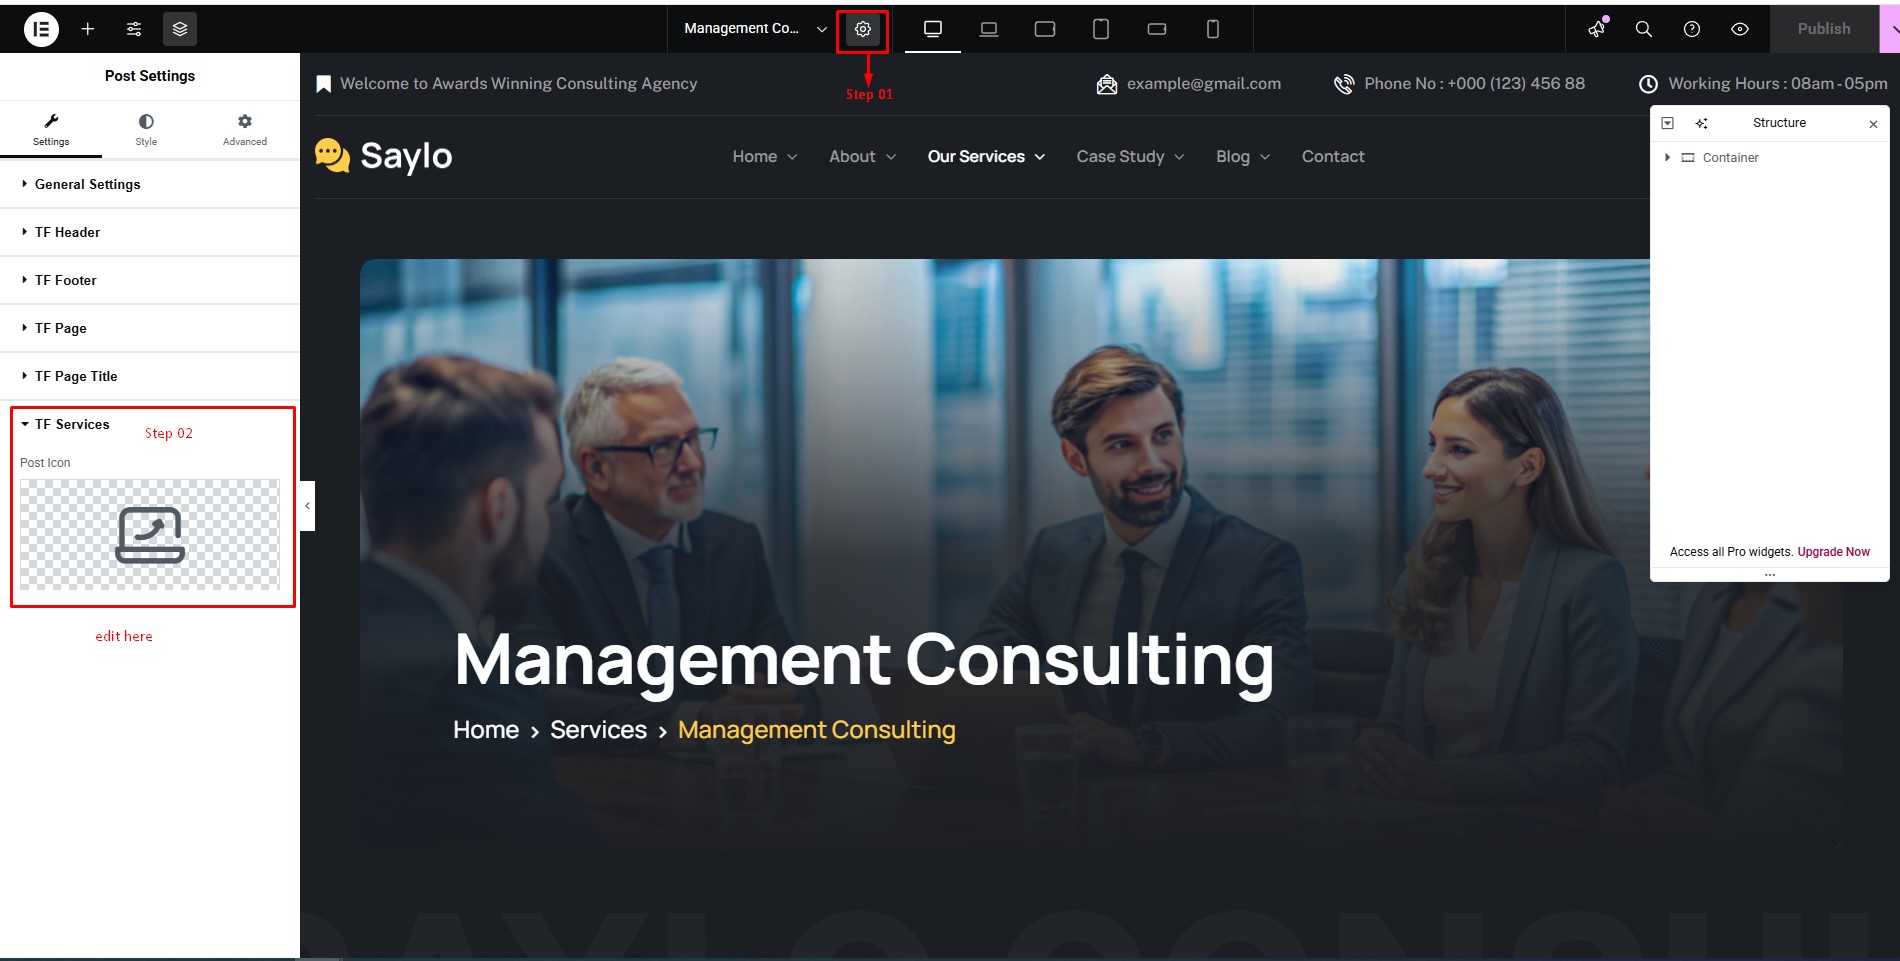
Then open Settings > TF Services > Choice icon.
Go to Dashboard > Team, edit an existing member or click Add New.
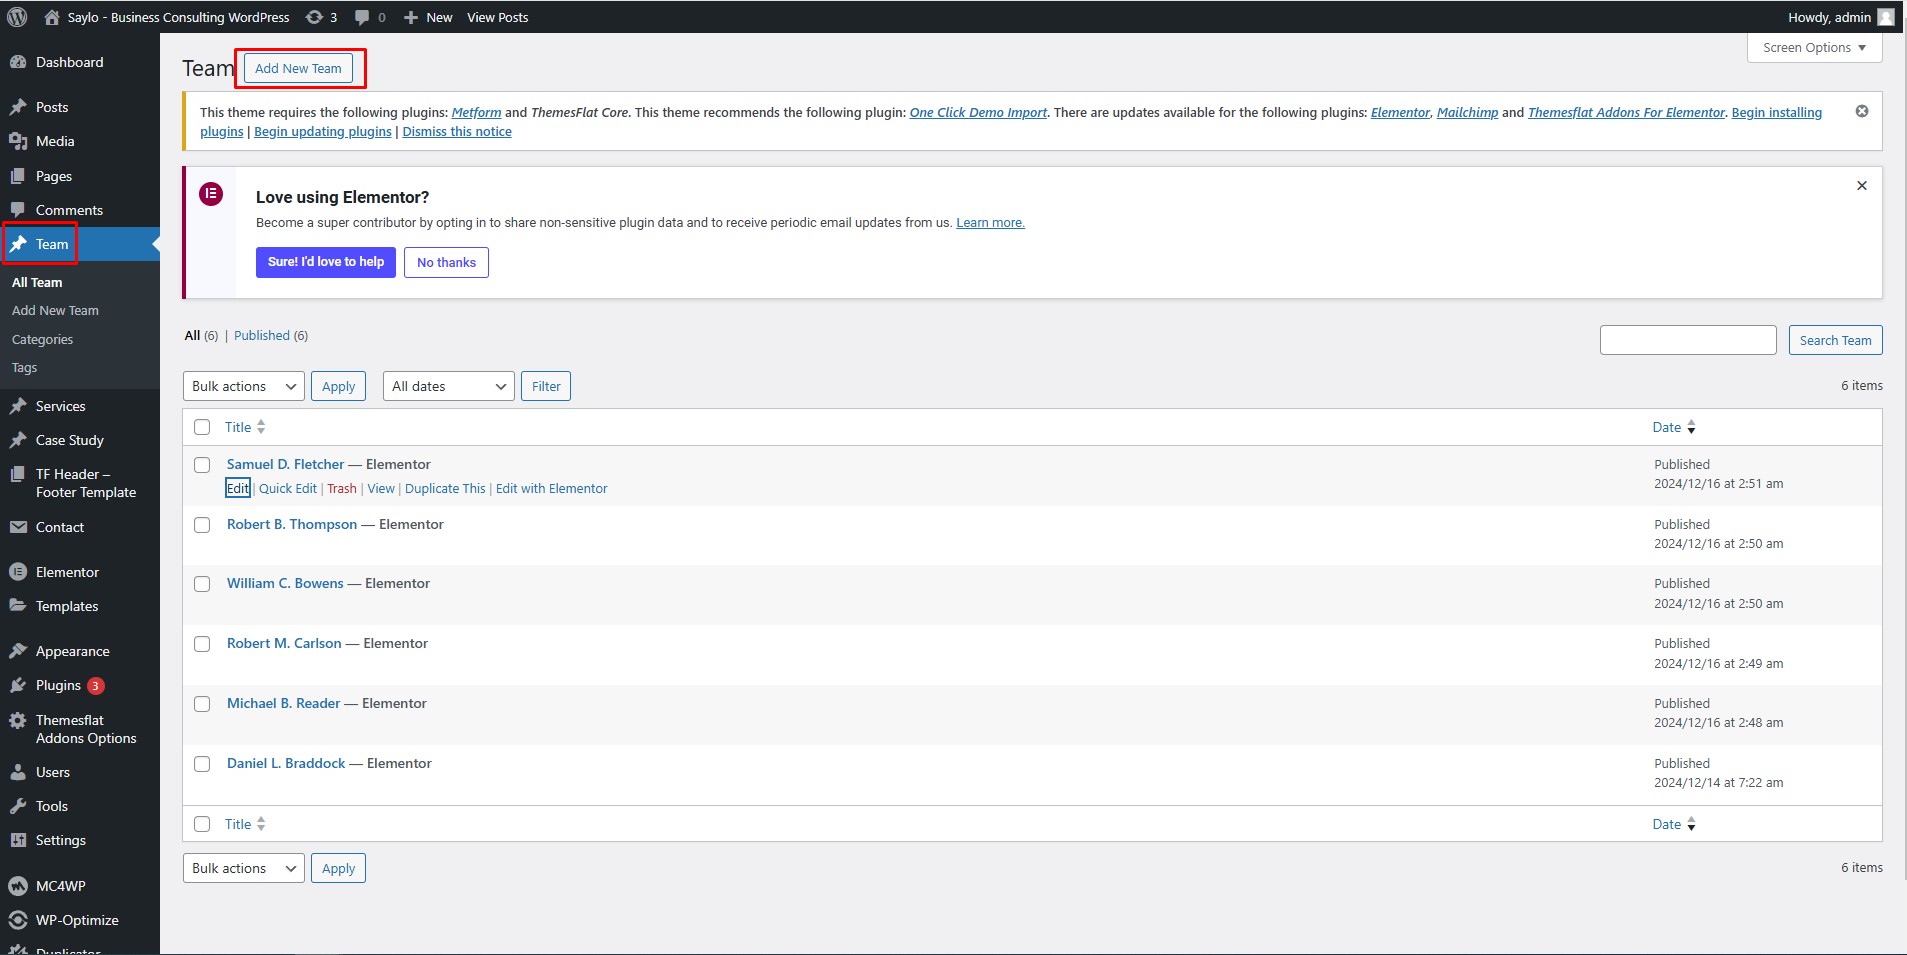
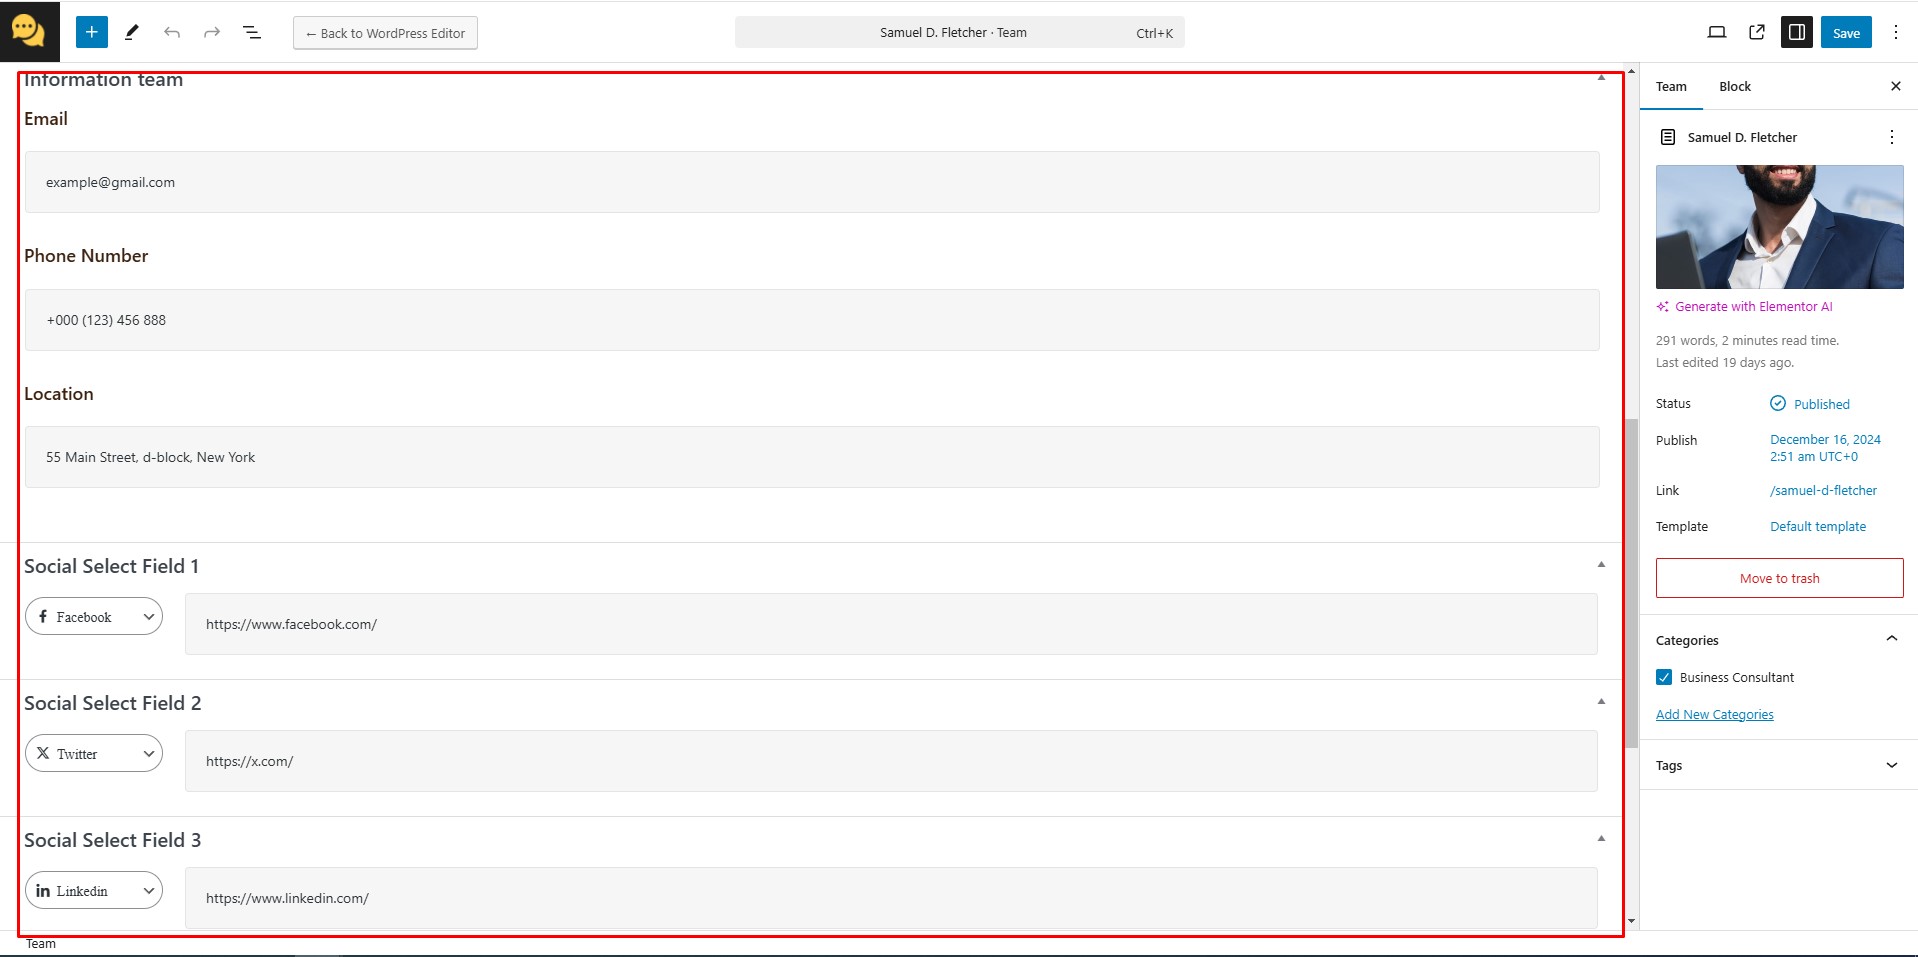
Edit the member information in Dashboard > Team > Edit.
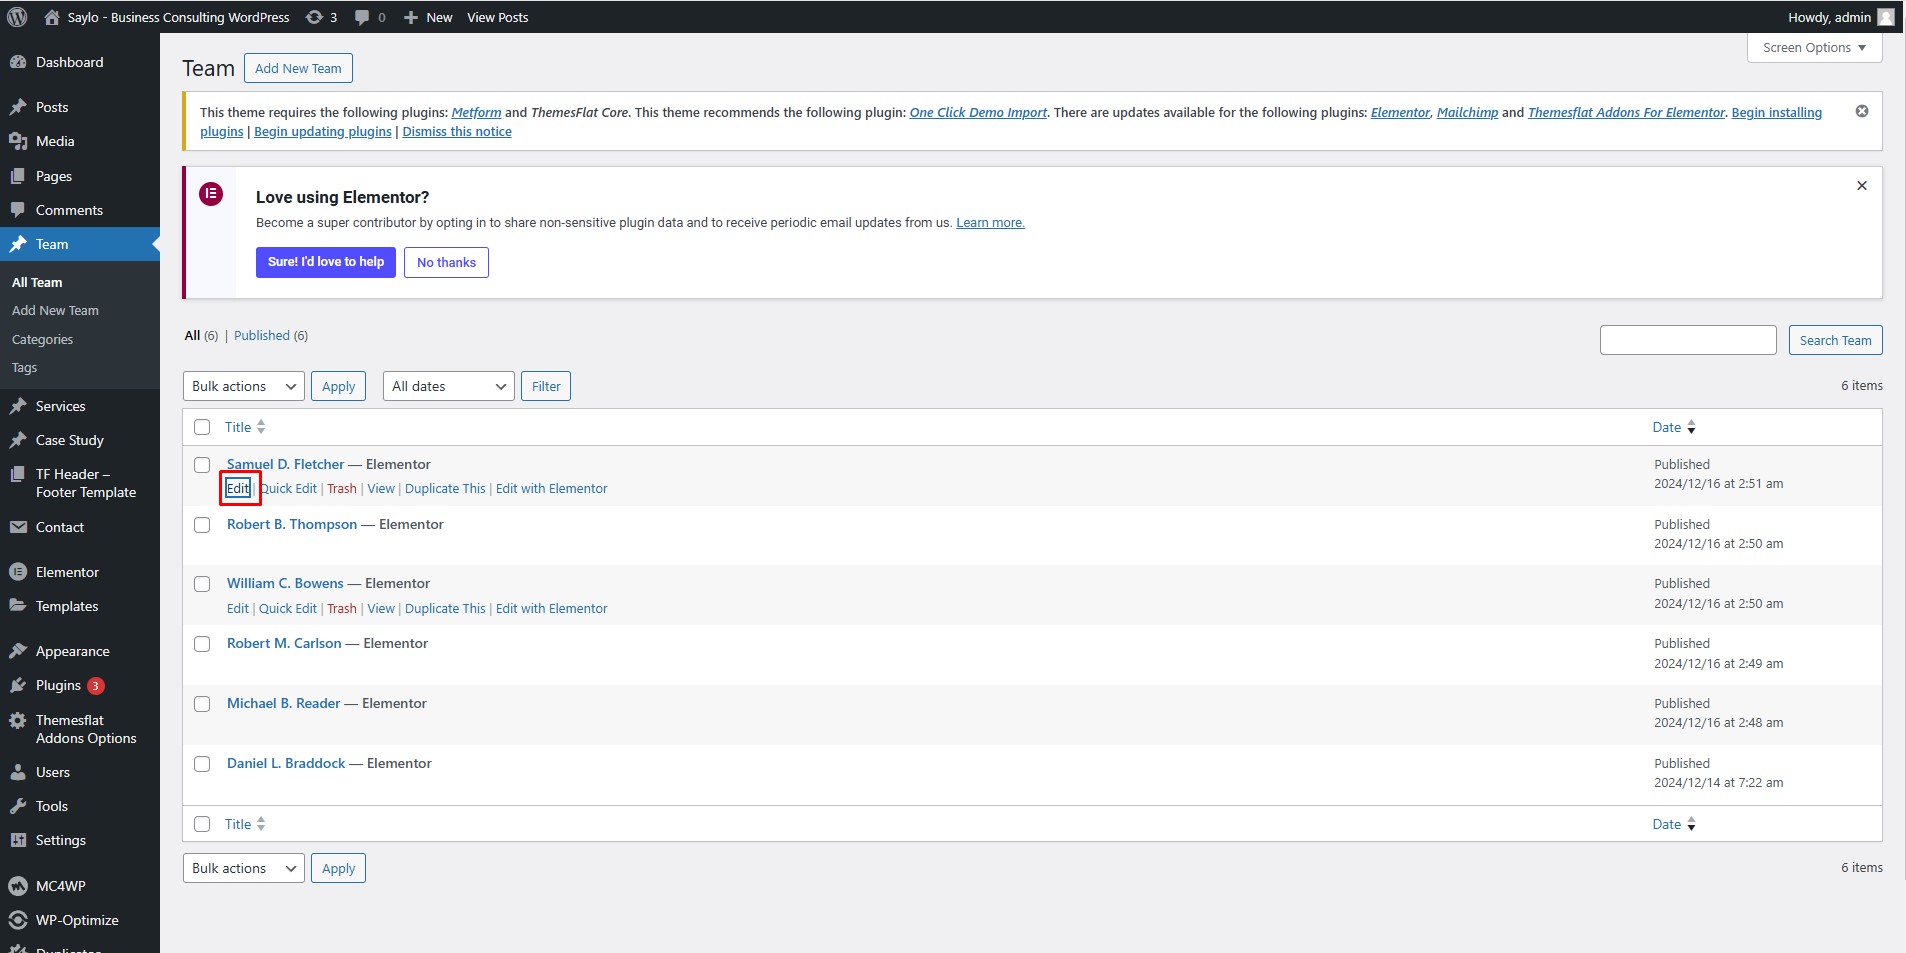
Info: email, phone, location and social links.
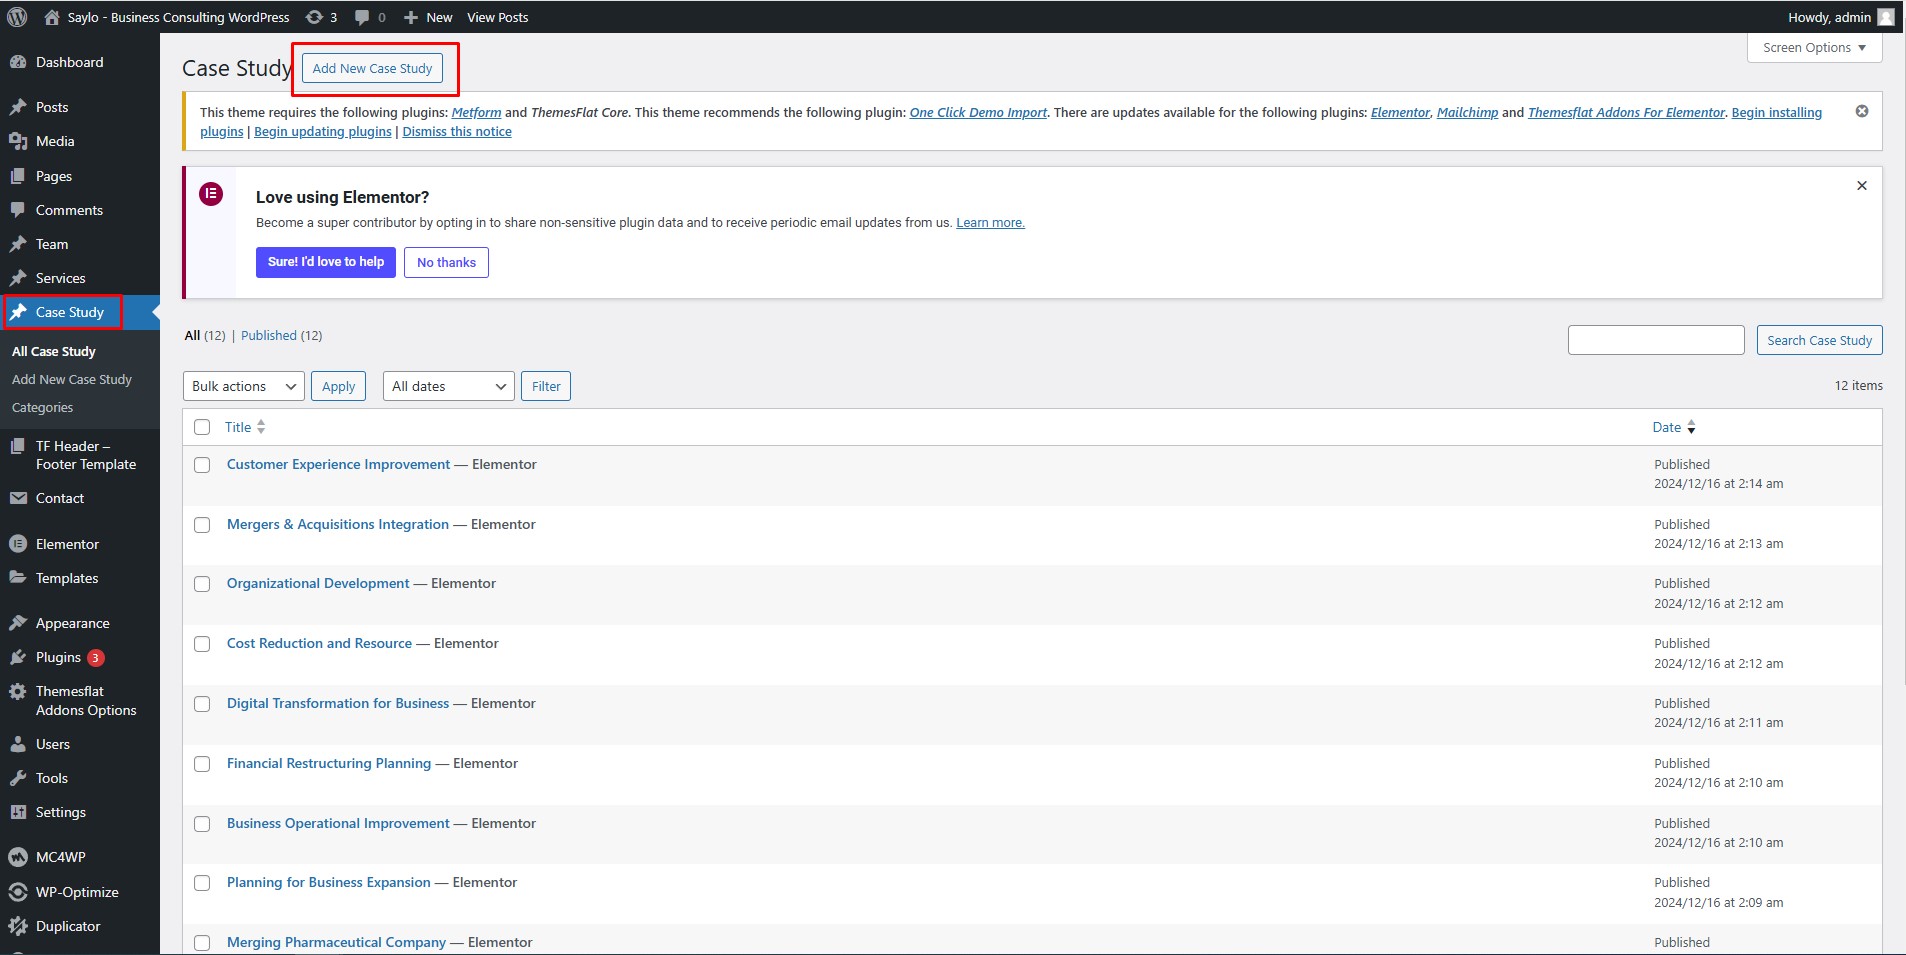
Go to Dashboard > Case Study, edit an existing case study or click Add New.
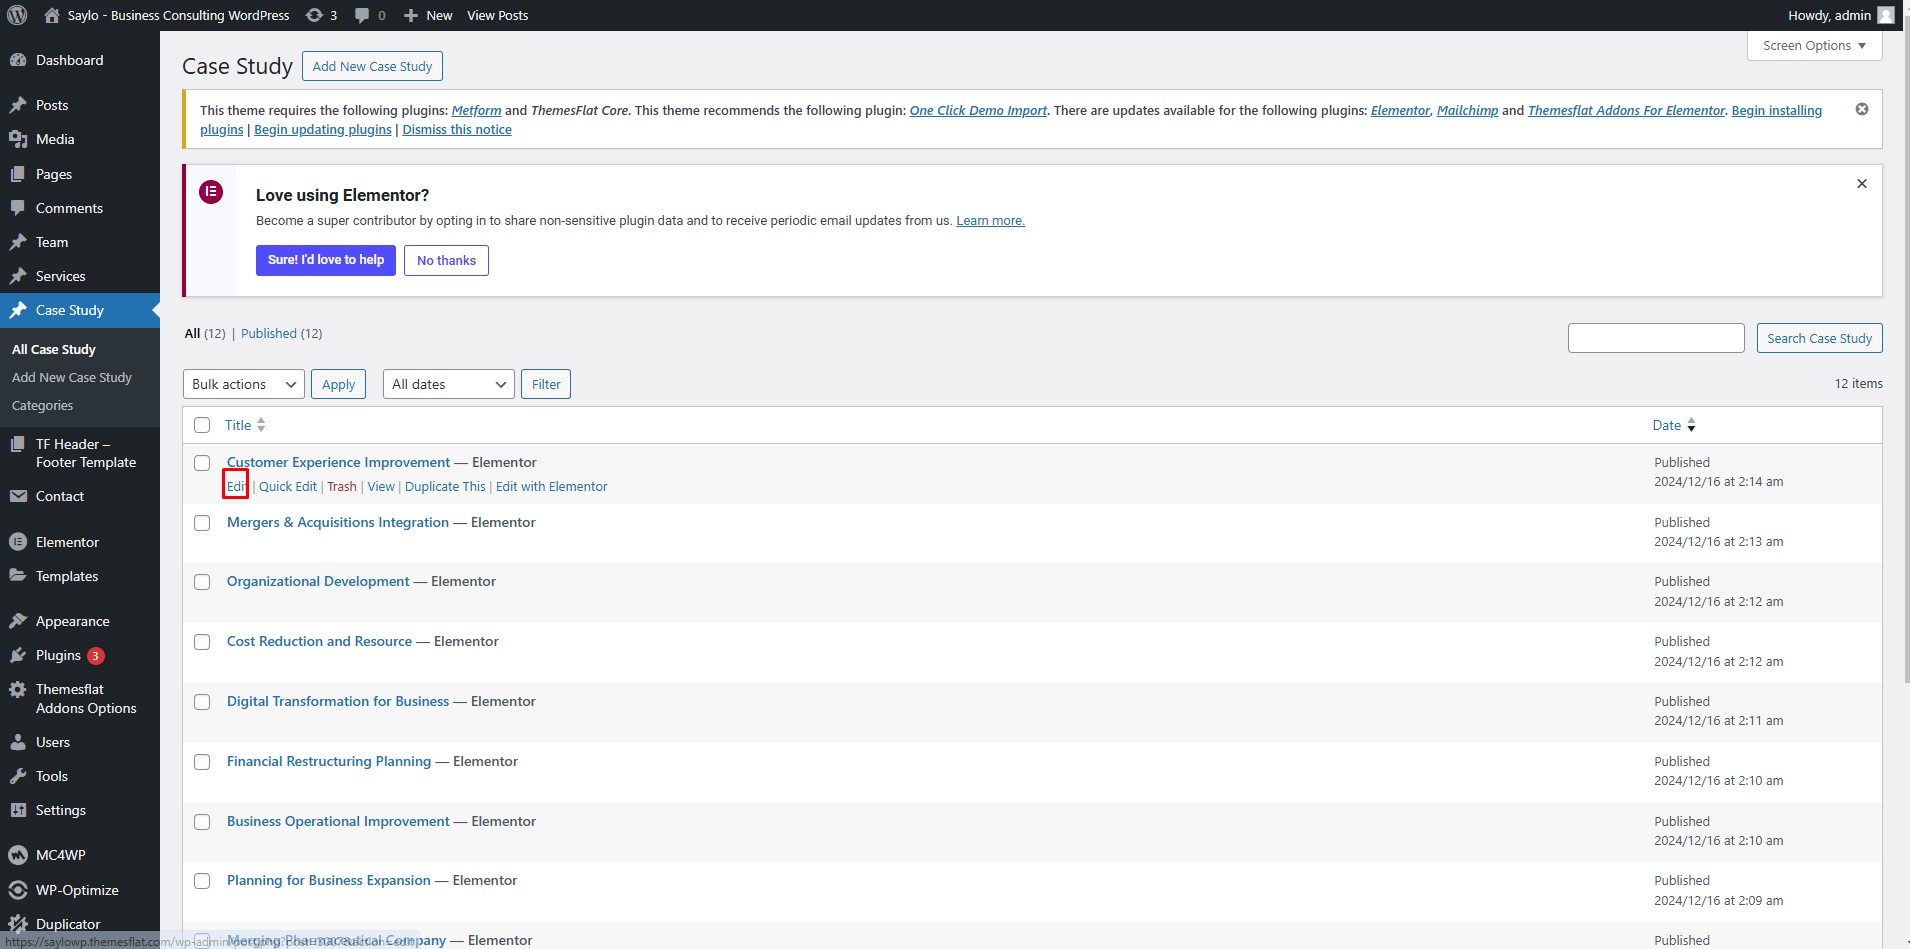
Edit it in Dashboard > Case Study > Edit.
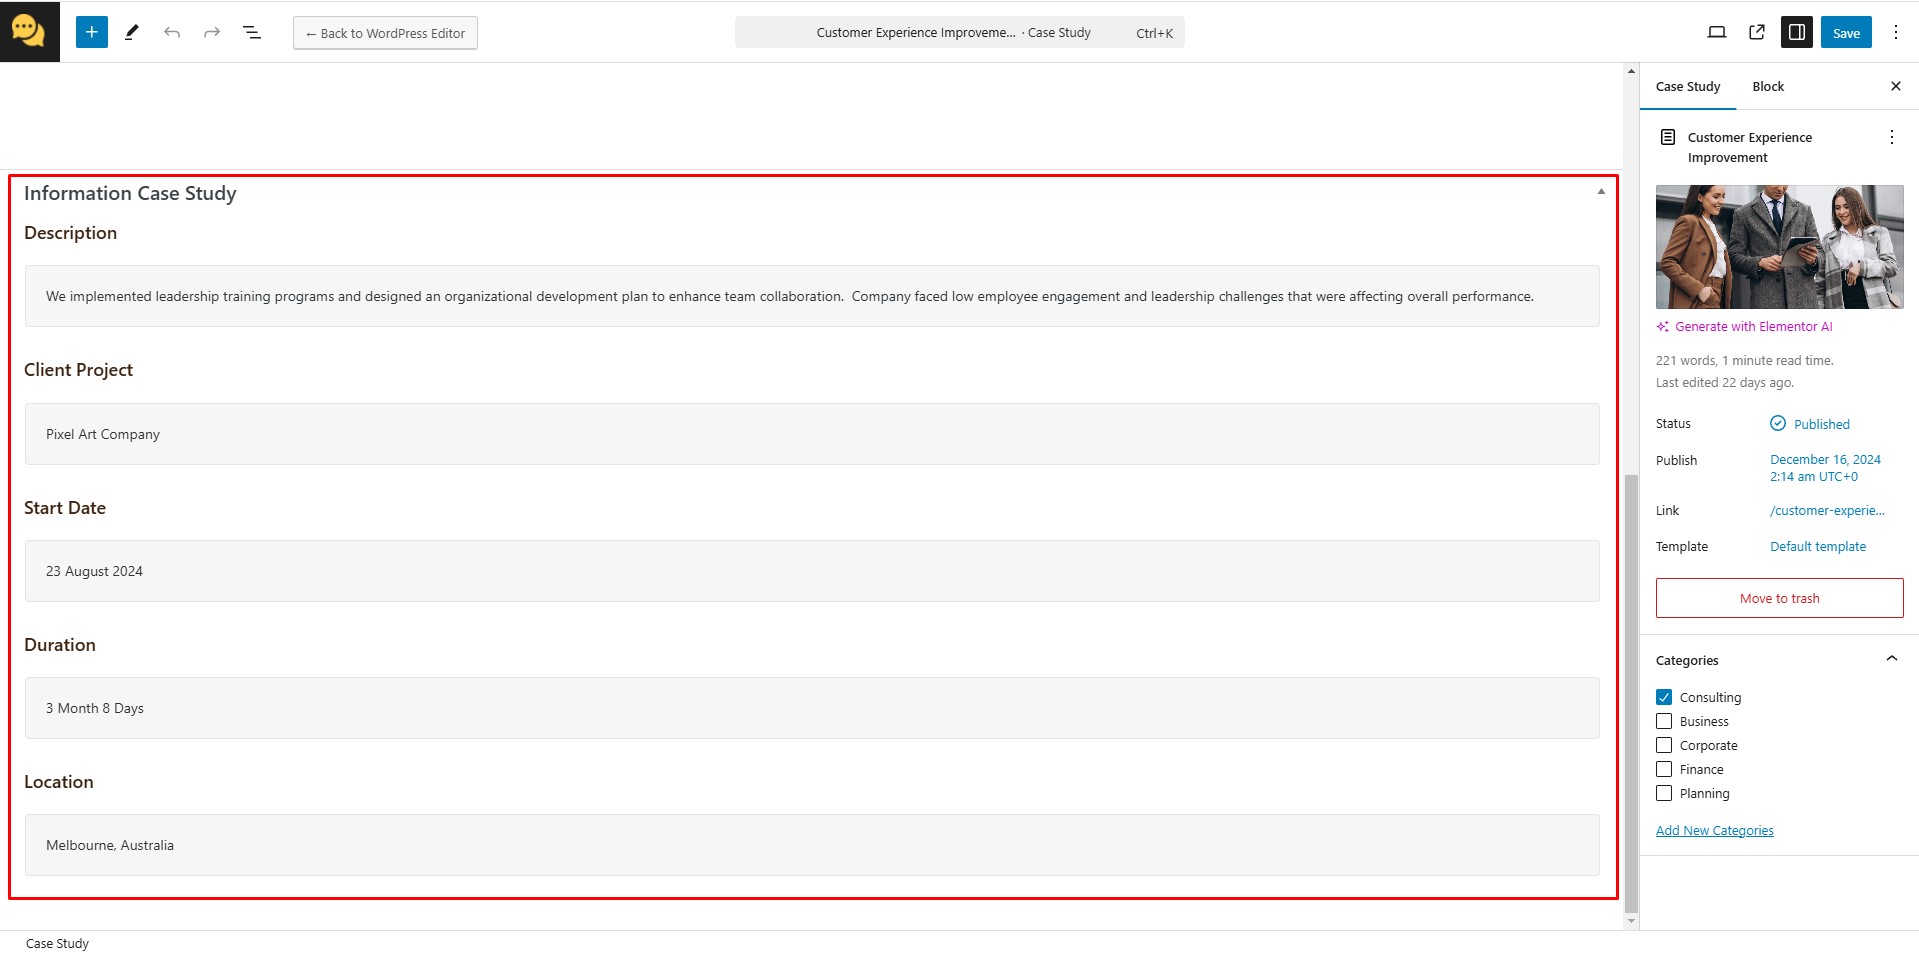
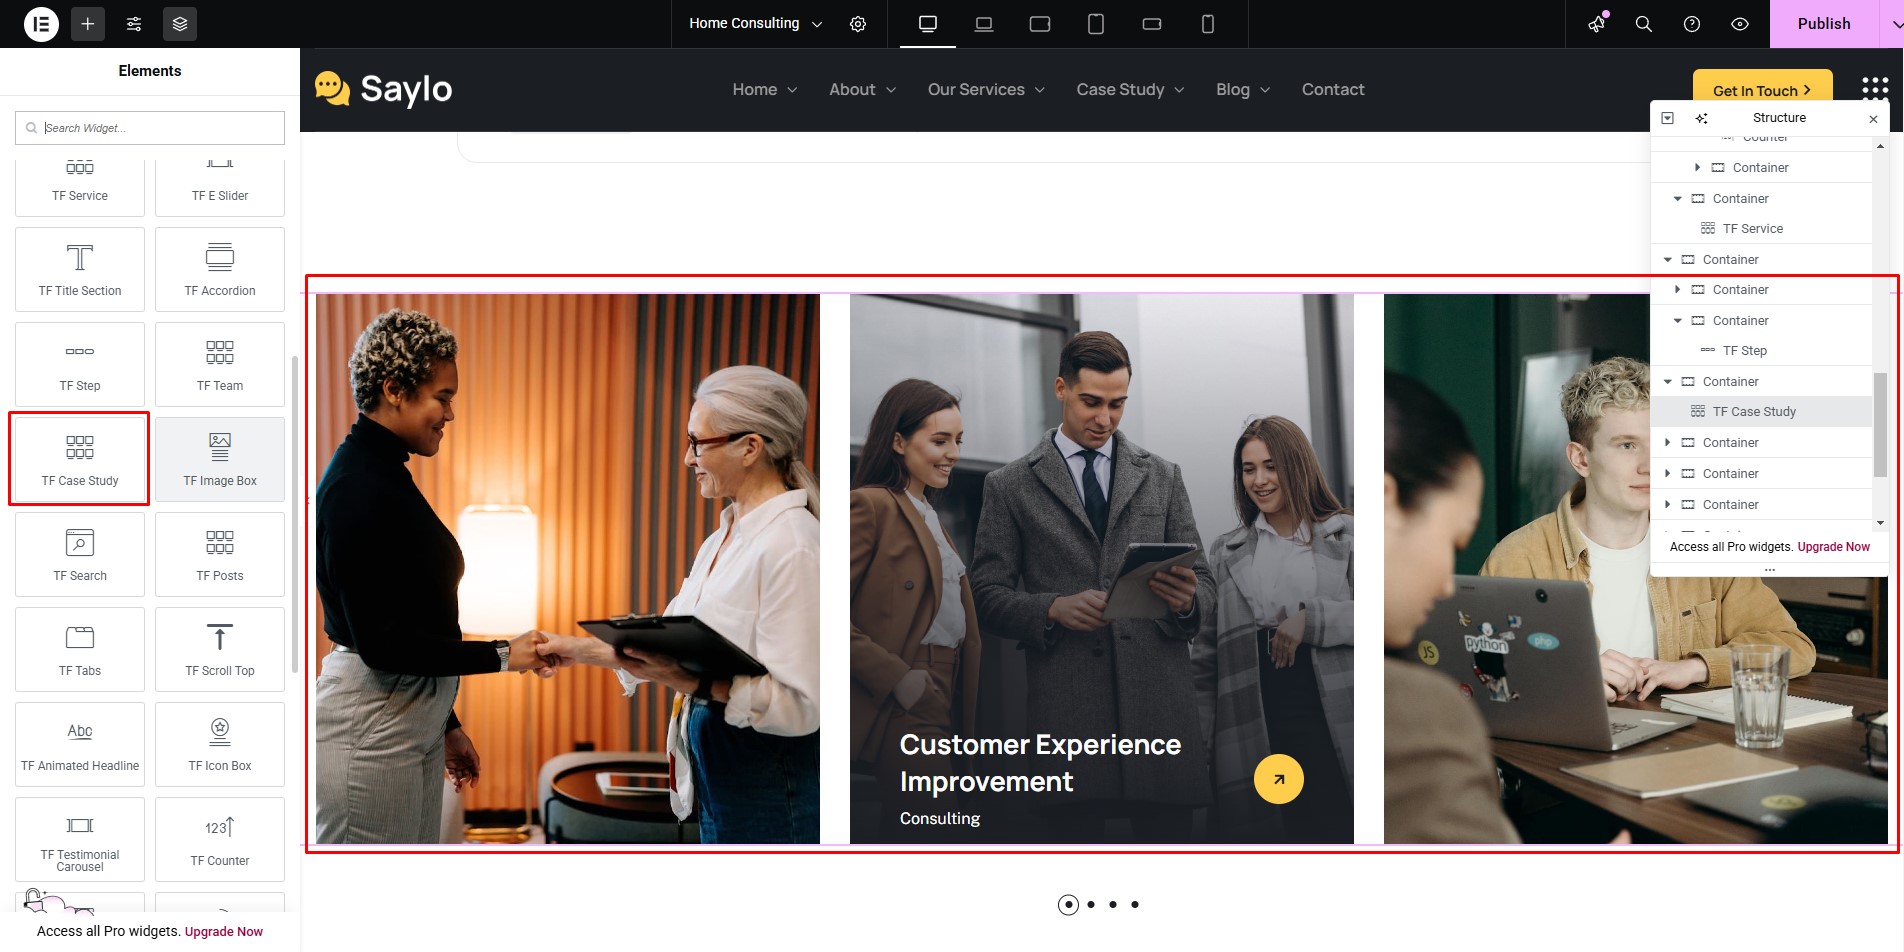
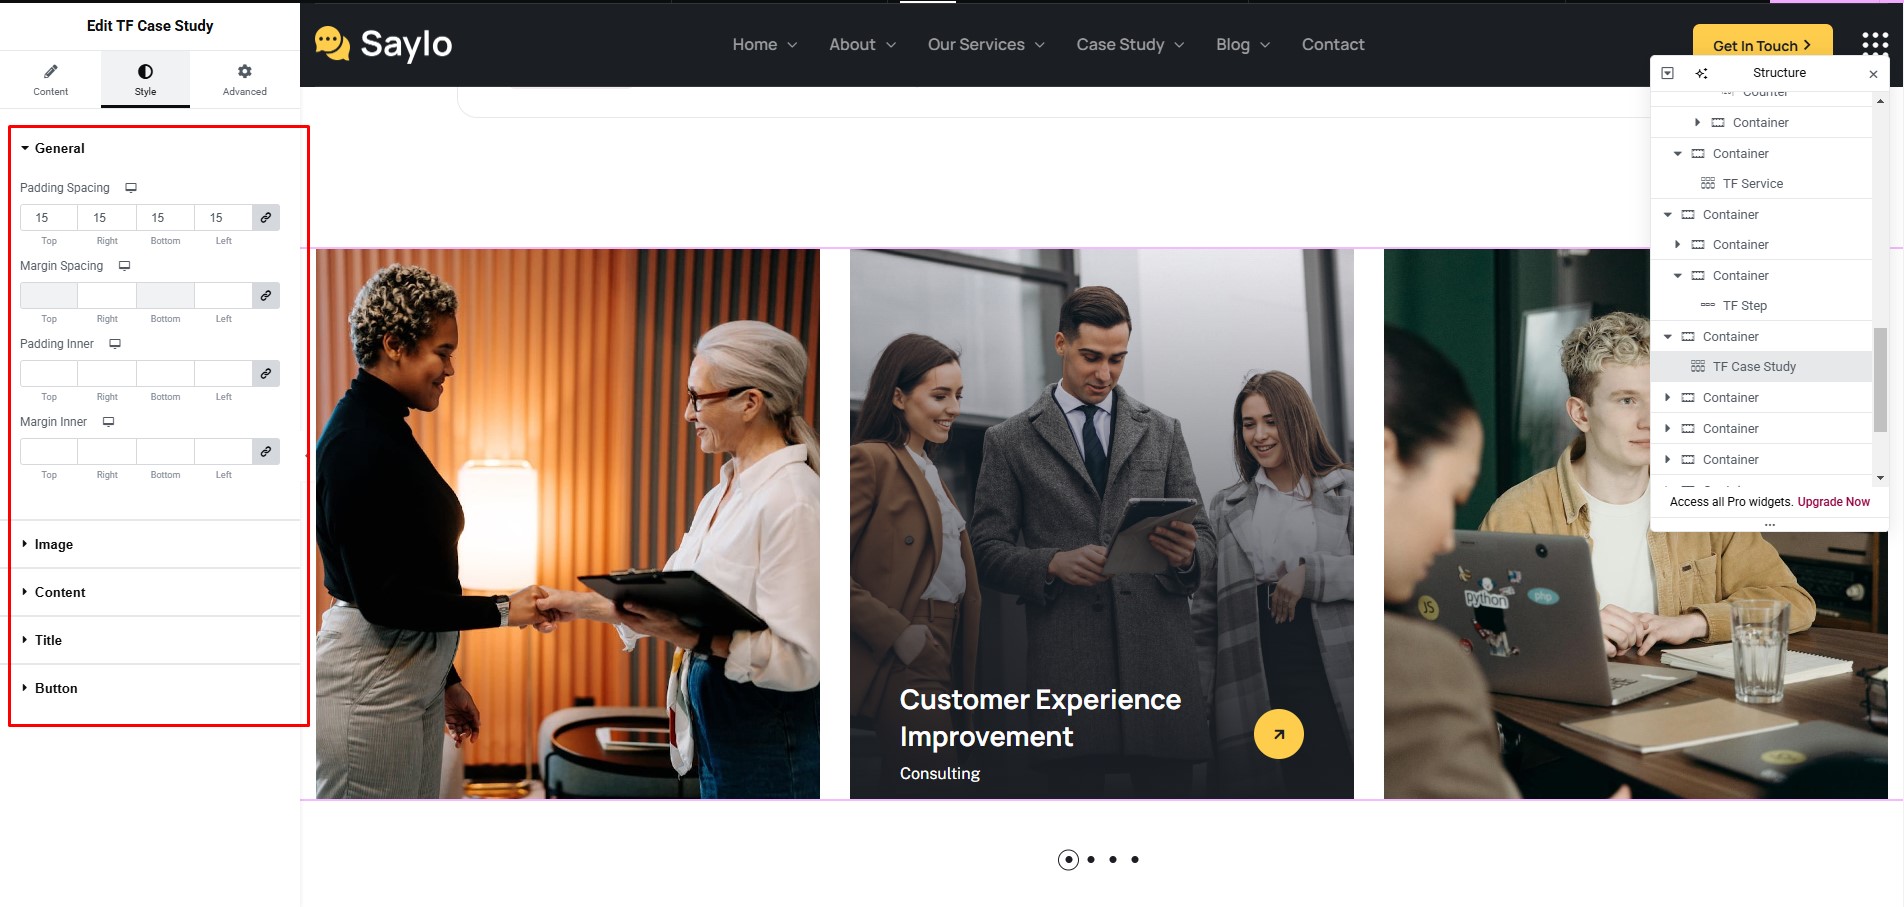
Build it with Themesflat Addons, then customize it in the Content and Advanced tabs.
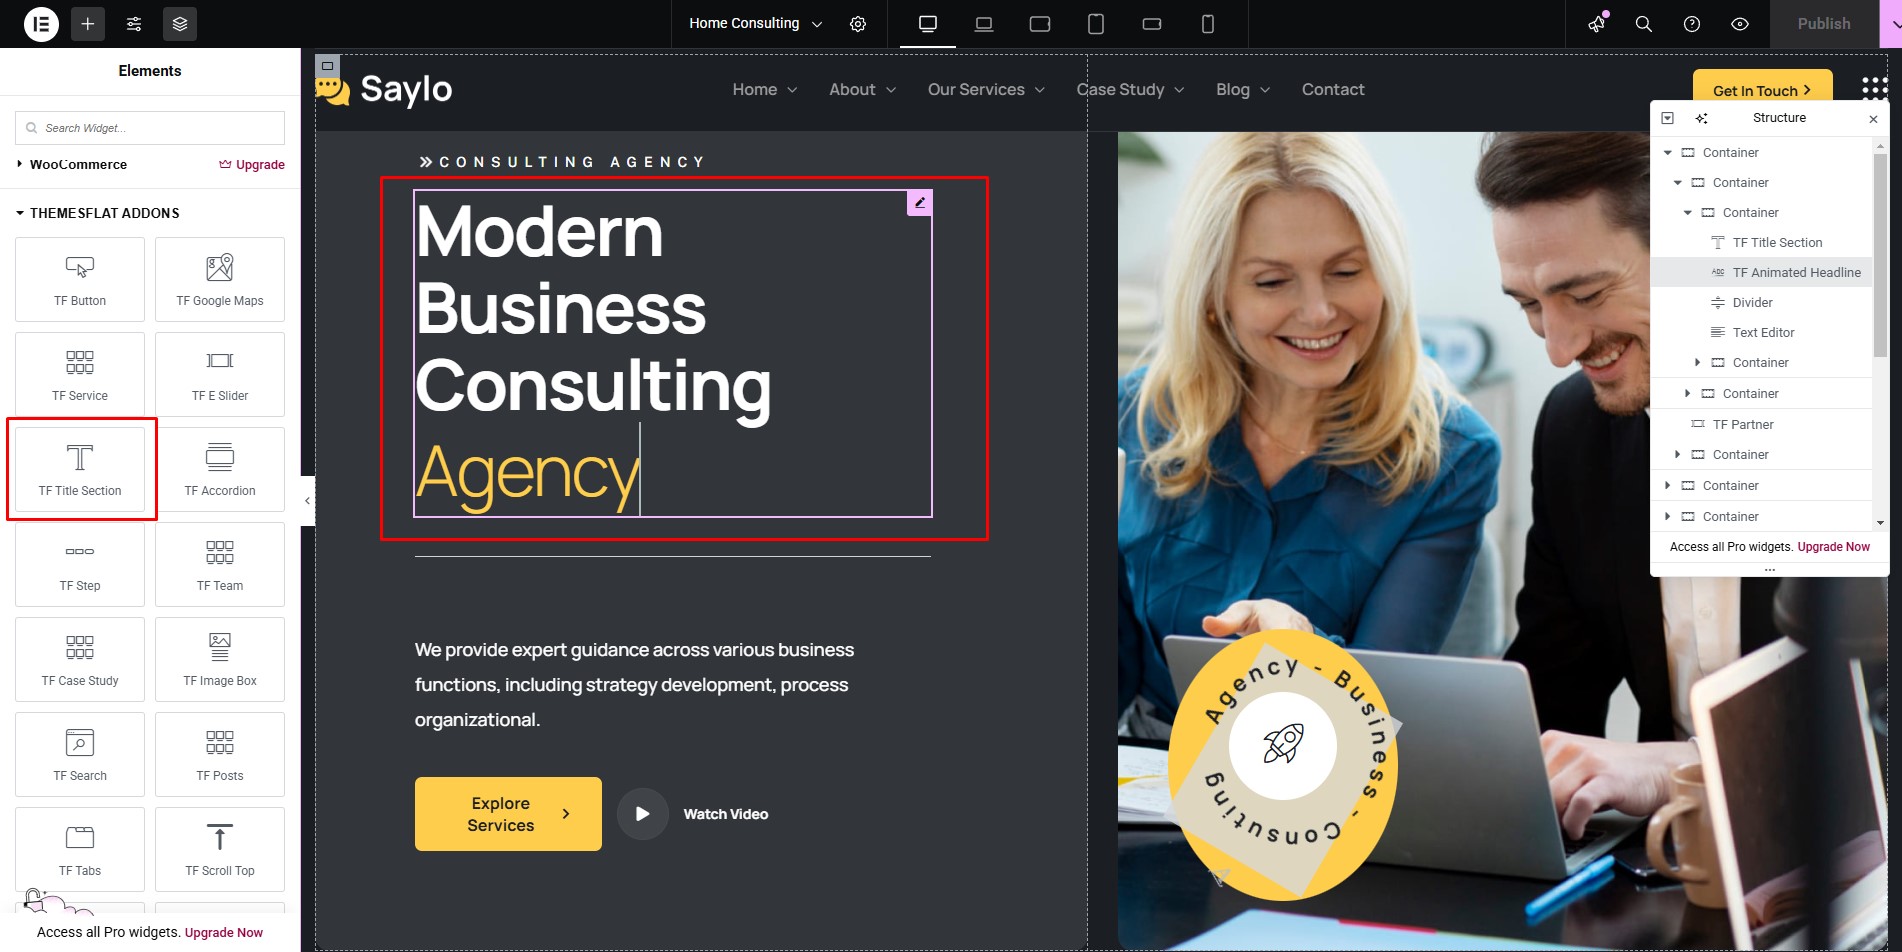
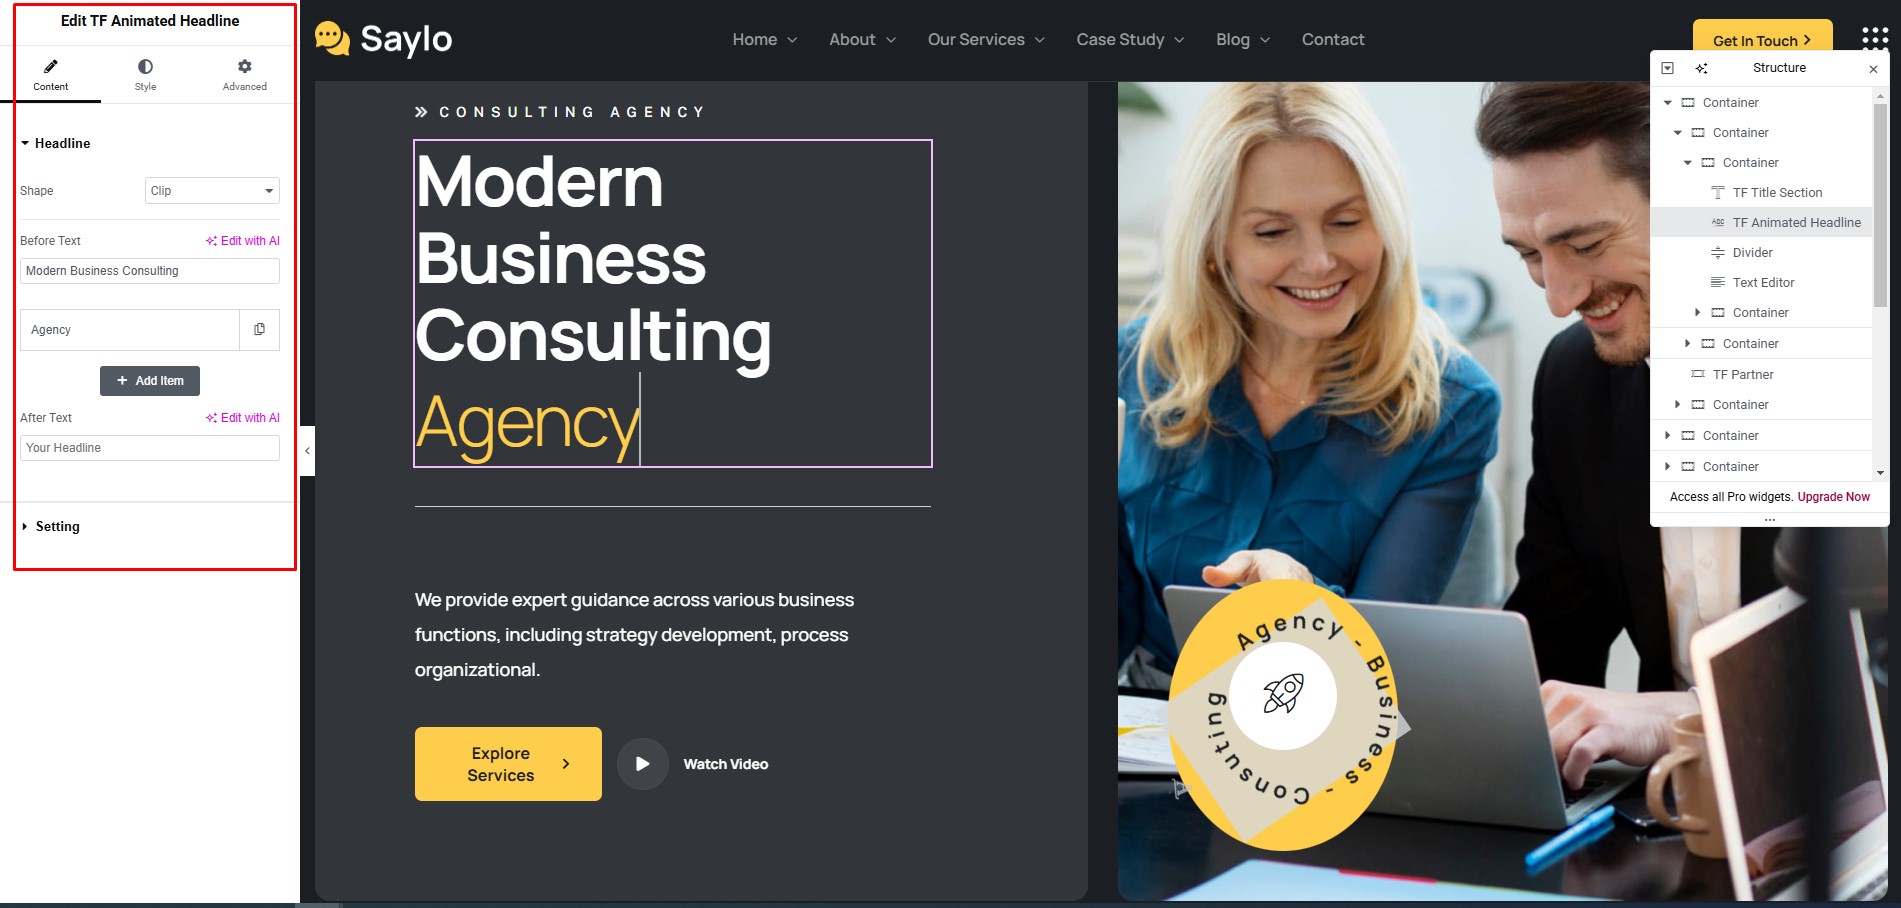
Build it with Themesflat Addons, then customize it in the Content and Advanced tabs.
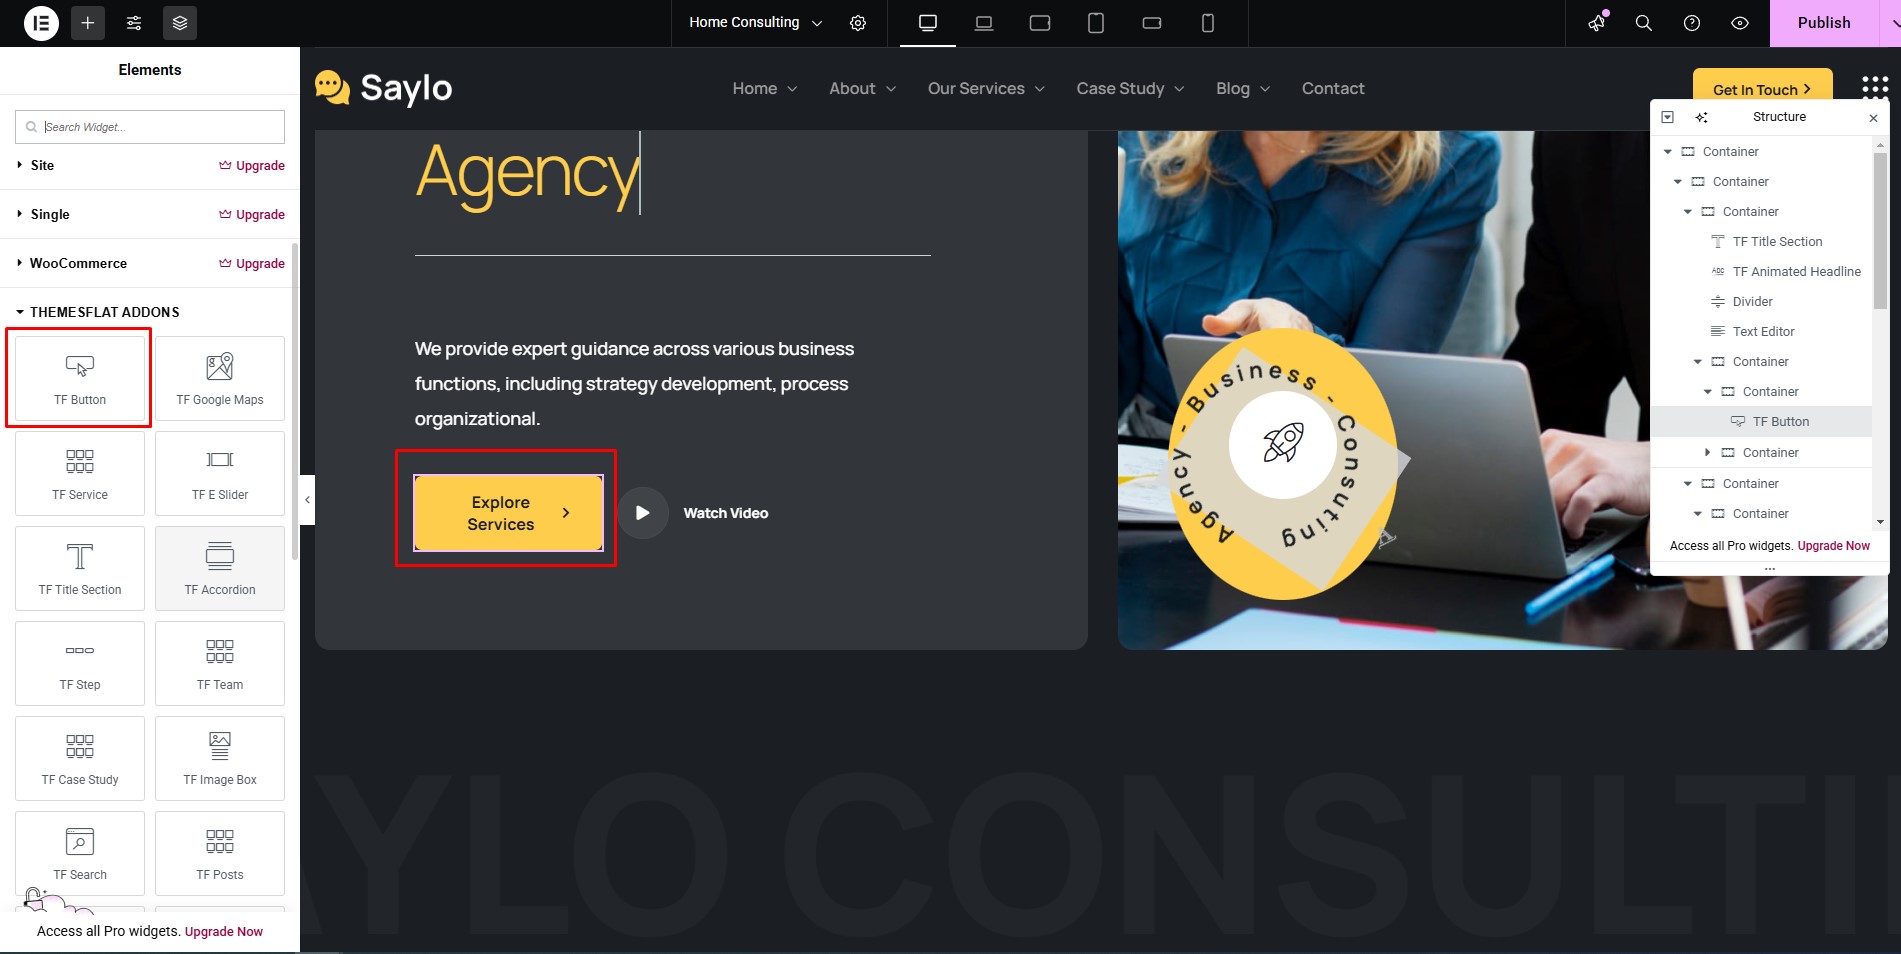
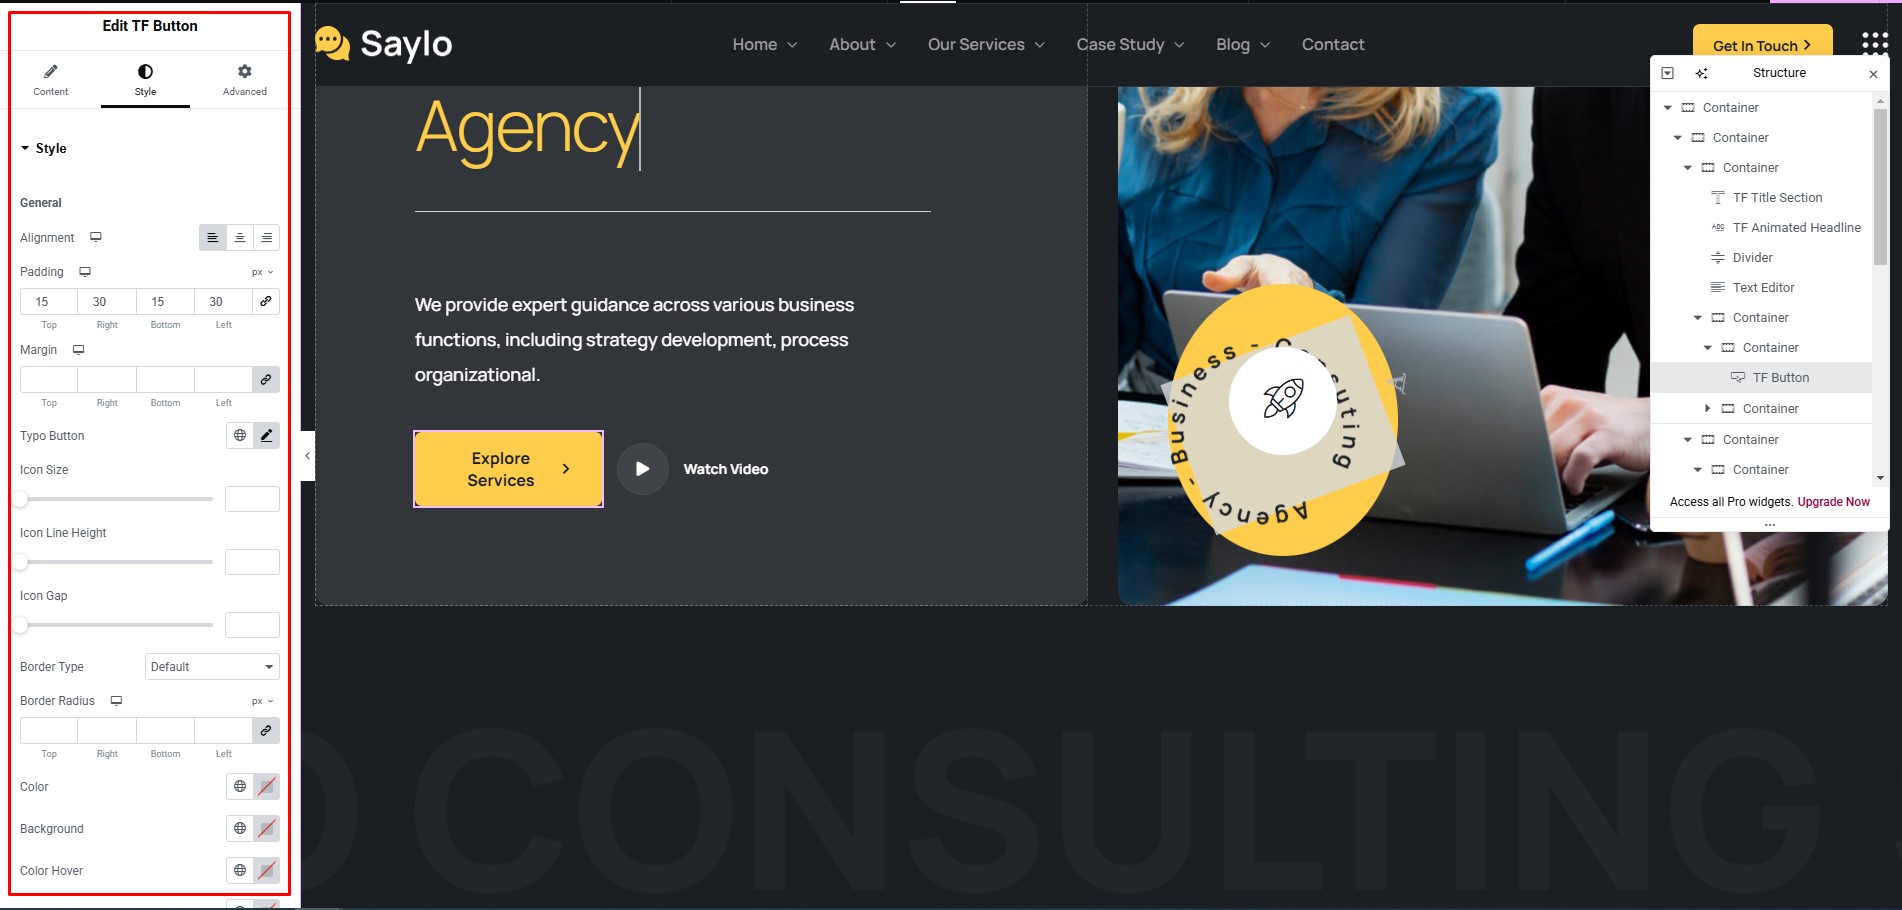
Build it with Themesflat Addons, then customize it in the Content and Advanced tabs.
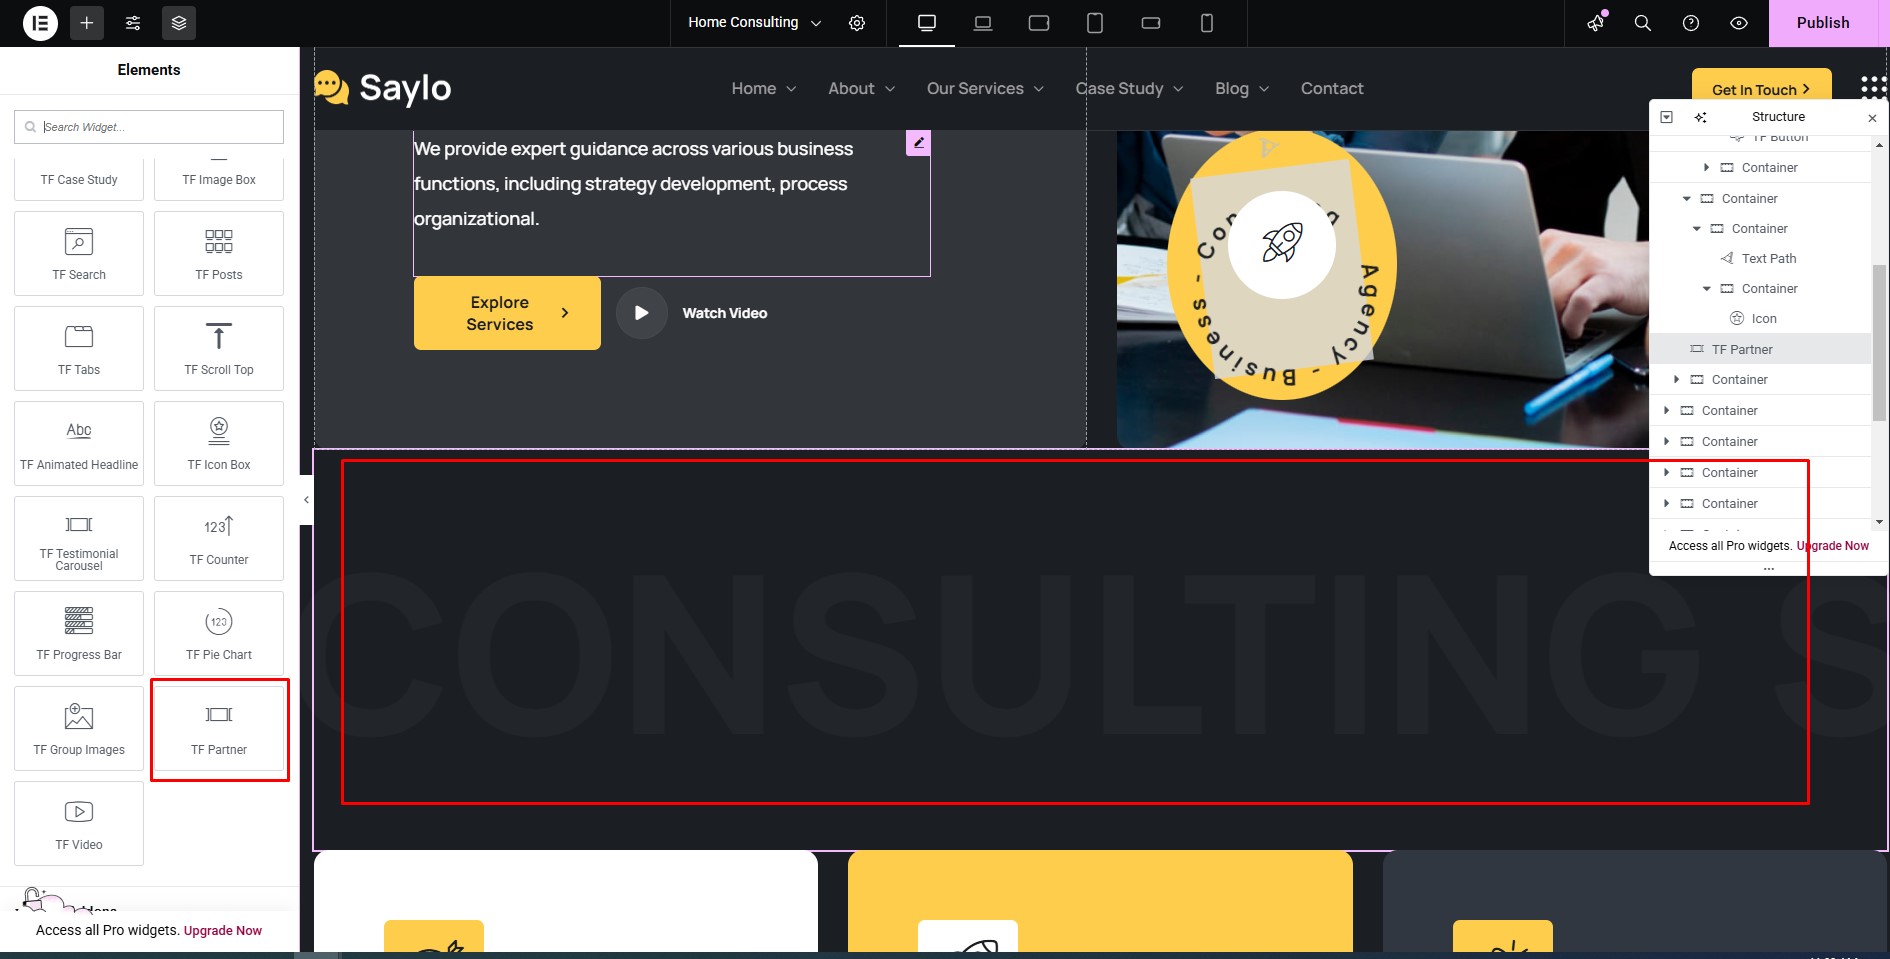
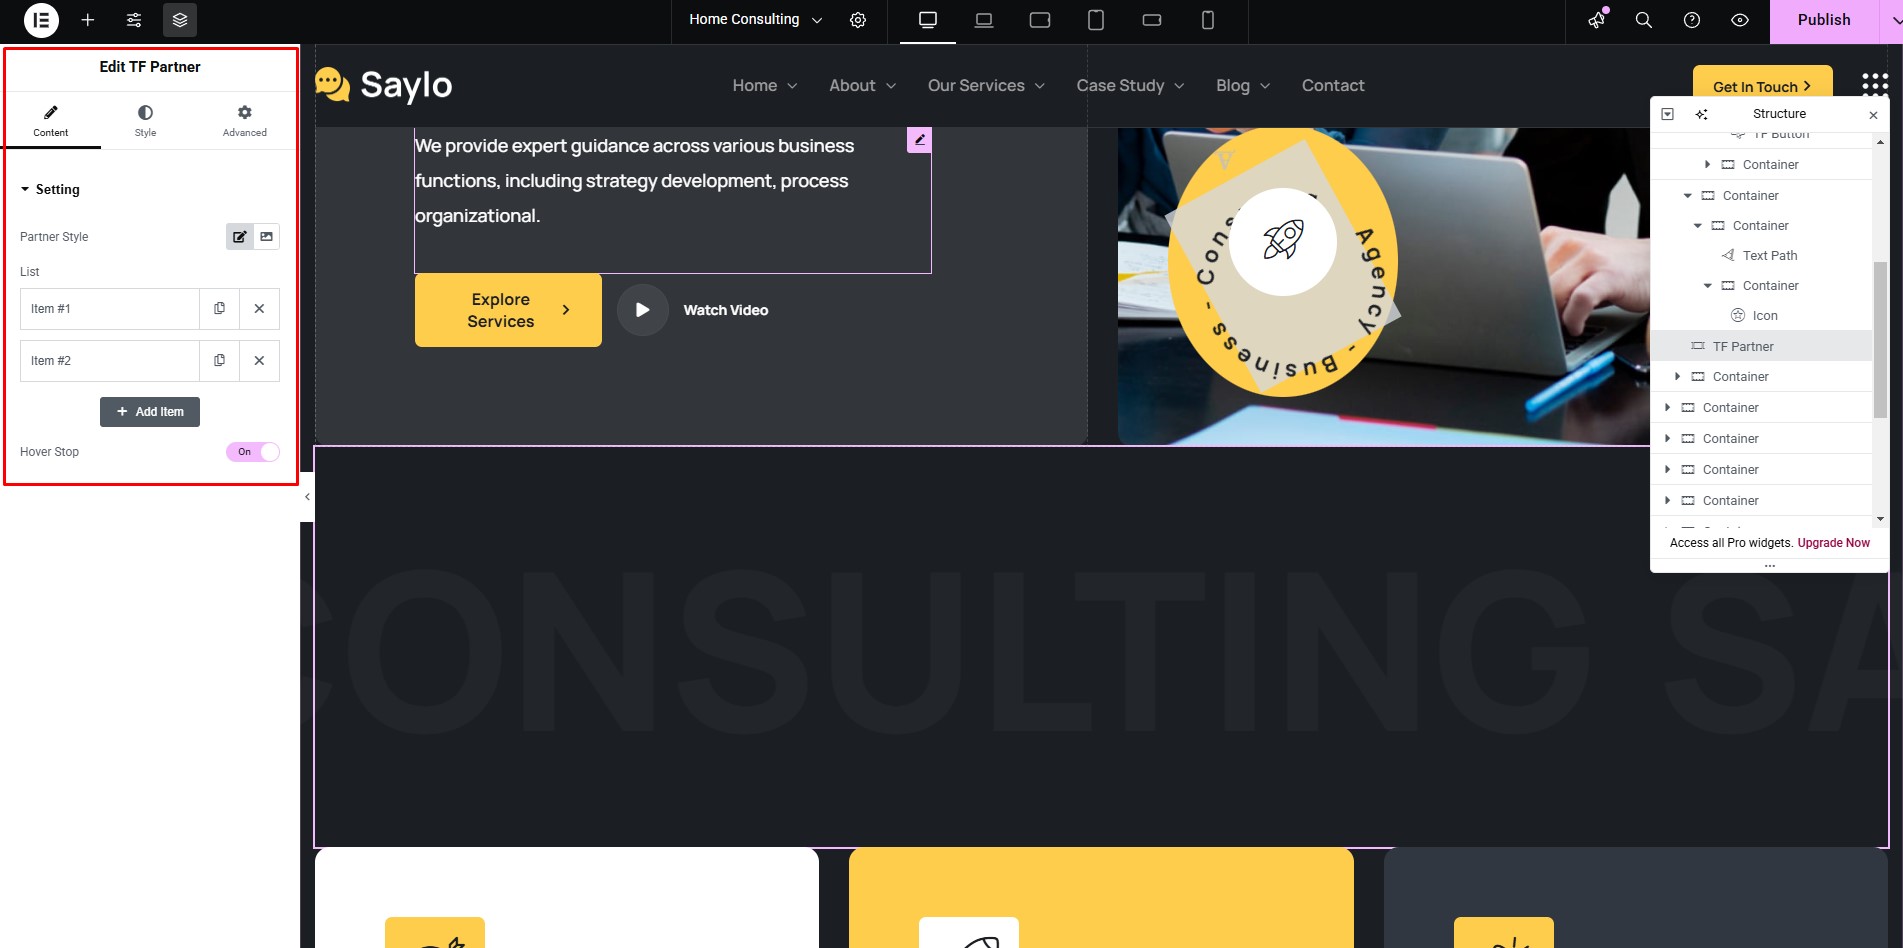
Build it with Themesflat Addons, then customize it in the Content and Advanced tabs.
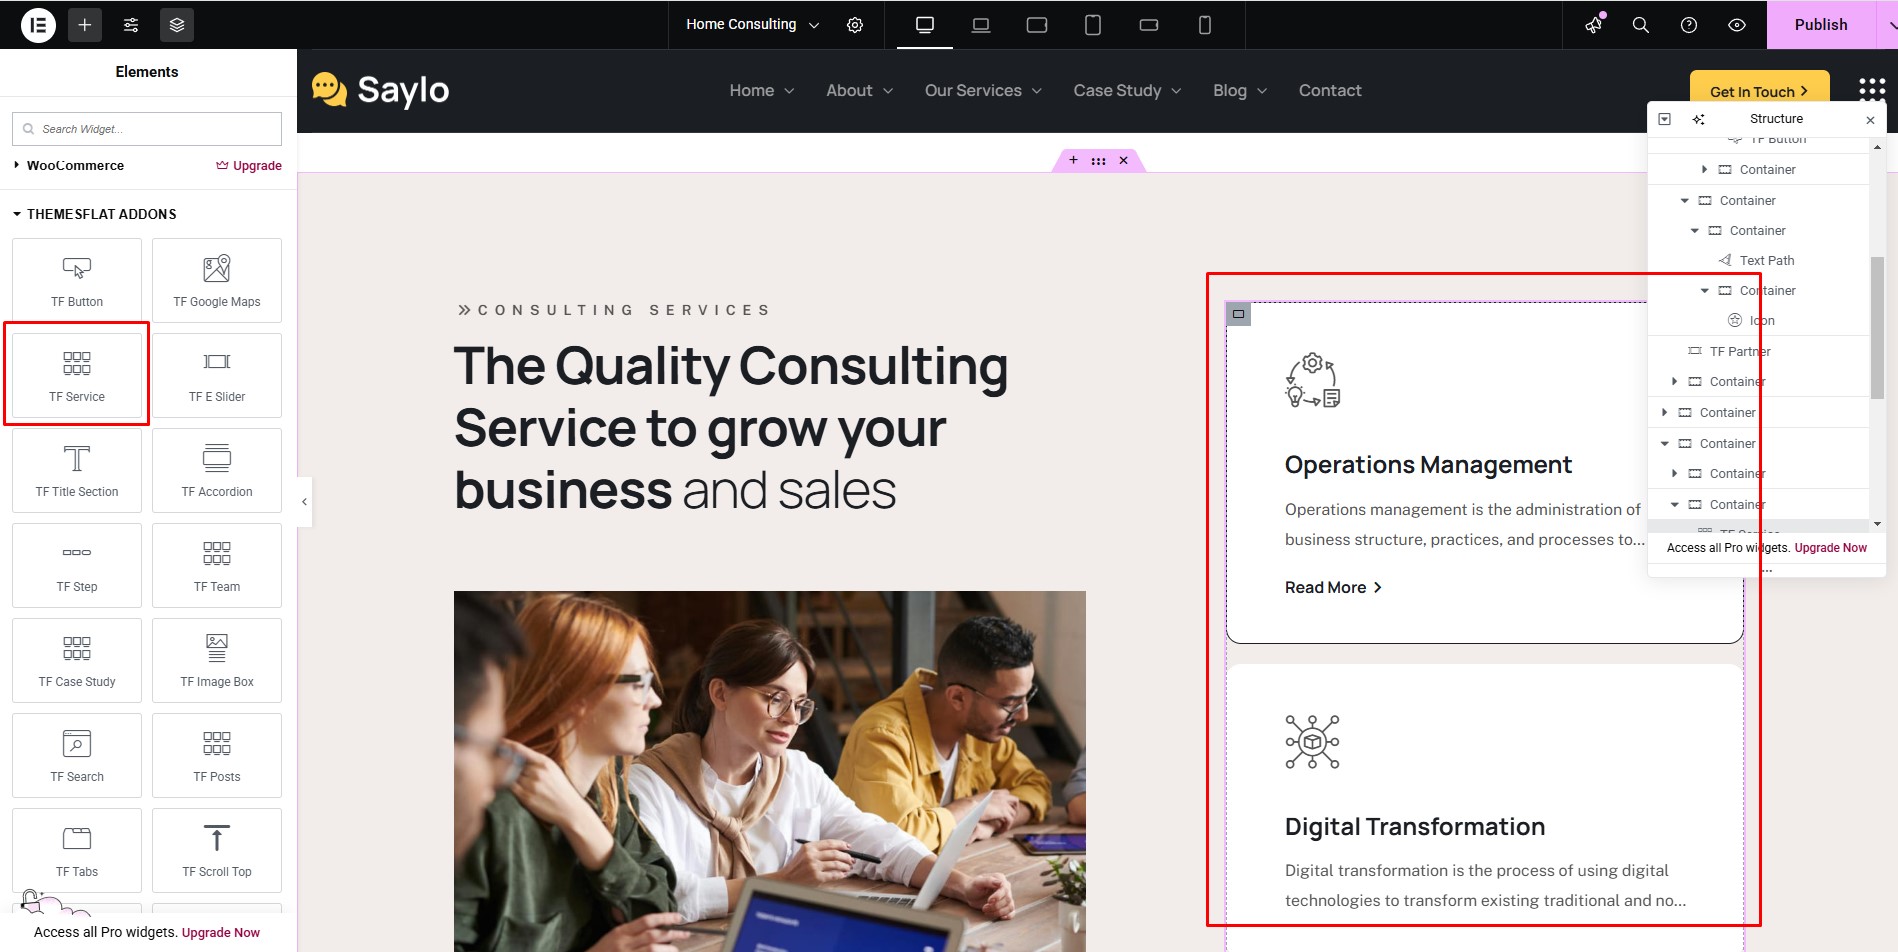
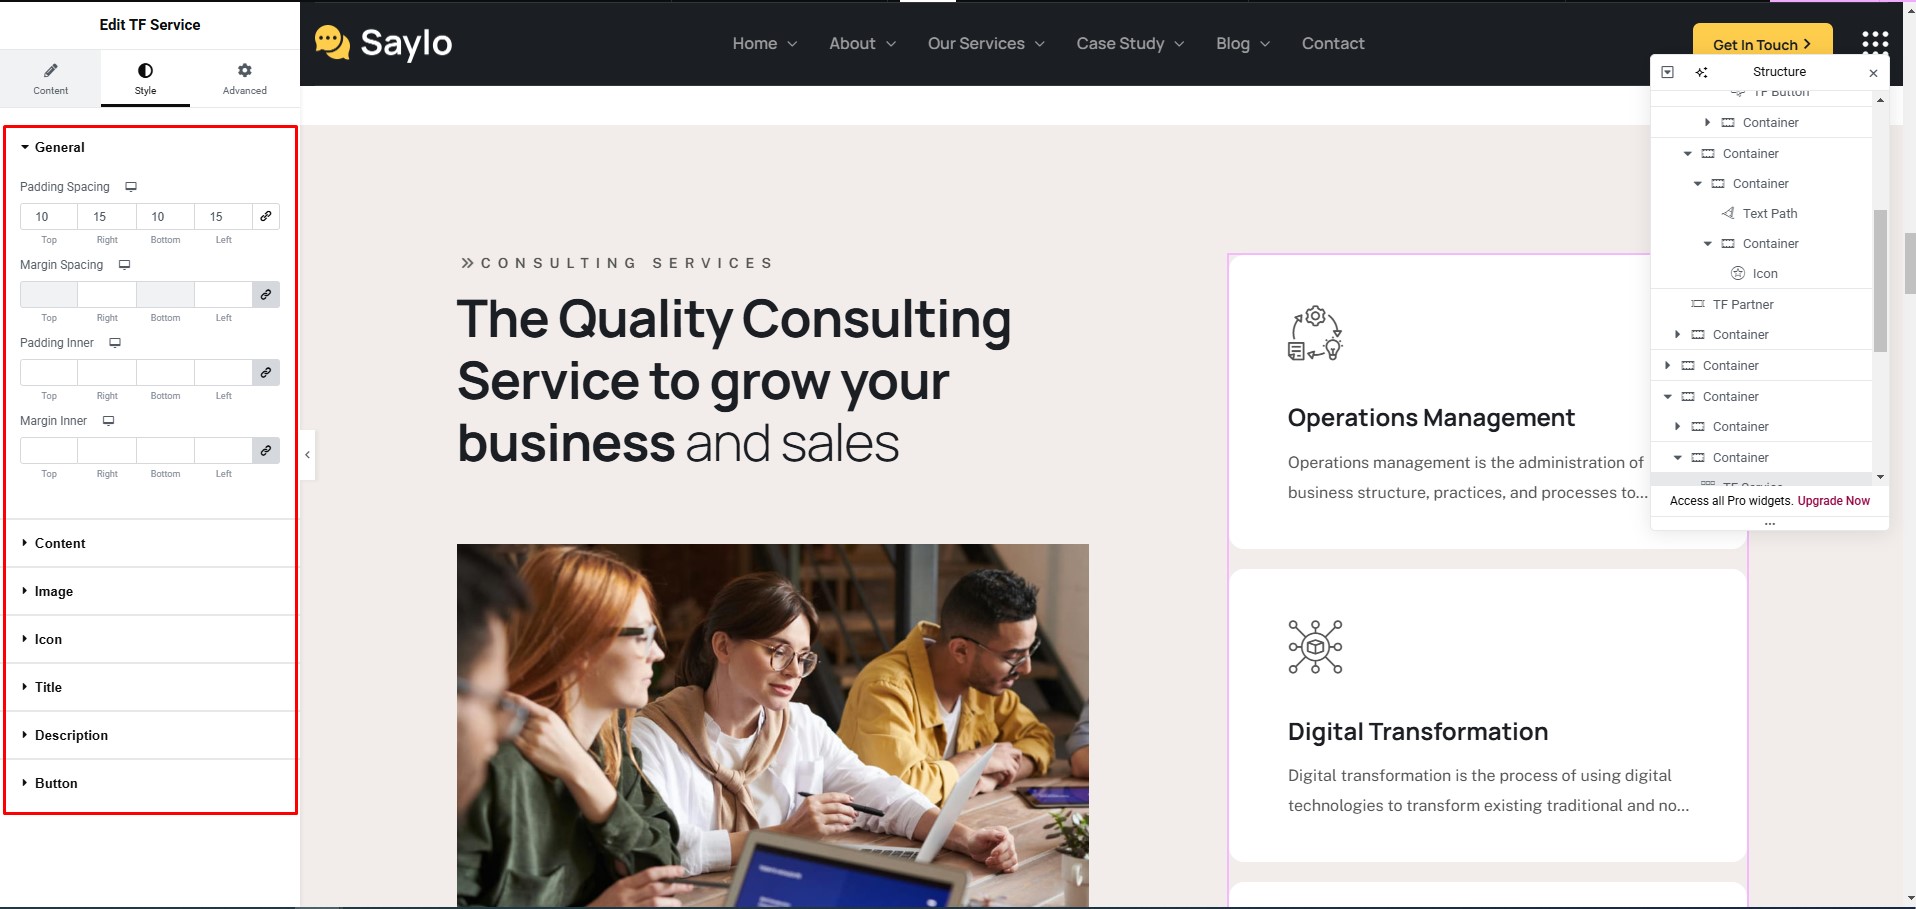
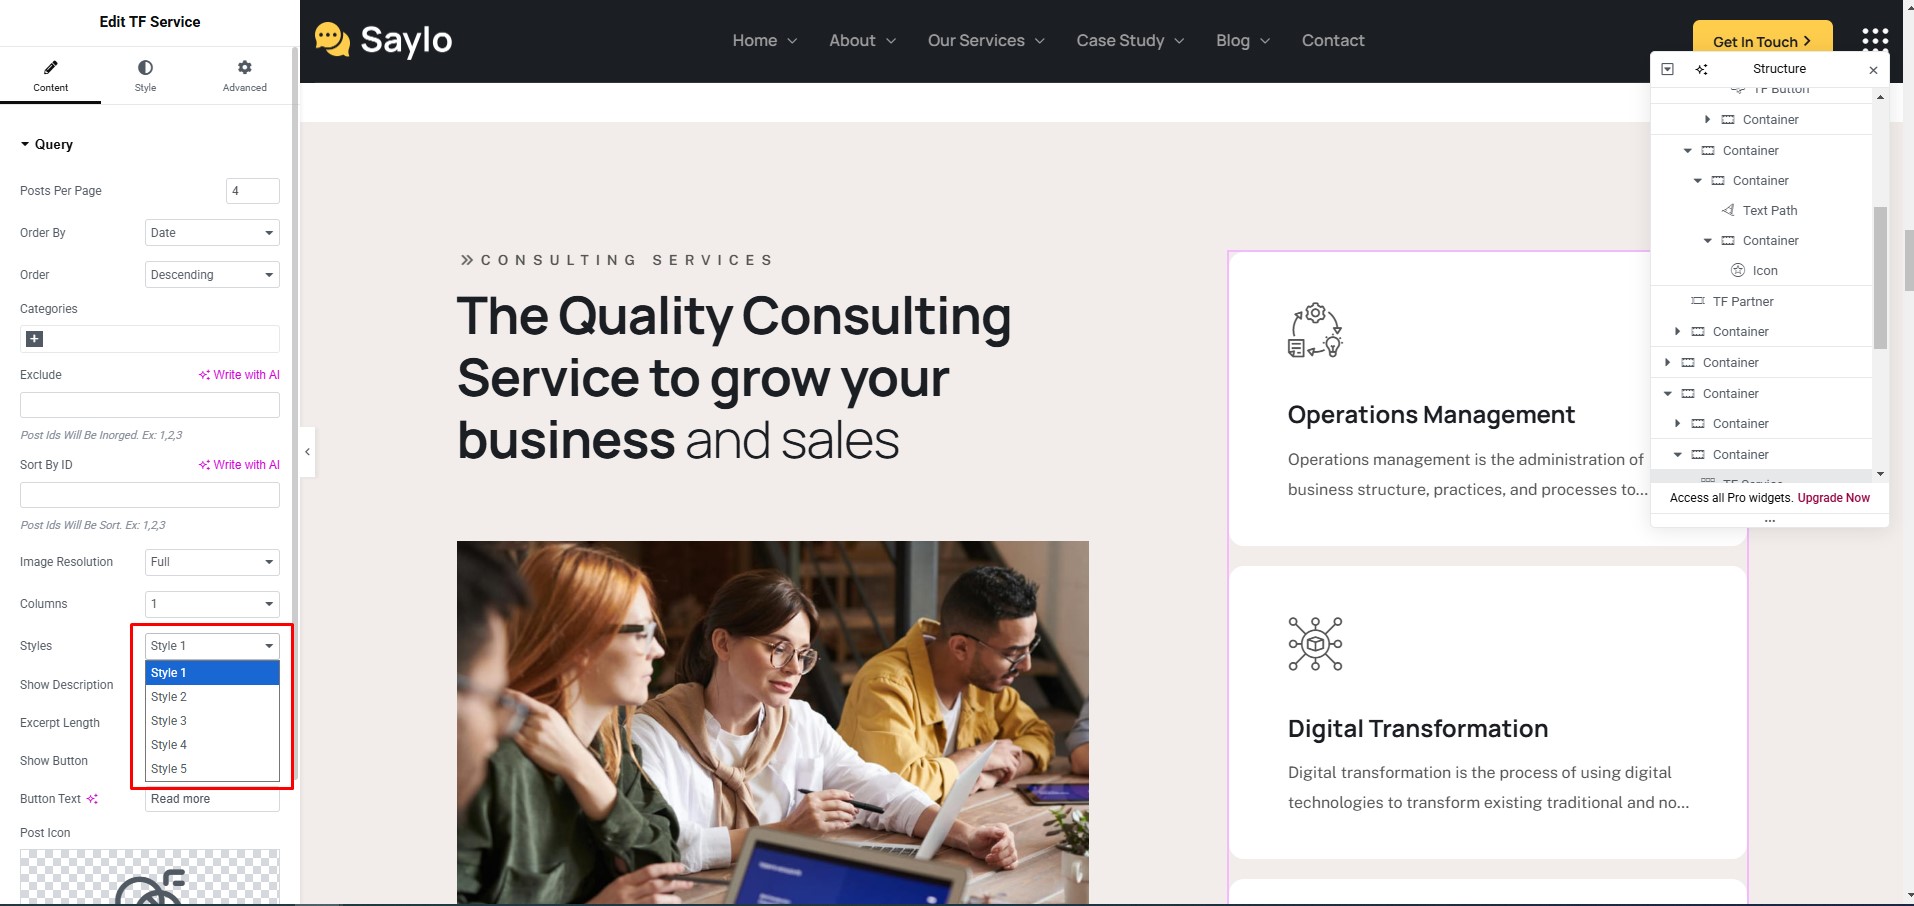
You can also choose the style of the services.
Build it with Themesflat Addons, then customize it in the Content and Advanced tabs.
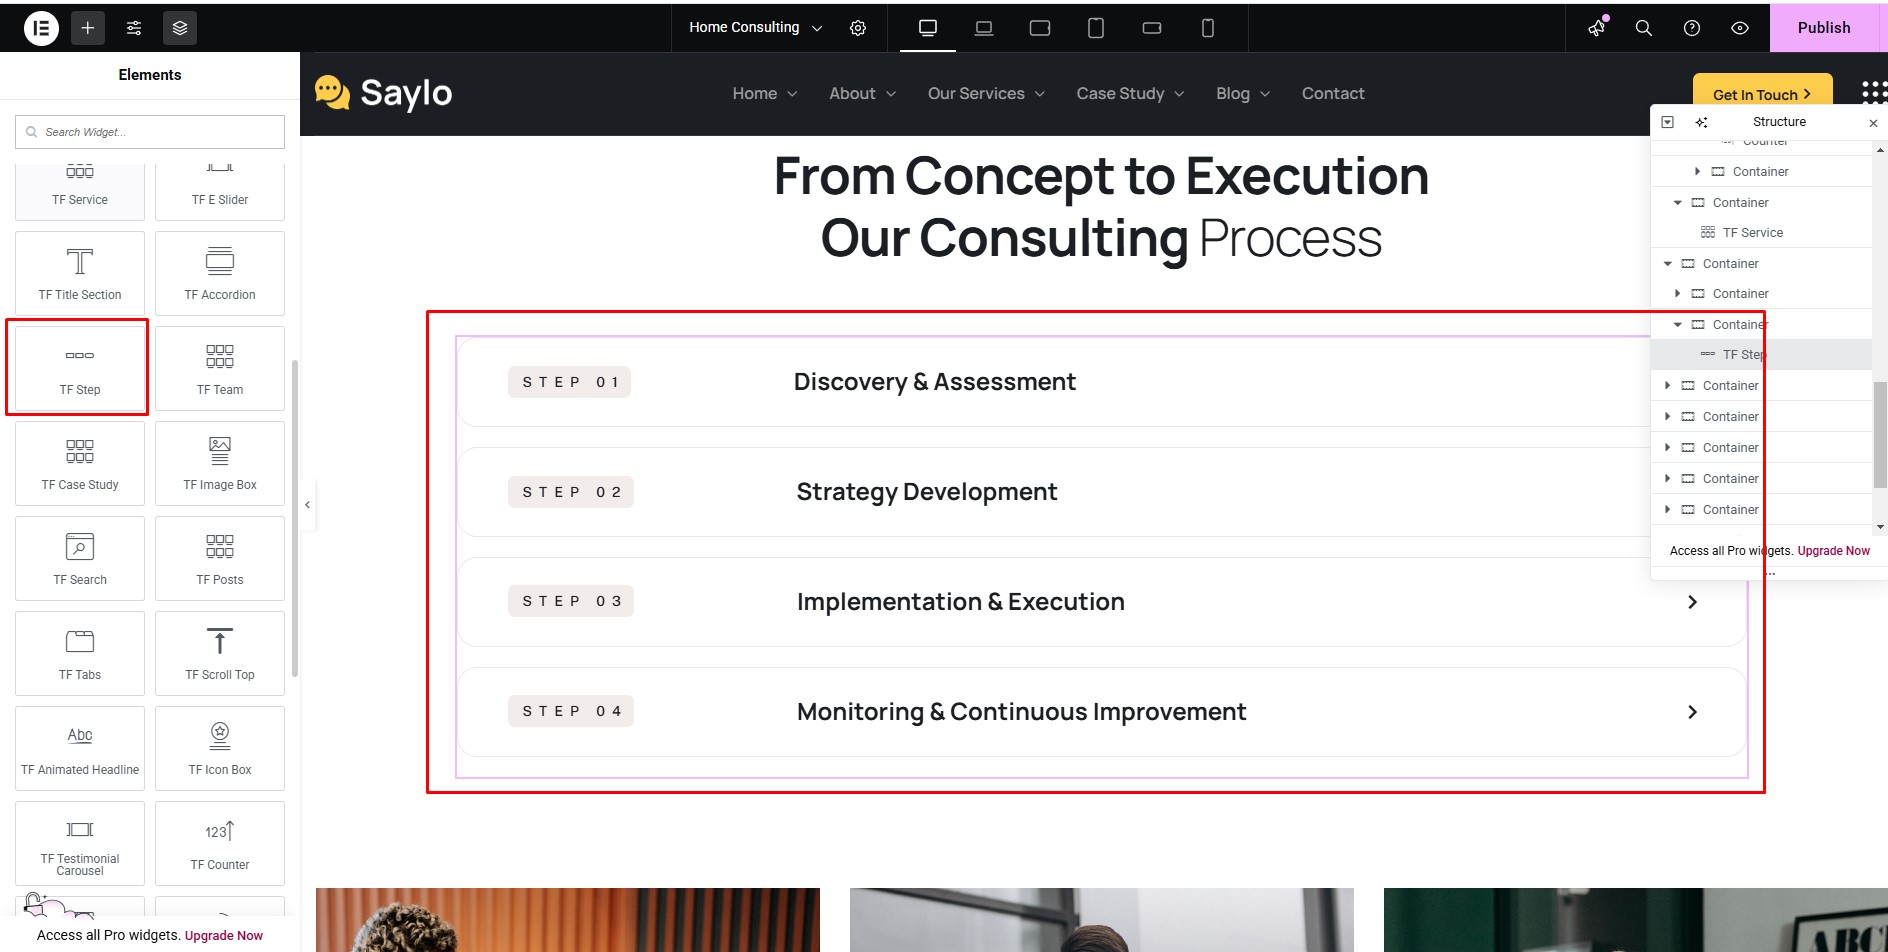
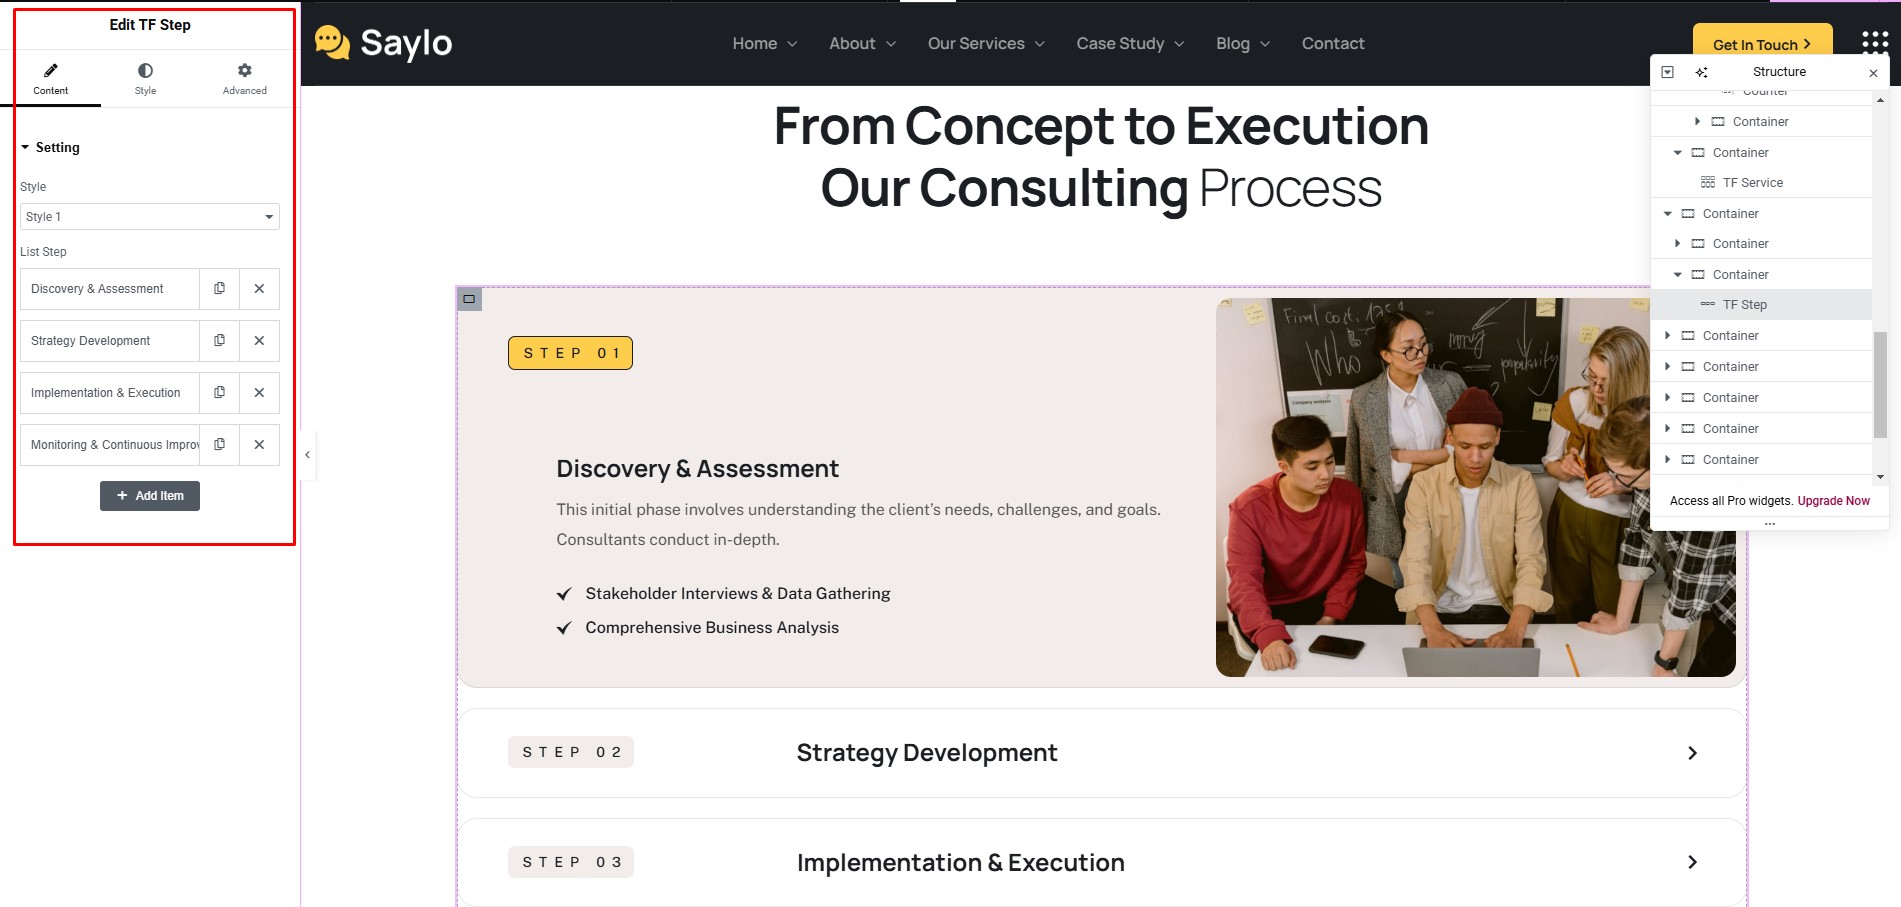
Build it with Themesflat Addons, then customize it in the Content and Advanced tabs.